How Do You Use A Bluetooth Selfie Stick?
Using a Bluetooth selfie stick has become an essential skill for anyone keen on capturing perfect moments without needing an extra set of hands. The Bluetooth feature adds convenience by allowing you to take photos without physically touching your phone, thus improving the overall quality and ease of the process. In this article, I will provide a detailed and coherent guide on how to effectively use a Bluetooth selfie stick, helping you confidently capture those unforgettable moments.
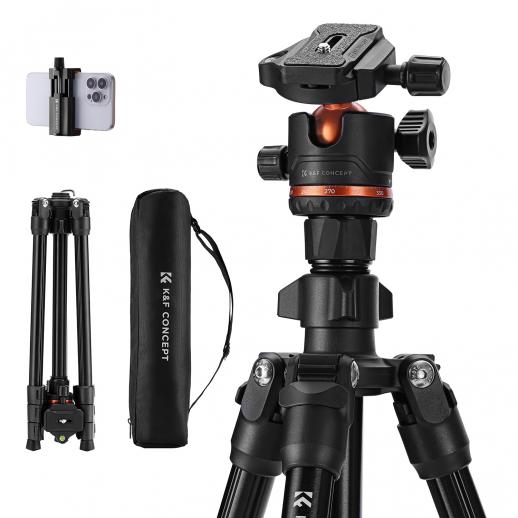
Understanding Your Bluetooth Selfie Stick
Before diving into the step-by-step instructions, it’s vital to familiarize yourself with the different parts of the selfie stick and how they function together.
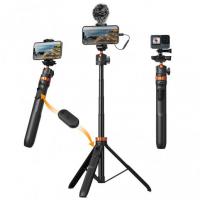
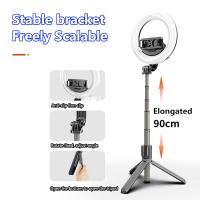
1. Stick and Handle: The stick is telescopic, meaning it can be extended and retracted. The handle is where the grip is located, and often it contains the Bluetooth button.
2. Phone Holder: This is a clamp at the top of the stick where you place your phone. It’s adjustable to fit various phone sizes.
3. Bluetooth Remote or Button: Located either on the handle or as a separate remote, this button pairs with your phone and signals the camera to take a photo.
4. Charging Port: Some sticks come with a built-in battery charged via a USB cable.
Step-by-Step Guide to Using Your Bluetooth Selfie Stick
Step 1: Charge Your Selfie Stick
Most modern Bluetooth selfie sticks come with a built-in rechargeable battery. Before your first use, ensure it’s fully charged. This typically involves plugging a USB cable into the selfie stick and connecting it to a power source. Charging times can vary, but two hours is usually sufficient for a full charge.
Step 2: Pair the Selfie Stick with Your Phone
1. Turn On the Bluetooth Feature: Start by turning on the Bluetooth connectivity on your smartphone. This is usually found within the settings menu under ‘Bluetooth.’
2. Power Up the Selfie Stick: Some sticks have a power button; press it to turn the stick on. You may see a small LED light indicating it’s ready to pair.
3. Pairing: On your phone’s Bluetooth settings, look for the name of your selfie stick, which is typically the brand or model number. Select it to pair.
4. Confirmation: Once paired, your phone will usually display a confirmation message, and the LED on the selfie stick may change color or turn off.
Step 3: Mount Your Phone
Once paired, it’s time to mount your phone securely:
1. Extend the Clamp: Expand the phone holder to fit your device. Avoid stretching too much as it could damage the holder.
2. Position Your Phone: Place your phone into the holder and ensure it’s secure. The camera should face outwards, unobstructed by the holder.
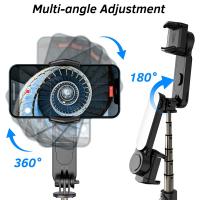
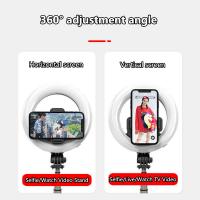
3. Adjust the Angle: Most holders allow you to tilt and rotate the phone, providing the optimal angle for your shot. Experiment with different angles to find what works best for your scene.
Step 4: Extend the Selfie Stick
With your phone securely in place, extend the selfie stick to the desired length. The stick should telescope smoothly but make sure not to pull too hard, risking damage or accidental collapse. If your holder can rotate, decide whether a landscape or portrait orientation suits your photo.
Step 5: Taking the Photo
1. Open Camera App: On your smartphone, open the camera application. Some selfie sticks come with their app, but the default camera app usually works fine.
2. Position the Stick: Hold the stick firmly, ensuring it's stable. Adjust the angle for the perfect shot.
3. Click the Button: Either press the Bluetooth button on the handle or use the remote to take the photo. The photo should capture instantly while ensuring minimal to no shake.
Troubleshooting Common Issues
Unsuccessful Pairing
If you face trouble pairing the selfie stick with your phone, ensure the stick is charged and in pairing mode. Restart the Bluetooth function on your phone and try again. If all else fails, consult the manual specific to your selfie stick model.
Phone Falling Out
If your phone constantly slips out of the holder, ensure the clamp is undamaged and adequately tight. If the holder is loose or broken, consider replacing it. Also, don’t extend the stick too far as it increases the lever force on the holder, making it unstable.
Button Malfunction
If the Bluetooth button or remote doesn’t work, ensure it’s fully charged and properly paired with the phone. Sometimes, drivers or specific app permissions may need updating.
Additional Tips and Tricks
Lighting
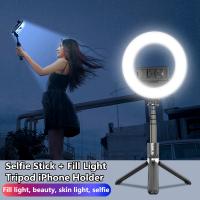
Optimal lighting is crucial for taking great photos. Natural light is preferable, but if you’re indoors or it’s dark, ensure your phone’s flash is on. Some selfie sticks come with built-in LED lights to enhance lighting conditions.
Stability
To avoid blurry pictures, stabilize the stick by holding it steadily or resting it against a firm surface. Extending the stick fully makes it prone to shakes, so avoid fully extending unless necessary.
Using Timer Mode
Instead of using the button, consider using your phone’s timer mode to take a selfie. This can add another layer of stability as you can prepare and hold still after setting a countdown.
Filters and Editing
Enhance your photos with filters available on your camera app or third-party photo editing apps. Subtle edits can make a significant difference, especially in a well-composed shot.
Mastering the use of a Bluetooth selfie stick can significantly elevate your photography game, making it easier to capture perfect shots without assistance. From charging and pairing your device to mounting your phone and taking stunning photos, each step is vital for a seamless experience. With practice, these actions become second nature, allowing you to focus more on capturing beautiful moments rather than fumbling with equipment. Happy snapping!


