How To Attach A Camera Lens?
Attaching a camera lens is a fundamental skill for any photographer, whether you're a beginner or a seasoned professional. Understanding how to properly attach and detach a lens can ensure that your equipment remains in good condition and that you capture the best possible images. In this article, we will walk you through the step-by-step process of attaching a camera lens, discuss common issues you might encounter, and provide tips to maintain your camera and lenses.
Step-by-Step Guide to Attaching a Camera Lens
1. Prepare Your Workspace
Before you begin, make sure you have a clean and stable workspace. Dust and dirt can easily get into your camera and lens, potentially causing damage or affecting image quality. A clean, flat surface is ideal for this task.
2. Turn Off Your Camera
Always turn off your camera before changing lenses. This helps to prevent any electrical damage and reduces the risk of dust being attracted to the sensor due to static electricity.
3. Remove the Rear Lens Cap and Camera Body Cap
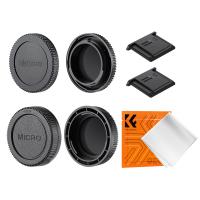
Both your camera body and lens will have protective caps. Remove the rear lens cap from the lens and the body cap from the camera. Keep these caps in a safe place as you will need them when you detach the lens.
4. Align the Mounting Indexes
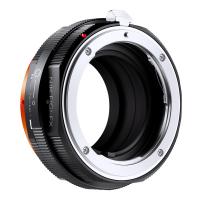
Most cameras and lenses have alignment marks (often a dot or a line) that help you attach the lens correctly. Align the mark on the lens with the corresponding mark on the camera body. This ensures that the lens is positioned correctly for attachment.
5. Attach the Lens
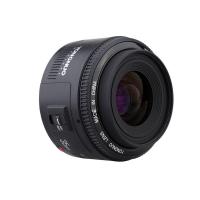
Once the alignment marks are matched, gently insert the lens into the camera body. Rotate the lens clockwise (or counterclockwise, depending on your camera model) until you hear a click. This click indicates that the lens is securely attached.
6. Check the Attachment
Gently wiggle the lens to ensure it is firmly attached. If the lens feels loose or does not click into place, remove it and try again. Never force the lens as this can damage the mounting mechanism.
Common Issues and Troubleshooting
1. Lens Won't Attach
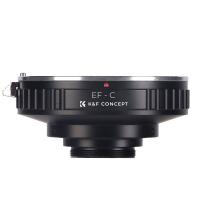
If the lens does not attach, check the alignment marks again. Ensure that you are using a compatible lens for your camera model. Some lenses are designed for specific camera mounts and will not fit on other models.
2. Dust and Debris
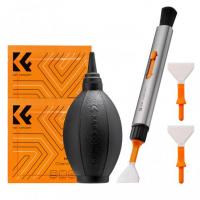
If you notice dust or debris on the lens or camera sensor, use a blower or a soft brush to clean it. Avoid using your breath as this can introduce moisture. Keeping your equipment clean is crucial for maintaining image quality.
3. Stuck Lens
If the lens gets stuck and won't detach, do not force it. Check the camera's manual for specific instructions on detaching the lens. Some cameras have a release button that needs to be pressed before the lens can be removed.
Tips for Maintaining Your Camera and Lenses
1. Regular Cleaning
Regularly clean your camera and lenses to prevent dust and dirt buildup. Use a microfiber cloth and lens cleaning solution for the glass elements. For the camera body, a soft, dry cloth is usually sufficient.
2. Proper Storage
Store your camera and lenses in a dry, cool place. Use a camera bag with compartments to keep your equipment organized and protected. Consider using silica gel packs to absorb moisture and prevent mold growth.
3. Use Lens Caps
Always use lens caps when your camera is not in use. This protects the lens from scratches, dust, and other potential damage. Both the front and rear lens caps are essential for maintaining the longevity of your lenses.
4. Avoid Extreme Conditions
Avoid exposing your camera and lenses to extreme temperatures, humidity, or direct sunlight for extended periods. These conditions can damage the internal components and affect performance.
Advanced Tips for Professional Photographers
1. Lens Calibration
For professional photographers, lens calibration is essential for ensuring sharp images. Some cameras allow for micro-adjustments to fine-tune the focus. Check your camera's manual for instructions on how to calibrate your lenses.
2. Firmware Updates
Keep your camera and lens firmware up to date. Manufacturers often release updates that improve performance, add new features, and fix bugs. Check the manufacturer's website regularly for updates.
3. Use a UV Filter
A UV filter can protect the front element of your lens from scratches and dust. While it may slightly affect image quality, the protection it offers is often worth the trade-off, especially in harsh environments.
4. Invest in Quality Lenses
While it might be tempting to save money on cheaper lenses, investing in high-quality lenses can make a significant difference in your photography. High-quality lenses offer better sharpness, color accuracy, and build quality.
Attaching a camera lens is a straightforward process, but it requires attention to detail to ensure that your equipment remains in good condition and that you achieve the best possible results. By following the steps outlined in this article, you can confidently attach and detach your lenses, troubleshoot common issues, and maintain your camera and lenses for optimal performance.
Remember, the key to successful photography is not just in the equipment you use, but in how well you take care of it. Regular maintenance, proper storage, and careful handling will ensure that your camera and lenses serve you well for years to come. Whether you're a hobbyist or a professional, mastering the basics of lens attachment is an essential skill that will enhance your photography experience.


