How To Change Canon Camera Wifi Password?
Changing the Wi-Fi password on a Canon camera is a crucial task for maintaining the security of your device and ensuring that only authorized users can access your camera's network. Whether you're updating your password for security reasons or simply because you've forgotten the existing one, this guide will take you through the steps necessary to successfully change your Canon camera Wi-Fi password. In this article, we will explore the practical considerations and the step-by-step process involved in changing the Wi-Fi password on various Canon camera models.
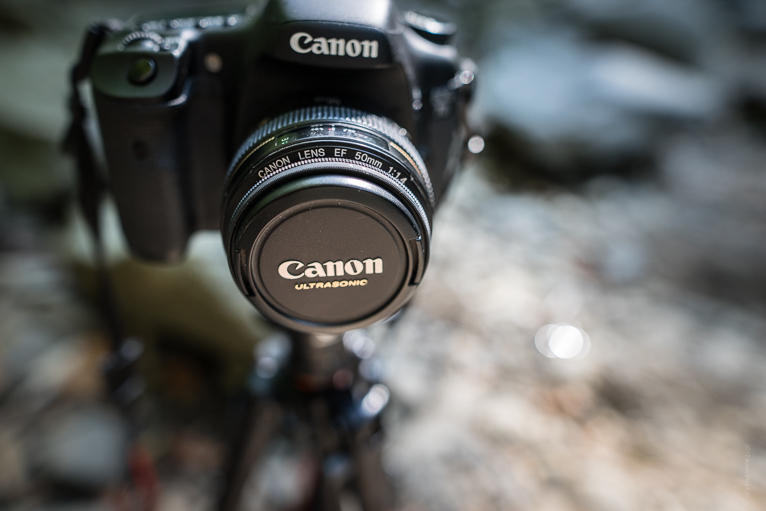
## Understanding the Importance of a Secure Wi-Fi Password
Before diving into the actual steps, it's essential to understand why keeping your Wi-Fi password secure is so critical. Just like any other digital device, your Canon camera's Wi-Fi network can be susceptible to unauthorized access or hacking attempts. An unsecured network can lead to potential privacy breaches, loss of important photographic data, or even unauthorized control over your camera. Therefore, frequently updating and securing your Wi-Fi password is a proactive measure that helps safeguard your equipment and your work.
## Pre-requisites Before Changing the Password
Before you change the Wi-Fi password on your Canon camera, ensure the following:
1. Battery Level: Your camera should have enough battery life to complete the process without interruption.
2. Firmware Updated: Make sure your camera's firmware is up to date to avoid any compatibility issues.
3. Instruction Manual: It's useful to have your camera's manual handy for model-specific instructions.
## Step-by-Step Guide to Changing the Wi-Fi Password
Different Canon camera models may have slightly varied procedures for changing the Wi-Fi password. Here, we’ll cover the general steps that apply to most Canon cameras with Wi-Fi capabilities.
Step 1: Turn On Your Camera
First, ensure your camera is powered on. You will need to access the camera's main menu to start the configuration.
Step 2: Navigate to Wi-Fi Settings
1. Open the Menu: Press the ‘Menu’ button on your camera.
2. Find Wi-Fi/NFC Settings: Navigate through the menu options to find ‘Wi-Fi/NFC settings.’ This is typically found under the ‘Setup’ tab, which is often represented by a wrench or spanner icon.
3. Select Wi-Fi Settings: Once in the Wi-Fi/NFC settings, select the Wi-Fi settings option.
Step 3: Modify Connection Settings
Once you’re in the Wi-Fi settings menu, you will have several options. You’ll need to modify the connection settings to change the password.
1. Choose a Network: If you have multiple networks saved, select the one you wish to change the password for.
2. Edit Settings: You will usually find an option to ‘Edit’ or ‘Change’ settings. Select this option.
Step 4: Update the Password
1. Select Password Field: Locate the password field within the settings.
2. Enter New Password: Using the camera's on-screen keyboard, delete the old password and enter the new one. Make sure your new password is strong and secure, comprising a mix of letters, numbers, and special characters.
3. Confirm Changes: After entering the new password, confirm the changes by pressing ‘OK’ or ‘Save.’
Step 5: Reconnect Devices
After changing your Wi-Fi password, you will need to reconnect any devices (such as smartphones, tablets, or computers) that previously had access to your camera’s network. Input the new password on these devices to re-establish the connection.
Step 6: Test the Connection
It’s always a good idea to test the connection after making changes to ensure everything is functioning correctly. Attempt to connect your camera to a device using the new password and verify that you can transfer images or control the camera via the app you’re using.
## Troubleshooting Tips
Sometimes, you might encounter issues while changing your Wi-Fi password. Here are a few troubleshooting tips to help you through potential challenges:
1. Password Rejection: If the camera rejects your new password, ensure no spaces are inadvertently added, and double-check for correct case-sensitive input.
2. Firmware Issues: If your camera doesn't allow password changes or you face repeated disconnections, consider updating the firmware.
3. Reset Settings: As a last resort, resetting the camera’s Wi-Fi settings to factory defaults can sometimes resolve persistent issues. Remember to reconfigure all your settings if you opt for a reset.
## Best Practices for Wi-Fi Security
While changing your Wi-Fi password is an essential step in securing your Canon camera, there are other best practices you should consider to maintain a secure Wi-Fi network:
1. Regular Updates: Frequently update your password to minimize the risk of unauthorized access.
2. Use Encryption: Ensure your Wi-Fi network uses a strong encryption method such as WPA2 or WPA3.
3. SSID Broadcasting: Avoid broadcasting your network SSID publicly if possible, making it less visible to potential hackers.
4. Secure Connections: When connecting to public Wi-Fi or unsecured networks to transfer images, ensure you are using a secure VPN connection to protect your data.
## Conclusion
Changing the Wi-Fi password on your Canon camera is a straightforward yet essential task for maintaining the security of your device and the data it holds. By following the steps outlined above, you can easily update your password and ensure that your camera’s Wi-Fi network remains secure. Regularly updating your password, along with adhering to other Wi-Fi security best practices, will help protect your valuable photographic work and keep unauthorized users at bay.
Whether you're a professional photographer or an enthusiast, taking the time to secure your equipment adequately is always a wise investment. Your Canon camera is a significant technological asset, and its security reflects the overall safety and integrity of your work. By staying vigilant and proactive, you can keep your creative process both fluid and secure.

















There are no comments for this blog.