How To Get Retro Camera Filter?
In the age of digital photography, the charm of retro camera filters has captivated many enthusiasts and casual photographers alike. These filters can transform modern photos into nostalgic masterpieces reminiscent of the days of film photography. Whether you're looking to evoke the warm tones of the 1970s or the grainy textures of the 1950s, retro camera filters can help you achieve that timeless look. This article will guide you through various methods to get retro camera filters, ensuring you can add that vintage touch to your photos with ease.
Understanding Retro Camera Filters
Before diving into the methods, it's essential to understand what retro camera filters are. These filters mimic the characteristics of old film cameras, including color shifts, grain, vignetting, and light leaks. They can be applied through various means, such as physical filters, software applications, or in-camera settings.
Method 1: Using Smartphone Apps
One of the most accessible ways to get retro camera filters is through smartphone apps. These apps are designed to be user-friendly and often come with a variety of preset filters that emulate different eras of photography.
Popular Apps for Retro Filters:
1. VSCO: Known for its high-quality filters, VSCO offers a range of presets that can give your photos a vintage look. The app also allows for fine-tuning, so you can adjust the intensity of the filter to your liking.
2. Huji Cam: This app mimics the look of disposable cameras from the 1990s. It adds light leaks, date stamps, and a unique color palette to your photos, making them look like they were taken decades ago.
3. Afterlight: Afterlight provides a wide range of filters and editing tools. Its retro filters are particularly popular for their ability to add grain, dust, and light leaks to photos.
4. Snapseed: Developed by Google, Snapseed offers a variety of filters and editing tools. Its "Vintage" and "Grainy Film" filters are perfect for achieving a retro look.
Method 2: Using Desktop Software
For those who prefer editing photos on a computer, desktop software offers more advanced tools and greater control over the final image. Programs like Adobe Photoshop and Lightroom are industry standards for photo editing and come with a plethora of options for creating retro effects.
Steps to Create Retro Filters in Photoshop:
1. Open Your Image: Start by opening the image you want to edit in Photoshop.
2. Add a Curves Adjustment Layer: This allows you to adjust the color balance and contrast. For a retro look, create an S-curve to boost the contrast and adjust the red, green, and blue channels to achieve the desired color shift.
3. Add Grain: Go to Filter > Noise > Add Noise. Adjust the amount to add a subtle grain effect.
4. Add Vignetting: Create a new layer and fill it with black. Then, use the Elliptical Marquee Tool to create a circular selection in the center of the image. Invert the selection and delete the black area inside the circle. Finally, reduce the opacity of the layer to create a vignette effect.
5. Add Light Leaks: Create a new layer and use a soft brush with a low opacity to paint light leaks in various colors. Set the layer blending mode to "Screen" to blend the light leaks with the image.
Method 3: Using Physical Filters
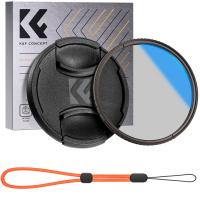
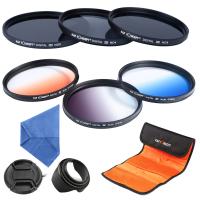
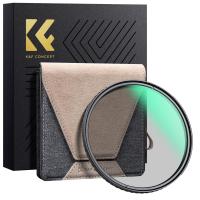
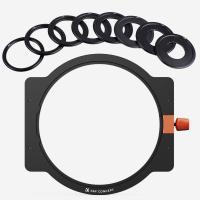
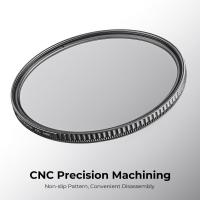
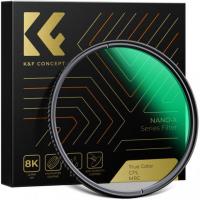
For those who prefer shooting with a camera rather than editing photos afterward, physical filters can be attached to your camera lens to achieve a retro look. These filters can be found in various styles, including color filters, diffusion filters, and special effect filters.
Types of Physical Filters:
1. Color Filters: These filters can add a color cast to your photos, mimicking the look of old film. Popular colors include sepia, blue, and red.
2. Diffusion Filters: These filters soften the image and create a dreamy, vintage look. They are perfect for portraits and landscapes.
3. Special Effect Filters: These include filters that add light leaks, starbursts, and other effects to your photos. They can be used to create unique, retro-inspired images.
Method 4: In-Camera Settings
Many modern digital cameras come with built-in filters and settings that can help you achieve a retro look without the need for additional software or physical filters. These settings can often be found in the camera's menu under "Picture Styles" or "Creative Filters."
Common In-Camera Retro Settings:
1. Monochrome: Converts your photos to black and white, mimicking the look of old film cameras.
2. Sepia: Adds a warm, brownish tint to your photos, reminiscent of early 20th-century photography.
3. Toy Camera: Adds vignetting and color shifts to create a lo-fi, retro look.
4. Grainy Film: Adds grain and adjusts the contrast to mimic the look of high-ISO film.
Tips for Achieving the Best Results
1. Experiment with Different Methods: Don't be afraid to try different apps, software, and filters to find the look that best suits your style.
2. Combine Techniques: Sometimes, the best results come from combining multiple methods. For example, you can use a physical filter while shooting and then apply additional effects in post-processing.
3. Pay Attention to Lighting: Retro photos often have unique lighting characteristics. Experiment with different lighting setups to enhance the vintage feel of your photos.
4. Study Vintage Photos: Look at old photos to understand the characteristics that make them unique. Pay attention to color, contrast, grain, and composition.
Getting a retro camera filter is easier than ever, thanks to the wide range of tools available today. Whether you prefer using smartphone apps, desktop software, physical filters, or in-camera settings, there are plenty of options to help you achieve that nostalgic look. By experimenting with different methods and combining techniques, you can create stunning vintage-inspired photos that capture the charm and character of a bygone era. So, grab your camera or smartphone, and start exploring the world of retro photography today!









-200x200.jpg)





There are no comments for this blog.