How To Hook Up Surveillance Cameras?
Setting up surveillance cameras can be a daunting task, especially for those who are not tech-savvy. However, with the right guidance and understanding of the process, it can be a straightforward and rewarding endeavor. Surveillance cameras are essential for enhancing security, monitoring activities, and providing peace of mind. This article will walk you through the steps to hook up surveillance cameras, ensuring you have a comprehensive understanding of the process.
Understanding Your Surveillance Needs
Before diving into the installation process, it is crucial to assess your surveillance needs. This involves determining the areas you want to monitor, the type of cameras suitable for your environment, and the features you require. Here are some key considerations:
1. Coverage Area: Identify the specific areas you need to monitor, such as entry points, driveways, backyards, or interior spaces.
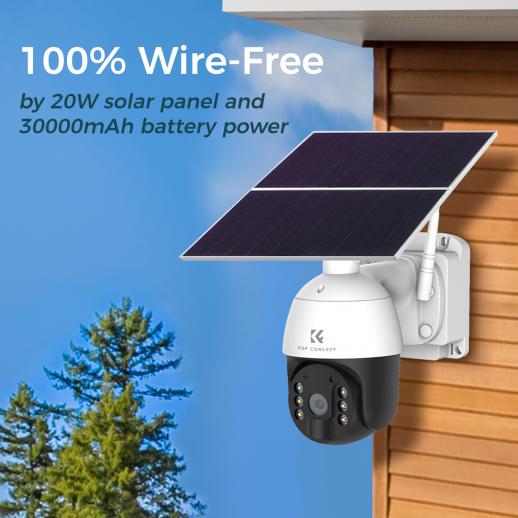
2. Camera Type: Choose between wired or wireless cameras. Wired cameras offer a stable connection, while wireless cameras provide flexibility in placement.
3. Resolution: Higher resolution cameras provide clearer images, which is essential for identifying faces and details.
4. Night Vision: Ensure the cameras have night vision capabilities if you need to monitor areas in low light conditions.
5. Storage: Decide whether you want local storage (DVR/NVR) or cloud storage for recorded footage.
6. Additional Features: Consider features like motion detection, two-way audio, and remote access.
Gathering the Necessary Equipment
Once you have a clear understanding of your surveillance needs, gather the necessary equipment. Here is a list of essential items:
1. Surveillance Cameras: Purchase the cameras that meet your requirements.
2. DVR/NVR: Digital Video Recorder (DVR) for analog cameras or Network Video Recorder (NVR) for IP cameras.
3. Cables: For wired cameras, you will need coaxial cables (for analog) or Ethernet cables (for IP cameras).
4. Power Supply: Ensure you have the appropriate power adapters or PoE (Power over Ethernet) switches for your cameras.
5. Mounting Hardware: Screws, anchors, and brackets for mounting the cameras.
6. Monitor: A monitor to view the camera feeds during setup.
7. Tools: Drill, screwdriver, and other necessary tools for installation.
Planning the Camera Placement
Proper camera placement is crucial for effective surveillance. Follow these guidelines to ensure optimal coverage:
1. Height: Mount cameras at a height of 8-10 feet to avoid tampering and provide a wide field of view.
2. Angle: Position cameras at an angle that covers the desired area without obstructions.
3. Lighting: Avoid pointing cameras directly at light sources to prevent glare and ensure clear images.
4. Entry Points: Focus on entry points like doors and windows, as these are common areas for unauthorized access.
5. Overlap: Ensure there is some overlap in the coverage areas of multiple cameras to avoid blind spots.
Installing the Cameras
With the planning complete, it’s time to install the cameras. Follow these steps for a successful installation:
1. Mount the Cameras: Use the mounting hardware to secure the cameras in the desired locations. Ensure they are firmly attached and positioned correctly.
2. Run the Cables: For wired cameras, run the cables from the cameras to the DVR/NVR. Use cable clips or conduits to keep the cables organized and protected.
3. Connect the Cameras: Connect the cameras to the DVR/NVR using the appropriate cables. For wireless cameras, follow the manufacturer’s instructions to connect them to your Wi-Fi network.
4. Power the Cameras: Plug in the power adapters or connect the cameras to a PoE switch if using Ethernet cables.
5. Test the Cameras: Turn on the system and check the camera feeds on the monitor. Adjust the camera angles if necessary to ensure optimal coverage.
Configuring the System
After installing the cameras, you need to configure the system to ensure it operates effectively. Here are the key steps:
1. Set Up the DVR/NVR: Follow the manufacturer’s instructions to set up the DVR/NVR. This typically involves connecting it to a monitor, configuring the network settings, and setting the date and time.
2. Configure Camera Settings: Access the camera settings through the DVR/NVR interface or the camera’s web interface. Adjust settings like resolution, frame rate, and motion detection sensitivity.
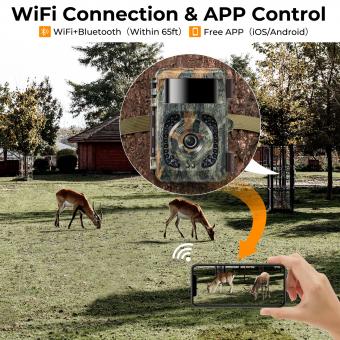
3. Set Up Remote Access: If you want to monitor the cameras remotely, configure the remote access settings. This usually involves setting up port forwarding on your router and using a mobile app or web portal provided by the camera manufacturer.
4. Create Recording Schedules: Set up recording schedules based on your needs. You can choose continuous recording, motion-triggered recording, or a combination of both.
5. Test the System: Perform a thorough test of the system to ensure all cameras are working correctly, the recordings are being saved, and remote access is functioning.
Maintaining Your Surveillance System
Regular maintenance is essential to ensure your surveillance system continues to operate effectively. Here are some maintenance tips:
1. Clean the Cameras: Periodically clean the camera lenses to remove dust, dirt, and cobwebs that can obstruct the view.
2. Check the Connections: Inspect the cables and connections to ensure they are secure and free from damage.
3. Update Firmware: Keep the camera and DVR/NVR firmware up to date to benefit from the latest features and security patches.
4. Review Footage: Regularly review the recorded footage to ensure the system is capturing the necessary events.
5. Test the System: Periodically test the system to ensure all components are functioning correctly and make any necessary adjustments.
Troubleshooting Common Issues
Despite careful planning and installation, you may encounter some common issues with your surveillance system. Here are some troubleshooting tips:
1. No Video Feed: Check the power supply, cables, and connections. Ensure the camera is properly connected to the DVR/NVR or Wi-Fi network.
2. Poor Image Quality: Adjust the camera settings, clean the lens, and ensure the camera is positioned correctly. Check the resolution and frame rate settings.
3. Intermittent Connection: For wireless cameras, ensure they are within range of the Wi-Fi router. For wired cameras, check the cables for damage.
4. Motion Detection Issues: Adjust the motion detection sensitivity and ensure there are no obstructions in the camera’s field of view.
5. Remote Access Problems: Verify the network settings, port forwarding configuration, and ensure the mobile app or web portal is set up correctly.
Hooking up surveillance cameras may seem challenging, but with careful planning, the right equipment, and a step-by-step approach, it can be a manageable task. By understanding your surveillance needs, gathering the necessary equipment, planning the camera placement, and following the installation and configuration steps, you can set up an effective surveillance system. Regular maintenance and troubleshooting will ensure your system continues to provide the security and peace of mind you need. Whether for home or business, a well-installed surveillance system is a valuable investment in safety and security.

