How To Improve Sound Voice Recordings?
Improving the quality of sound voice recordings is a crucial aspect for podcasters, musicians, voice-over artists, and anyone involved in audio production. High-quality recordings can make a significant difference in the listener's experience, ensuring clarity, professionalism, and engagement. This article will delve into various strategies and techniques to enhance your sound voice recordings, covering aspects such as equipment, environment, recording techniques, and post-production processes.
1. Invest in Quality Equipment

The foundation of a good recording starts with the right equipment. Here are some essential tools you should consider:
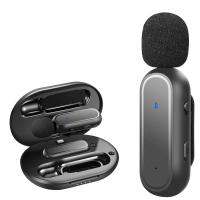
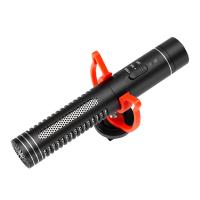
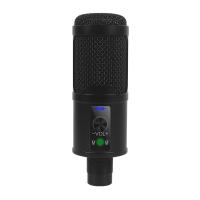
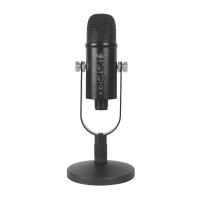
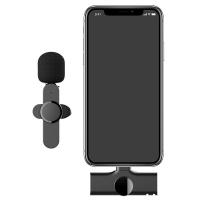
Microphones: A high-quality microphone is paramount. Condenser microphones are generally preferred for studio recordings due to their sensitivity and accuracy. Dynamic microphones, on the other hand, are robust and handle high sound pressure levels well, making them suitable for live performances and certain studio applications.
Audio Interface: An audio interface converts your analog signals into digital ones, ensuring that your recordings are clear and free from latency. Look for interfaces with high-quality preamps and low noise levels.
Headphones: Closed-back headphones are ideal for monitoring recordings as they prevent sound leakage, which can be picked up by the microphone.
Pop Filter: A pop filter helps reduce plosive sounds (like 'p' and 'b') that can cause distortion in your recordings.
Shock Mount: A shock mount isolates the microphone from vibrations and handling noise, ensuring a cleaner recording.
2. Optimize Your Recording Environment

The environment in which you record plays a significant role in the quality of your sound recordings. Here are some tips to optimize your recording space:
Soundproofing: Minimize external noise by soundproofing your recording space. This can be achieved by using heavy curtains, carpets, and acoustic panels. Sealing windows and doors can also help reduce noise intrusion.
Acoustic Treatment: To prevent unwanted reflections and echoes, treat your room with acoustic panels, bass traps, and diffusers. This will help create a balanced sound environment.
Microphone Placement: Position your microphone correctly to capture the best sound. Generally, placing the microphone about 6-12 inches away from the sound source is ideal. Experiment with angles and distances to find the sweet spot.
3. Master Recording Techniques
Even with the best equipment and environment, poor recording techniques can ruin your sound quality. Here are some best practices:
Gain Staging: Set the gain levels correctly to avoid clipping and distortion. Aim for a level where the peaks of your recording are around -6dB to -3dB.
Proximity Effect: Be aware of the proximity effect, which causes an increase in bass frequencies when the sound source is close to the microphone. Adjust your distance accordingly to achieve the desired tonal balance.
Consistent Levels: Maintain consistent levels throughout your recording session. This can be achieved by using a compressor to even out the dynamic range.
Breath Control: Practice proper breath control to avoid unwanted breaths and pops in your recordings. This can be achieved through vocal exercises and proper microphone technique.
4. Post-Production Enhancements
Post-production is where you can polish your recordings and fix any issues that may have occurred during the recording process. Here are some key post-production techniques:
Equalization (EQ): Use EQ to balance the frequencies in your recording. Cut unwanted frequencies and boost those that enhance the clarity and presence of your voice.
Compression: Apply compression to control the dynamic range of your recording. This ensures that the quieter parts are audible and the louder parts are not overwhelming.
Noise Reduction: Use noise reduction tools to eliminate background noise and hum. Be careful not to overdo it, as this can introduce artifacts and affect the natural sound of your recording.
Reverb and Delay: Add reverb and delay effects to give your recording a sense of space and depth. Use these effects sparingly to avoid making your recording sound muddy.
Editing: Edit your recordings to remove any mistakes, unwanted noises, or silences. This can be done using digital audio workstations (DAWs) like Pro Tools, Logic Pro, or Audacity.
5. Continuous Learning and Improvement
The field of audio recording is constantly evolving, with new techniques and technologies emerging regularly. To stay ahead, consider the following:
Education: Take online courses, attend workshops, and read books on audio recording and production. Websites like Coursera, Udemy, and LinkedIn Learning offer valuable resources.
Practice: Regular practice is essential to hone your skills. Experiment with different techniques and equipment to find what works best for you.
Feedback: Seek feedback from peers and professionals. Constructive criticism can help you identify areas for improvement and refine your techniques.
Stay Updated: Follow industry blogs, forums, and social media groups to stay informed about the latest trends and advancements in audio recording.
Improving the quality of your sound voice recordings involves a combination of investing in the right equipment, optimizing your recording environment, mastering recording techniques, and refining your post-production skills. By following the strategies outlined in this article, you can significantly enhance the clarity, professionalism, and overall quality of your recordings. Remember, continuous learning and practice are key to achieving excellence in audio production. Whether you're a podcaster, musician, or voice-over artist, these tips will help you create recordings that captivate and engage your audience.
















There are no comments for this blog.