How To Improve Video Quality In Low Light?
How to Improve Video Quality in Low Light: A Comprehensive Guide
In the world of video production, lighting is one of the most important factors influencing image quality. However, there are situations where you simply don’t have ideal lighting conditions, and low light can be a significant challenge. Whether you're filming indoors at night, recording a vlog in a dimly lit room, or shooting a cinematic scene with minimal natural light, improving video quality in low-light settings is crucial for producing professional-looking results.
In this article, we’ll explore several practical techniques to enhance video quality in low-light conditions. These methods range from adjusting your camera settings to using specialized equipment, and we'll also look at some post-production tips to make your footage shine despite the darkness.
1. Understanding the Challenges of Low-Light Video
Before diving into solutions, it's important to understand why low light is problematic for video quality. Low-light environments present several issues:
- Noise and Grain: In low light, cameras tend to boost the ISO (sensitivity to light) to capture more detail. While this can make the image brighter, it also introduces grain or digital noise.
- Lack of Detail: Without enough light, the camera can struggle to capture fine details, especially in the shadows, leading to flat, murky footage.
- Poor Color Accuracy: Low light often results in color inaccuracies or a washed-out look since cameras rely on natural or artificial light sources to accurately render colors.
2. Increase ISO Sensitivity with Caution
One of the first settings you can adjust to improve video quality in low light is the ISO sensitivity. ISO controls the camera’s sensitivity to light, and increasing it allows the sensor to capture more details in dimly lit environments.
Pros:
- Captures More Light: Boosting ISO makes the camera more sensitive to available light, allowing you to shoot in darker settings without needing additional lighting.
- Simple and Quick Adjustment: ISO is easy to tweak, especially on modern cameras, and is a go-to solution for low-light conditions.
Cons:
- Digital Noise: Increasing ISO beyond a certain point introduces noise or grain, which can severely degrade video quality. High ISO levels can make the footage look unprofessional or amateurish.
Best Practices:
- Use the lowest ISO setting possible that still allows for proper exposure. Most cameras perform best between ISO 800 and ISO 3200, but this varies depending on the model.
- If you're using a DSLR or mirrorless camera, check how it handles noise at higher ISO settings. Many newer models have advanced sensors that perform well in low light with minimal noise.
- For video, try not to exceed ISO 1600 unless absolutely necessary. If you need to go higher, consider using noise reduction software in post-production.
3. Use a Fast Lens
A "fast lens" refers to a lens with a wide aperture, typically denoted by a low f-number (e.g., f/1.4, f/2.8). A wider aperture allows more light to reach the camera’s sensor, which is especially helpful in low-light situations.
Why a Fast Lens Works:
- More Light: A wide aperture allows more light into the camera, reducing the need for higher ISO settings.
- Shallow Depth of Field: Fast lenses can also create a shallow depth of field, which can add cinematic effects to your footage by blurring the background and focusing attention on the subject.
Recommended Lenses:
- A 50mm f/1.8 lens is a popular choice for many filmmakers because it offers great low-light performance at an affordable price.
- 24mm f/1.4 or 35mm f/1.4 lenses provide excellent performance in low-light situations, and their wide apertures can help isolate the subject from the background.
4. Add Artificial Lighting
While it’s often ideal to rely on natural light, sometimes it’s necessary to add artificial lighting to achieve the best results in low-light video. Proper lighting can drastically improve the quality of your video by illuminating your subject and creating depth, contrast, and texture.
Lighting Equipment:
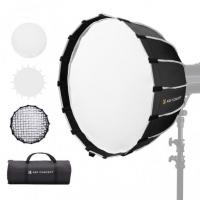
- Softbox Lights: Softboxes provide diffused light, reducing harsh shadows and giving your subject a flattering appearance.
- Ring Lights: Commonly used for vlogs, interviews, and social media content, ring lights provide even, diffused lighting around the subject, reducing shadows.
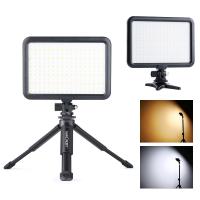
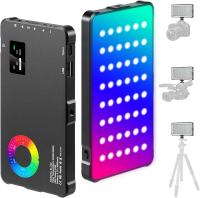
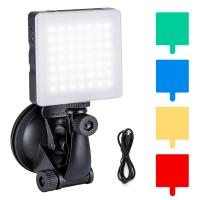
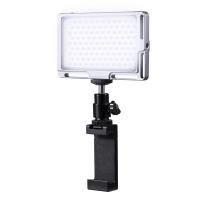
- LED Panels: Adjustable LED panels are portable, versatile, and provide bright, soft light. Many have adjustable color temperatures, so you can match the ambient light in the scene.
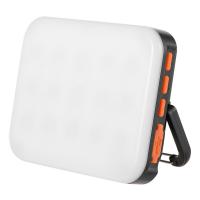
- Portable Light Sources: For shooting on-the-go or in tight spaces, consider battery-operated lights, like the Aputure AL-M9 or Godox LEDP260C.
Lighting Techniques:
- Key Light: Position a strong light source, called the key light, to illuminate your subject’s face or the main area of interest.
- Fill Light: Use a softer fill light to soften harsh shadows created by the key light.
- Backlight or Rim Light: Adding a backlight can create separation between the subject and the background, helping to add depth to your video.
5. Optimize Camera Settings for Low Light
In addition to adjusting ISO and aperture, there are several other camera settings that can help you get the best video quality in low light.
Shutter Speed:
- Use a slower shutter speed in low light to allow more time for light to hit the camera sensor. However, make sure not to go too slow, as this will introduce motion blur, especially if there’s movement in your video. A good rule of thumb is to keep your shutter speed around 1/50 to 1/60 second for video.
White Balance:
- In low-light environments, the color temperature of the available light can shift, often introducing a cooler or warmer tone to your footage. Adjust the white balance to match the lighting conditions and avoid color distortions.
Focus:
- Manual Focus: Autofocus can struggle in low light, leading to slower or inconsistent focusing. Use manual focus to ensure the subject stays sharp, especially when working with shallow depth of field.
6. Use Noise Reduction in Post-Production
Even with careful camera settings, noise can still creep into your footage, especially if you’ve had to boost the ISO or use a high-shutter speed in low light. Fortunately, there are several software tools available to reduce or eliminate noise from your videos.
Recommended Noise Reduction Software:
- Neat Video: This is one of the most popular and effective noise reduction plugins for video editing software like Adobe Premiere, Final Cut Pro, and DaVinci Resolve. Neat Video analyzes your footage and removes noise while preserving important details.
- Red Giant Denoiser: This plugin provides fast and automatic noise reduction, with customizable settings to balance noise removal and detail retention.
- DaVinci Resolve: DaVinci Resolve has built-in noise reduction tools, especially in its Studio version, that can effectively clean up grainy footage without sacrificing quality.
7. Post-Production Color Grading
Low-light video footage often appears flat or desaturated, making color grading an important step in the post-production process. By adjusting the contrast, saturation, and shadows, you can enhance the visual appeal of your video.
Color Grading Tips:
- Increase Contrast: In low light, you might lose contrast, which can make the video appear dull. Increase the contrast to give your video more depth.
- Enhance Shadows: Don’t be afraid to push the shadows and blacks to deepen the overall mood, but avoid crushing them completely, as this could lead to loss of detail.
- Use LUTs: Look-up tables (LUTs) are pre-designed color grading presets that can instantly add a cinematic look to your footage. Many LUTs are specifically designed to improve low-light footage.
8. Advanced Techniques for Cinematic Looks
For filmmakers seeking a more cinematic aesthetic, here are a few advanced techniques for improving low-light video quality:
- Lighting Ratios: A high lighting ratio (the difference between your key and fill light) can add drama and dimension to your footage. Experiment with lighting angles and intensity to create more cinematic looks.
- Lighting Modifiers: Use gels to change the color temperature or diffusion material to soften the light, giving you greater control over the light's characteristics.
- Film Emulation: If you’re aiming for a vintage or film-like look, consider using digital film emulation filters or LUTs in post-production to recreate the appearance of old-school film stock.
Improving video quality in low light doesn’t have to be a daunting task. By understanding the challenges and employing the right techniques, you can capture stunning footage in almost any lighting condition. From adjusting camera settings like ISO and aperture to using external lighting and post-production tools, every step you take can help transform your low-light footage into something professional.
Remember that while the tools and techniques are important, the best results often come from a combination of creative lighting, skillful camera settings, and thoughtful post-production. With these strategies in your arsenal, you’ll be able to tackle any low-light situation with confidence and produce videos that stand out.













There are no comments for this blog.