How To Make Recorded Audio Sound Better?
How to Make Recorded Audio Sound Better: A Comprehensive Guide
In today’s multimedia-driven world, the quality of recorded audio holds significant importance. Whether you are a podcaster, content creator, musician, or just someone recording voice memos, clear and professional audio makes a significant difference. Poor sound quality can detract from the message and turn off your audience. Fortunately, improving audio quality is achievable with some effort and the right techniques. This article provides a detailed guide on enhancing recorded audio to meet professional standards.
---
Understanding the Basics of Audio Recording
Before diving into improvements, it’s important to understand some key factors that affect audio quality:
1. Recording Environment: Ambient noise, echo, and room acoustics play a critical role in sound quality.
2. Equipment Quality: The microphone and recording device used significantly impact the fidelity of the audio.
3. Recording Techniques: Proper positioning of the microphone, consistent volume levels, and clear enunciation matter.
---
Step 1: Optimizing Your Recording Environment

The foundation of great audio is a controlled recording environment. Here’s how you can optimize yours:
- Choose a Quiet Location: Minimize external sounds by selecting a secluded, quiet space. Avoid locations with high traffic or constant noise sources.
- Reduce Echo: Bare walls and hard surfaces create reflections that cause echoes. Use curtains, carpets, or foam panels to dampen sound.
- Minimize Background Noise: Turn off fans, air conditioners, or other equipment that generates hums or white noise.
Creating a good recording environment upfront reduces the effort required in post-production.
---
Step 2: Using Quality Recording Equipment

High-quality equipment directly impacts the clarity and richness of audio recordings. If possible, invest in the following:
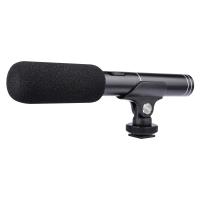
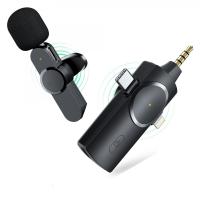
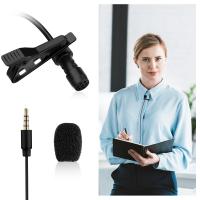
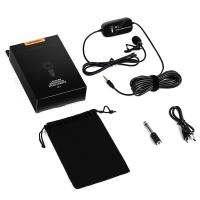
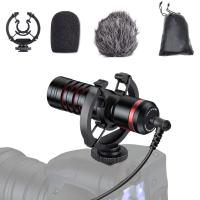
- Microphone: A dedicated condenser or dynamic microphone will offer better audio fidelity compared to built-in laptop or phone microphones.
- Pop Filter: This accessory reduces plosive sounds caused by letters like "P" and "B."
- Audio Interface: If using a professional microphone, an audio interface converts analog signals into digital format with better accuracy.
Ensure your recording device supports the format and quality (bit rate and sample rate) needed for your project.
---
Step 3: Employing Proper Recording Techniques
The way you handle recording significantly affects the outcome:
- Maintain Consistent Distance: Keep a consistent distance (6–12 inches) from the microphone to avoid volume fluctuations.
- Speak Clearly: Enunciate words properly and avoid speaking too fast.
- Monitor Levels: Avoid clipping (distortion caused by overly loud signals) by setting input levels below 0 dB. Aim for levels around -12 dB to allow headroom for peaks.
Practicing good recording habits ensures you start with clean audio, making it easier to refine during editing.
---
Step 4: Editing the Audio
Editing is where you can drastically improve the sound quality. Popular tools for this include Adobe Audition, Audacity, Logic Pro X, and GarageBand. Key editing techniques include:
1. Noise Reduction
Even in a controlled environment, some background noise may creep in. Most audio software includes noise reduction tools that help isolate and remove constant noises such as hums, hisses, or air conditioning.
- Select a section of silence in your recording to create a noise profile.
- Apply the noise reduction tool to the entire recording.
2. Equalization (EQ)
EQ adjusts the balance of different frequency ranges in your audio. Proper equalization can make voices sound richer and clearer.
- Boost low frequencies (bass) to add warmth.
- Cut mid-range frequencies to remove muddiness.
- Slightly enhance high frequencies to add clarity.
3. Compression
Compression evens out volume levels, ensuring quieter parts are amplified and louder parts are tamed. This improves overall consistency and makes the audio more professional.
- Use a moderate ratio (e.g., 3:1) and set a threshold to reduce peaks.
- Avoid over-compression, as it can make the audio sound unnatural.
4. De-essing
De-essers reduce harsh "s" sounds that can be jarring in speech. Most audio editing tools include a de-essing feature.
5. Reverb and Effects
Adding a small amount of reverb can create a natural, fuller sound. However, use effects sparingly to maintain clarity and prevent artificiality.
6. Volume Normalization
Normalize your audio to a consistent loudness level. Aim for industry standards like -16 LUFS for podcasts or -23 LUFS for broadcast.
---
Step 5: Enhancing Audio with Advanced Techniques
For those with more experience or access to professional tools, advanced techniques can elevate your recordings further:
- Multi-band Compression: Applies compression to specific frequency ranges for more precise control.
- Stereo Imaging: Enhances the width and spatial depth of audio, useful for music and immersive soundscapes.
- Pitch Correction: Ensures vocals are in tune (commonly used in music production).
- Layering: Combine multiple audio tracks or overdubs to create a richer, more dynamic sound.
---
Step 6: Testing and Feedback
Once you’ve edited your audio, test it across different playback devices like headphones, speakers, and mobile devices. Gather feedback from others to identify any areas needing improvement. Ensure your audio sounds good in various environments, such as a noisy café or a quiet room.
---
Common Pitfalls to Avoid
1. Over-editing: Excessive use of effects or filters can make audio sound artificial.
2. Ignoring Input Quality: Poorly recorded audio cannot be fully fixed in post-production.
3. Clipping: Always monitor input levels to prevent distortion.
4. Inconsistent Workflow: Establish a consistent process for recording and editing to maintain quality.
---
Tools and Resources
Here are some recommended tools for audio editing:
- Free Tools: Audacity, GarageBand
- Professional Software: Adobe Audition, Pro Tools, Logic Pro X
- Plugins: iZotope RX (for restoration), Waves Audio (for effects)
Additionally, online platforms like YouTube and Skillshare offer tutorials to help you master these tools.
---
Practical Scenarios and Solutions
Scenario 1: Recording on a Budget
If you’re limited to basic equipment, focus on optimizing your environment and mastering free tools like Audacity. Use your smartphone wisely by positioning it on a stable surface and recording in a quiet, treated room.
Scenario 2: Editing a Noisy Recording
For audio with unavoidable background noise, use advanced noise reduction plugins like iZotope RX. Experiment with EQ to isolate and enhance the vocal frequencies.
Scenario 3: Preparing Audio for Different Platforms
Each platform may have specific loudness standards. For example:
- Podcasts: Normalize to -16 LUFS
- YouTube: Normalize to -14 LUFS
Use tools like LUFS meters to measure and adjust loudness accurately.
---
Improving recorded audio involves a mix of preparation, technical skill, and creative decision-making. By optimizing your environment, using quality equipment, mastering editing techniques, and continuously testing and iterating, you can achieve professional-quality audio.
Remember, great sound starts with great preparation. The better your recording, the less effort required in post-production. Whether you’re creating content for personal use or a wide audience, prioritizing audio quality ensures your message resonates effectively. By following the steps outlined above, you can elevate your recordings and create a lasting impression on your listeners.







![Supfoto Osmo Action 3 Screen Protector for DJI Osmo Action 3 Accessories, 9H Tempered Glass Film Screen Cover Protector + Lens Protector for DJI Osmo 3 Dual Screen [6pcs] Supfoto Osmo Action 3 Screen Protector for DJI Osmo Action 3 Accessories, 9H Tempered Glass Film Screen Cover Protector + Lens Protector for DJI Osmo 3 Dual Screen [6pcs]](https://img.kentfaith.com/cache/catalog/products/us/GW41.0076/GW41.0076-1-200x200.jpg)






There are no comments for this blog.