How To Record From A Wifi Camera?
WiFi cameras have revolutionized security and convenience in our homes and workplaces. With their ability to stream video wirelessly and store recordings, they are indispensable tools for surveillance, monitoring, and even creative tasks. However, understanding how to set up and manage recordings from a WiFi camera can be daunting. This guide will delve into the ultimate steps and solutions, covering everything from initial setup to advanced tips, ensuring you can record efficiently and confidently.
---
Understanding WiFi Cameras: An Overview
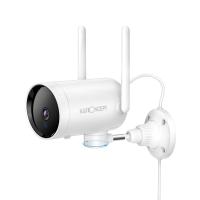
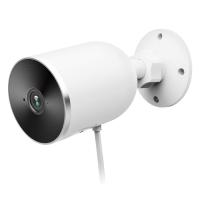
WiFi cameras are network-connected devices that capture video and transmit data wirelessly to a storage location or live feed application. Their portability, lack of extensive wiring, and flexibility make them popular for personal and professional use. The recordings from these cameras can be stored locally (e.g., SD cards) or remotely (e.g., cloud storage or networked devices).
Before recording from your WiFi camera, it’s essential to identify its capabilities:
- Does it support local storage via SD cards?
- Can it integrate with cloud services?
- What mobile or desktop applications does it use?
- Does it require a subscription for advanced features?
With these aspects clarified, let’s move on to the recording process.
---
Step 1: Setting Up Your WiFi Camera
To begin recording, ensure your WiFi camera is set up correctly. This involves:
1. Positioning the Camera: Choose a location with a strong WiFi signal. Weak connectivity can lead to interruptions in recording or live streaming.
2. Power Supply: Ensure the camera is connected to a stable power source or is fully charged if battery-operated.
3. Connecting to WiFi: Follow the manufacturer’s instructions to connect the camera to your home or office WiFi network. Typically, this involves:
- Downloading a companion app.
- Using the app to scan a QR code or manually entering the WiFi credentials.
4. Testing Connectivity: Use the app to check the live feed. This confirms that the camera is successfully connected and ready for use.
---
Step 2: Configuring the Recording Settings
WiFi cameras offer multiple recording options to suit various needs. These include:
- Continuous Recording: Records 24/7. Ideal for high-security areas but requires ample storage.
- Motion-Triggered Recording: Starts recording when motion is detected. This saves storage space and is great for general surveillance.
- Scheduled Recording: Lets you specify times for recording, which is helpful if you only need coverage during certain hours.
To configure these:
1. Access the App: Open the camera’s app or software interface.
2. Navigate to Recording Settings: Look for options like “Recording Modes” or “Video Settings.”
3. Set Preferences: Choose the desired mode, video quality (e.g., HD or SD), and storage location (local or cloud).
---
Step 3: Selecting the Storage Option
Where your recordings are saved plays a critical role in their accessibility and longevity. Let’s examine the options:
1. Local Storage (SD Card):
- Most WiFi cameras have an SD card slot. Insert a compatible card, ensuring it has enough capacity for your needs.
- Pros: No subscription fees, data remains in your control.
- Cons: Limited storage, vulnerable to theft or damage.
2. Cloud Storage:
- Many manufacturers offer cloud services for remote storage. Subscriptions typically include features like longer retention periods and enhanced security.
- Pros: Accessible from anywhere, secure backups.
- Cons: Recurring costs, potential data privacy concerns.
3. Network Video Recorder (NVR):
- Connects multiple cameras to a centralized recording system.
- Pros: Suitable for multiple cameras, large storage capacity.
- Cons: Higher initial cost, requires setup expertise.
---
Step 4: Initiating Recording
Once the camera is set up and storage is configured, start recording:
1. Via the App:
- Open the live feed.
- Tap the record button to manually start and stop recordings.
2. Automated Recording:
- Enable motion detection or schedules as configured earlier.
3. Confirm Functionality:
- Test the setup by triggering motion or checking a live feed during the scheduled period. Verify that the recordings are saved in the designated location.
---
Step 5: Accessing and Managing Recordings
After recording, you’ll need to access and manage your video files. Here’s how:
1. Viewing in the App:
- Navigate to the “Recordings” or “Library” section of the app.
- Select a file to view, download, or share.
2. Downloading to Devices:
- Save important recordings to your phone, computer, or external drive for easy access or backup.
3. Organizing Storage:
- Regularly delete unnecessary files, especially if using local storage, to prevent it from filling up.
---
Troubleshooting Common Issues
Even with a robust setup, issues can arise. Here’s how to tackle them:
1. Recording Not Saving:
- Check storage capacity (SD card or cloud).
- Ensure the camera has power and a stable WiFi connection.
2. Motion Detection Not Triggering:
- Adjust sensitivity settings in the app.
- Clean the camera lens and check its field of view.
3. Low-Quality Recordings:
- Switch to a higher resolution in the settings.
- Improve the WiFi signal strength at the camera’s location.
---
Advanced Tips for Optimal Use
1. Integrate with Smart Home Systems:
- Connect your WiFi camera to platforms like Google Home or Amazon Alexa for voice commands and automation.
2. Enable Encryption:
- Use WPA3 for your WiFi network and enable end-to-end encryption (if supported) to secure recordings.
3. Regular Firmware Updates:
- Update your camera’s firmware to access new features and fix vulnerabilities.
4. Expand Storage:
- If local storage fills up quickly, consider upgrading to a larger SD card or subscribing to additional cloud storage.
---
Conclusion
Recording from a WiFi camera can seem complex at first, but breaking it down into manageable steps simplifies the process. By setting up the camera properly, choosing the right storage option, and configuring recording preferences, you can ensure seamless and reliable video capture. Addressing issues promptly and leveraging advanced tips will further enhance your experience. Whether you’re using a WiFi camera for security or creative pursuits, mastering its recording features is an ultimate step toward maximizing its potential.
Make your WiFi camera a reliable companion by applying these strategies today!




















There are no comments for this blog.