How To Record Sounds And Turn Into Mp3?
How to Record Sounds and Convert Them into MP3: A Comprehensive Guide
In today's digital world, recording and converting sounds into MP3 format is an essential skill for creating podcasts, music, lectures, or even personal voice memos. Whether you're a beginner or a seasoned creator, this guide will walk you through the entire process—from recording sound to converting it into the popular MP3 format. We will also explore various tools, software, and tips to optimize your recordings.
Step 1: Preparing Your Equipment

The quality of your recorded sound largely depends on the equipment you use. Here are the key components you'll need:
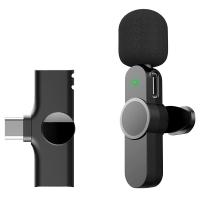
1. Microphone: A good quality microphone is critical to capturing clear sound. While your computer's built-in microphone may suffice for casual recordings, investing in an external microphone is recommended for higher quality. USB microphones, like the Blue Yeti or Audio-Technica ATR2100x, are popular choices for both beginners and professionals.
2. Headphones: High-quality headphones will help you monitor your recording in real-time. This allows you to identify issues such as background noise or distortion.
3. Soundproof Environment: The environment in which you record plays a significant role in the sound quality. Try to record in a quiet room, away from traffic, loud appliances, or other potential sources of noise. Using soundproofing techniques, such as foam panels or blankets, can help reduce external interference.
4. Audio Interface (Optional): If you're using a professional microphone (XLR type), an audio interface may be required to connect the mic to your computer. Popular models include the Focusrite Scarlett series and the Behringer UMC22.
Step 2: Choosing the Right Software for Recording
There are several software options available for recording audio, depending on your operating system and preferences. Here are some popular ones:
1. Audacity (Free, Open-Source):
- Platform: Windows, Mac, Linux
- Best For: Beginners and intermediate users
- Features: Audacity is one of the most widely used free audio recording and editing tools. It allows you to record sound, edit the recording (such as cutting, trimming, and adjusting volume), and export it in various formats, including MP3.
2. GarageBand (Free for Mac users):
- Platform: Mac, iOS
- Best For: Mac users looking for an intuitive interface
- Features: While primarily designed for music production, GarageBand can be used to record voiceovers, podcasts, or any other sound. It offers various audio effects and a user-friendly interface.
3. Adobe Audition (Paid, Professional):
- Platform: Windows, Mac
- Best For: Professionals
- Features: Adobe Audition is a premium software offering advanced features such as multi-track editing, noise reduction, and audio restoration. It's ideal for high-quality audio production, though it comes with a subscription cost.
4. Reaper (Paid with Free Trial):
- Platform: Windows, Mac
- Best For: Advanced users and those seeking a more affordable professional option
- Features: Reaper is highly customizable and has a vast array of plugins for mixing, mastering, and editing audio. It’s often favored by music producers but works well for any sound recording.
Once you've chosen the software, follow the next steps to record your sound.
Step 3: Recording the Sound
1. Set Up Your Microphone:
- Plug your microphone into your computer or audio interface.
- If using software like Audacity or GarageBand, select your microphone as the input device in the settings or preferences section of the software.
2. Adjust the Input Levels:
- Before hitting the record button, check the input levels to ensure they aren't too high or too low. If the input is too high, the audio will clip (distort), and if it's too low, the sound will be too faint. Aim for levels that peak around -6dB to -3dB.
3. Begin Recording:
- Click the record button in your software and start speaking, singing, or playing the sound you wish to capture. Ensure that you maintain consistent microphone distance and avoid sudden loud noises that might cause distortion.
4. Monitor the Recording:
- Use headphones to monitor the sound in real-time. This allows you to catch any issues like background noise or volume inconsistencies while you're recording.
5. Stop the Recording:
- Once you've captured all the audio you need, stop the recording. Review the clip to ensure that the sound quality is acceptable.
Step 4: Editing the Audio
Once you've finished recording, you may need to edit the file to remove unwanted sections or enhance the sound quality. Most audio editing software offers basic editing tools, such as:
1. Cutting and Trimming: Remove unwanted sections of the recording, such as silence at the beginning or end, or mistakes that occurred during the session.
2. Noise Reduction: Use noise reduction features to remove background hum, static, or other unwanted noises. In Audacity, for example, you can use the “Noise Reduction” effect to sample a noise profile and remove it throughout the recording.
3. Volume Adjustment: If parts of the recording are too quiet or too loud, adjust the volume levels accordingly. Some software offers an automatic "Normalize" function that equalizes the volume of the entire track.
4. Adding Effects: Depending on your needs, you can add effects such as equalization (EQ) to balance frequencies or compression to even out volume fluctuations.
5. Exporting the File:
- Once you've edited the audio to your satisfaction, you can export it in a variety of formats. Most software allows you to export in WAV, FLAC, and MP3 formats.
Step 5: Converting the Audio to MP3 Format
MP3 is one of the most commonly used formats for audio files because of its balance between file size and sound quality. If your recording software does not support MP3 export, you can convert the file using separate software or online tools.
1. Audacity (with LAME MP3 Encoder):
- Audacity doesn't natively export to MP3 due to licensing restrictions, but you can install the LAME MP3 encoder to enable MP3 exports. Once the encoder is installed, simply select "Export as MP3" from the "File" menu.
2. Online Converters:
- If you prefer not to use editing software, you can convert audio files to MP3 using online conversion tools such as Online Audio Converter, Convertio, or Zamzar. These tools allow you to upload your WAV or other audio files and download them as MP3s.
3. Using Other Software:
- Many audio conversion tools, such as Freemake Audio Converter or Audible, allow you to convert audio files from various formats into MP3. Simply upload your recording and select MP3 as the output format.
4. Customizing the Bitrate:
- When converting to MP3, you can customize the bitrate. A higher bitrate (e.g., 320 kbps) offers better sound quality but results in larger file sizes. A lower bitrate (e.g., 128 kbps) reduces the file size at the cost of sound quality. For voice recordings, a bitrate of 192 kbps is typically sufficient.
Step 6: Testing the MP3 File
Once the conversion is complete, play the MP3 file on different devices, including your computer, smartphone, and headphones, to ensure the sound quality meets your expectations. Check for any distortion or issues that may have been introduced during the recording or conversion process.
Conclusion: Recording and Converting Sounds to MP3
Recording high-quality sound and converting it into MP3 format is a valuable skill for various applications, whether you're a podcaster, musician, teacher, or content creator. By following the steps outlined in this guide—choosing the right equipment, using appropriate software, editing your recordings, and converting them into MP3—you can produce clear, professional-quality audio files for any purpose.
As technology continues to advance, new tools and techniques for sound recording and conversion are emerging, making it easier than ever to create and share high-quality audio. With the right setup and know-how, you can turn any sound into an MP3 that sounds great on any device.
Remember, the key to excellent sound recording is practice. The more you record and experiment with different settings, the more proficient you'll become. Happy recording!













There are no comments for this blog.