How To Setup Ip Wireless Security Camera?
In today's world, security is a paramount concern for both residential and commercial properties. One of the most effective ways to enhance security is by installing IP wireless security cameras. These cameras offer the convenience of wireless connectivity, high-definition video quality, and remote access capabilities. However, setting up an IP wireless security camera can be a daunting task for those unfamiliar with the process. This guide aims to provide a step-by-step approach to setting up your IP wireless security camera, ensuring that you can monitor your property with ease and confidence.
Understanding IP Wireless Security Cameras
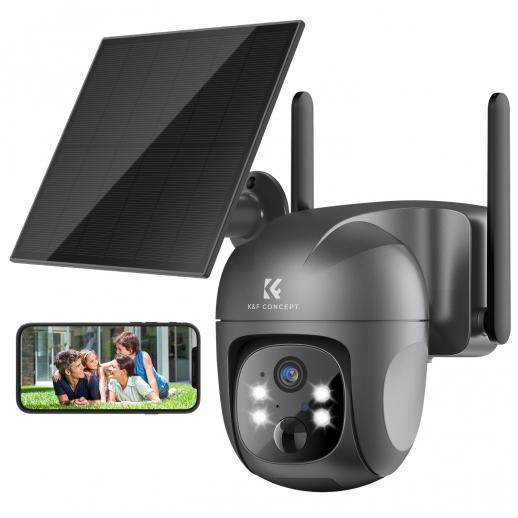
Before diving into the setup process, it's essential to understand what an IP wireless security camera is. An IP (Internet Protocol) camera transmits video data over a network, allowing you to view the footage remotely. Unlike traditional analog cameras, IP cameras offer higher resolution and more advanced features such as motion detection, night vision, and two-way audio. Wireless IP cameras connect to your network via Wi-Fi, eliminating the need for extensive cabling.
Step 1: Choose the Right Camera
The first step in setting up an IP wireless security camera is selecting the right model for your needs. Consider the following factors:
- Resolution: Higher resolution cameras provide clearer images. Look for cameras with at least 1080p resolution.
- Field of View: Determine the area you want to monitor and choose a camera with an appropriate field of view.
- Night Vision: Ensure the camera has infrared LEDs for night vision if you need to monitor low-light areas.
- Weather Resistance: For outdoor cameras, check the IP rating to ensure they can withstand various weather conditions.
- Power Source: Decide whether you want a battery-powered camera or one that requires a power outlet.
Step 2: Gather Necessary Equipment
Once you've chosen your camera, gather the necessary equipment for installation:
- IP wireless security camera
- Power adapter or batteries
- Mounting brackets and screws
- Ethernet cable (for initial setup)
- Smartphone or computer
- Wi-Fi network with internet access
Step 3: Install the Camera
Indoor Installation
1. Choose a Location: Select a location that provides a clear view of the area you want to monitor. Ensure the camera is within range of your Wi-Fi network.
2. Mount the Camera: Use the provided mounting brackets and screws to secure the camera to the wall or ceiling. Ensure the camera is stable and positioned correctly.
3. Power the Camera: Plug in the power adapter or insert the batteries. Wait for the camera to power on.
Outdoor Installation
1. Choose a Location: Select a location that provides a clear view of the area you want to monitor. Ensure the camera is within range of your Wi-Fi network and protected from extreme weather conditions.
2. Mount the Camera: Use the provided mounting brackets and screws to secure the camera to the wall or eaves. Ensure the camera is stable and positioned correctly.
3. Power the Camera: Plug in the power adapter or insert the batteries. Wait for the camera to power on.
Step 4: Connect the Camera to Your Network
1. Download the App: Most IP wireless security cameras come with a companion app. Download the app from the App Store or Google Play Store.
2. Create an Account: Open the app and create an account if you don't already have one.
3. Add the Camera: Follow the app's instructions to add the camera. This usually involves scanning a QR code on the camera or entering the camera's serial number.
4. Connect to Wi-Fi: During the setup process, you'll be prompted to connect the camera to your Wi-Fi network. Enter your Wi-Fi credentials and wait for the camera to connect.
Step 5: Configure Camera Settings
Once the camera is connected to your network, you can configure various settings through the app:
- Motion Detection: Enable motion detection and adjust the sensitivity to avoid false alarms.
- Recording Schedule: Set a recording schedule to capture footage during specific times.
- Notifications: Enable push notifications to receive alerts when motion is detected.
- Storage: Choose between local storage (SD card) or cloud storage for saving footage.
Step 6: Test the Camera
After configuring the settings, test the camera to ensure it's working correctly:
1. Live View: Open the app and access the live view to check the camera's feed.
2. Motion Detection: Walk in front of the camera to test the motion detection feature.
3. Night Vision: Turn off the lights to test the night vision capability.
Step 7: Secure Your Camera
To prevent unauthorized access, take the following security measures:
- Change Default Passwords: Change the default username and password for the camera.
- Enable Encryption: Ensure your Wi-Fi network is encrypted with WPA2 or WPA3.
- Firmware Updates: Regularly check for and install firmware updates to keep the camera secure.
Troubleshooting Common Issues
Despite following the setup process, you may encounter some common issues. Here are a few troubleshooting tips:
- Camera Not Connecting to Wi-Fi: Ensure the camera is within range of your Wi-Fi network and that you've entered the correct Wi-Fi credentials. Restart the camera and router if necessary.
- Poor Video Quality: Check the camera's resolution settings and ensure you have a strong Wi-Fi signal. Consider upgrading your internet plan if the issue persists.
- Motion Detection False Alarms: Adjust the motion detection sensitivity and create activity zones to reduce false alarms.
Setting up an IP wireless security camera may seem challenging, but by following these steps, you can ensure a smooth installation process. From choosing the right camera to configuring settings and securing your device, this guide covers all the essential aspects of setting up an IP wireless security camera. With your camera in place, you can enjoy the peace of mind that comes with knowing your property is under constant surveillance. Whether you're at home or away, you'll have access to real-time footage and alerts, enhancing the security of your property.


