How To Turn On Flash In Iphone Camera?
Unlock the Power of Flash on Your iPhone Camera: A Comprehensive Guide

The iPhone camera is a marvel of modern technology, offering users an impressive array of features that enhance photography in any setting. Among these features is the camera flash, an essential tool for capturing moments in low-light conditions or creatively manipulating lighting in your shots. However, many iPhone users often face confusion when it comes to enabling or optimizing the flash function. This article is designed to clear up any uncertainties and provide a complete guide on how to turn on the flash in the iPhone camera, addressing practical problems users commonly encounter.
---
Understanding the iPhone Flash Functionality
Before diving into the steps, it's essential to understand the flash feature on your iPhone. The flash serves multiple purposes:
- Illuminating Low-Light Scenes: It helps brighten up the subject in dimly lit conditions.
- Enhancing Contrast: Proper use of flash can add depth and clarity to your photos.
- Creative Lighting: It allows you to experiment with lighting effects to make your photos stand out.
Apple has designed the iPhone flash with convenience and versatility in mind. It’s available for both photography and videography, with settings that cater to different user preferences.
---
How to Turn On Flash in the iPhone Camera App
Apple makes enabling the flash straightforward. Here's a step-by-step guide:
1. Open the Camera App
- Unlock your iPhone and locate the Camera app on the home screen or app library.
- Tap to open it. Ensure your device is not in a low-power mode that might limit camera functionalities.
2. Locate the Flash Icon
- At the top of the screen (or to the side in landscape orientation), you'll find the flash icon, represented by a lightning bolt (`⚡`).
- This icon indicates the current flash mode: Off, Auto, or On.
3. Select the Desired Flash Mode
- Tap the Flash Icon: A small menu will appear with three options:
1. Auto: The flash activates automatically when the camera detects low light.
2. On: The flash will fire with every photo.
3. Off: The flash remains disabled.
- Select On to ensure the flash is always active.
4. Take Your Photo
- Frame your shot as desired and tap the shutter button. The flash will illuminate the scene momentarily to capture the photo.
---
Using Flash in Video Mode
To use the flash while recording videos:
1. Open the Camera app and switch to Video mode.
2. Tap the flash icon (`⚡`) and choose On.
3. Begin recording, and the flash will stay on throughout the session, acting as a continuous light source.
---
Troubleshooting Common Flash Issues
Despite its simplicity, users sometimes encounter challenges with the flash. Below are common problems and their solutions:
1. Flash Not Working
- Check Flash Settings: Ensure the flash is set to On in the Camera app.
- Inspect the Flash Hardware: Dirt or obstructions on the flash can hinder its performance. Clean it gently with a microfiber cloth.
- Restart Your iPhone: A quick restart can resolve software glitches affecting the camera.
- Update iOS: Bugs in outdated software might prevent the flash from functioning. Go to Settings > General > Software Update to ensure your system is up-to-date.
2. Flash Overexposes Photos
- Reduce the flash intensity by moving the subject farther from the lens.
- Use Auto mode for a balanced approach to lighting.
3. Flash Unavailable in Camera App
- Low Power Mode: Disable it in Settings > Battery, as this feature limits power-intensive functionalities, including the flash.
- Overheated Device: If your iPhone is too hot, the flash may be temporarily disabled. Allow it to cool down before trying again.
---
Pro Tips for Mastering Flash Photography on iPhone
Using the flash effectively requires more than simply turning it on. Here are professional tips to elevate your photography:
1. Avoid Overuse
The flash can be harsh on subjects, leading to overexposed photos or unnatural shadows. Use it sparingly and combine it with natural light whenever possible.
2. Experiment with Angles
To reduce harsh lighting effects, try angling your iPhone slightly or diffusing the light by using a small piece of tissue over the flash.
3. Leverage Night Mode
If you have an iPhone with Night mode, combine this feature with flash for a balanced exposure in dark environments.
4. Explore Third-Party Apps
Apps like Halide and ProCamera provide advanced flash controls, such as intensity adjustment, giving you greater creative freedom.
---
Alternatives to Flash
Sometimes, the flash might not provide the desired effect. Here are alternatives to consider:
1. Adjust ISO Settings
In manual camera apps, increase the ISO for brighter photos without a flash.
2. Use a Portable Light
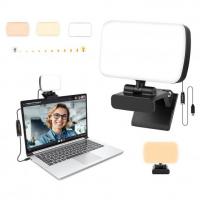
Portable LED lights can serve as a reliable, adjustable source of light for better results.
3. Rely on Ambient Light
Find natural or artificial light sources nearby to illuminate your subject effectively.
---
Conclusion
The iPhone’s flash is a powerful tool for photographers of all levels, offering a simple yet effective way to brighten up your shots. By mastering its use and addressing common issues, you can significantly enhance your photographic results. Whether you're capturing a family dinner in a dimly lit restaurant or experimenting with creative lighting techniques, this guide ensures that you’re fully equipped to make the most of the iPhone’s flash feature.
Understanding and implementing these tips will transform your photography experience, empowering you to confidently navigate any lighting situation. So, the next time you reach for your iPhone to capture a special moment, remember to unlock the full potential of its flash. Happy shooting!















There are no comments for this blog.