How To Turn On Screen Record Audio?
Screen recording has become an essential feature for many users, whether for creating tutorials, capturing gameplay, or saving video calls. However, one common challenge is ensuring that the audio is also recorded. This article will guide you through the steps to turn on screen record audio across various devices and platforms, addressing common issues and providing practical solutions.
Understanding Screen Recording and Audio Capture

Screen recording involves capturing the visual output of your device's screen. When combined with audio recording, it can create comprehensive and engaging content. Audio can be captured from different sources, such as system sounds, microphone input, or both. The process and options available can vary depending on the device and operating system you are using.
Screen Recording on Different Devices
1. Windows PC
Windows 10 and later versions come with a built-in screen recording tool called Xbox Game Bar. Here’s how to enable audio recording:
1. Open Xbox Game Bar: Press `Win + G` to open the Xbox Game Bar.
2. Settings: Click on the settings icon (gear icon) in the Game Bar.
3. Capturing: Navigate to the "Capturing" section.
4. Audio to Record: Choose the audio source you want to record. You can select "All" to capture both system sounds and microphone input.
5. Start Recording: Press `Win + Alt + R` to start recording. Ensure your microphone is enabled if you want to capture external audio.
For more advanced features, third-party software like OBS Studio or Camtasia can be used. These tools offer more control over audio sources and quality.
2. Mac
Mac users can utilize the built-in QuickTime Player for screen recording with audio:
1. Open QuickTime Player: Launch QuickTime Player from the Applications folder.
2. New Screen Recording: Go to `File > New Screen Recording`.
3. Microphone Options: Click the arrow next to the record button to select the audio source. Choose "Internal Microphone" to capture external audio or "None" if you only want system sounds.
4. Start Recording: Click the record button to start capturing your screen and audio.
For more advanced needs, tools like ScreenFlow or Camtasia for Mac can be used to capture multiple audio sources and provide editing capabilities.
3. iPhone/iPad
iOS devices have a built-in screen recording feature that can capture audio:
1. Enable Screen Recording: Go to `Settings > Control Center > Customize Controls`, then add "Screen Recording" to the Control Center.
2. Open Control Center: Swipe down from the upper-right corner of the screen (iPhone X or later) or swipe up from the bottom (iPhone 8 or earlier).
3. Microphone Audio: Long press the screen recording button and tap the microphone icon to turn on external audio recording.
4. Start Recording: Tap "Start Recording" and wait for the countdown to begin capturing your screen and audio.
4. Android
Screen recording on Android devices can vary depending on the manufacturer and Android version. However, most modern Android devices have a built-in screen recording feature:
1. Enable Screen Recording: Swipe down from the top of the screen to access the Quick Settings panel.
2. Screen Recorder: Tap the "Screen Recorder" icon.
3. Audio Source: Choose the audio source. Options typically include "No Sound," "Media Sounds," and "Media Sounds and Mic."
4. Start Recording: Tap "Start" to begin recording your screen and audio.
For older devices or more advanced features, third-party apps like AZ Screen Recorder or Mobizen can be used.
Common Issues and Troubleshooting
1. No Audio in Recordings
If your screen recordings lack audio, check the following:
- Permissions: Ensure the screen recording app has permission to access the microphone.
- Audio Source: Verify that the correct audio source is selected in the recording settings.
- Volume Levels: Check that the system and microphone volumes are not muted or too low.
2. Poor Audio Quality
To improve audio quality:
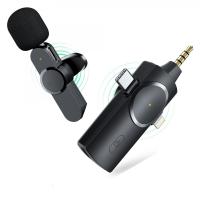
- Use an External Microphone: External microphones often provide better sound quality than built-in ones.
- Reduce Background Noise: Record in a quiet environment to minimize background noise.
- Audio Settings: Adjust the audio settings in your recording software to optimize quality.
3. Sync Issues
If the audio is out of sync with the video:
- Update Software: Ensure your operating system and recording software are up to date.
- Edit Post-Recording: Use video editing software to manually sync the audio and video tracks.
Advanced Tips for Professional Screen Recording

For those looking to create professional-quality screen recordings, consider the following tips:
1. Use Dedicated Software
While built-in tools are convenient, dedicated screen recording software like OBS Studio, Camtasia, or ScreenFlow offers advanced features such as multiple audio tracks, custom resolutions, and extensive editing capabilities.
2. Plan Your Recording
Before starting, plan your recording session. Outline the key points you want to cover and prepare any necessary materials. This will help ensure a smooth and coherent recording.
3. Edit Your Recordings
Post-production editing can significantly enhance the quality of your recordings. Use video editing software to trim unnecessary parts, add annotations, and improve audio quality.
4. Test Your Setup
Perform a test recording to check the audio and video quality. This allows you to make any necessary adjustments before the actual recording session.
Turning on screen record audio is a straightforward process, but it requires attention to detail to ensure high-quality results. By following the steps outlined for your specific device and addressing common issues, you can create effective and engaging screen recordings. Whether you are a content creator, educator, or professional, mastering screen recording with audio will enhance your ability to communicate and share information effectively.


