Install Uv Filter Lens How Sony Alpha?
When it comes to photography equipment, one of the most frequently asked questions by photographers, both amateur and professional, revolves around lens accessories, in particular, UV filter lenses. This blog focuses on the importance of UV filters and provides a comprehensive guide on how to install a UV filter lens on Sony Alpha cameras. Understanding these aspects is crucial for achieving clarity and protection for your camera lens.
Why Use a UV Filter Lens?
Before diving into the installation process, it is essential to understand why you might want to use a UV filter lens. UV filters serve multiple purposes:
1. Protection: The primary reason most photographers use UV filters is to protect the lens from dust, dirt, and scratches. Installing a UV filter acts as a barrier, keeping the actual lens elements safe from physical harm.
2. Reduce Haze: UV filters can cut down on the haze that often appears in outdoor photography, particularly in mountainous regions or near large bodies of water. This can result in clearer and sharper images.
3. Multifunctionality: While originally designed to block ultraviolet light, which film is sensitive to, modern sensors are not as affected by UV rays. However, the filter's protective and haze-reducing features remain relevant.
Tools and Equipment Needed
To install a UV filter lens on your Sony Alpha camera, you will need the following items:
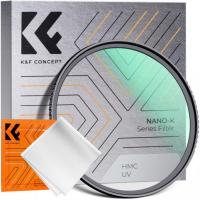
- A UV filter lens that matches your camera’s lens diameter.
- A clean, dust-free cloth or microfiber cloth.
- Your Sony Alpha camera.
Step-by-Step Guide to Installing a UV Filter
1. Check Compatibility
Before purchasing or attempting to install a UV filter, ensure that it is compatible with your lens. Every camera lens has a diameter measurement, usually noted in millimeters (mm). For instance, a 49mm or 67mm marking will be found on the front or side of the lens. This diameter measurement must match the measurement on the UV filter lens.
2. Clean the Lens
A clean lens is crucial for optimal performance. Take your microfiber cloth and gently wipe the camera lens in a circular motion to remove any dust, fingerprints, or smudges. Never apply too much pressure, as it can scratch the lens surface.
3. Unbox and Inspect the UV Filter
Unbox your UV filter and inspect it for any damages, dust, or smudges. Just like you cleaned your camera lens, you may want to gently clean the UV filter before installation to ensure it is free of any particles.
4. Attach the UV Filter
Carefully align the UV filter with the lens. Once aligned, screw the filter onto the lens in a clockwise direction. Do this gently; there is no need to force it as this could damage the threads. Make sure it is secured but not overtightened.
5. Check Alignment and Tightness
Verify that the filter is evenly aligned and securely attached. It should sit snugly on the lens without any wobble or loose parts. Turn on your camera and take a few test shots to ensure that the UV filter is correctly installed and that there are no obstructions or vignetting in the corners of the images.
Practical Tips for Using a UV Filter
After successfully installing a UV filter on your Sony Alpha camera, here are some practical tips:
1. Regular Cleaning: Ensure that both your lens and the UV filter are regularly cleaned to maintain image quality. Dirty filters can result in blurry or hazy images.
2. Remove When Needed: While UV filters provide protection and clarity, they are not always necessary in low-light conditions or studio settings. You can remove the filter when it is not needed to maximize light transmission.
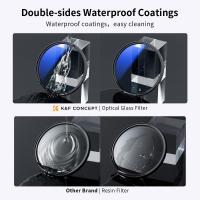
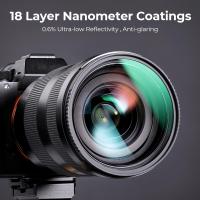
3. Quality Matters: Invest in a high-quality UV filter. Cheaper options might save money initially but can degrade image quality. Ensure that the filter features multi-coating to reduce reflections and increase clarity.
4. Storage: When not in use, store the UV filter in its original case to prevent damage and dust accumulation.
Troubleshooting Common Issues
Even with the simplest accessories, issues can arise. Here are some common problems and how to resolve them:
Filter Stuck on Lens
- If your UV filter gets stuck, use a rubber band wrapped around the filter for better grip and gently twist it off. Avoid using pliers or any hard tools as these can damage the filter and lens.
Unable to Attach Filter
- Double-check the filter size. Incorrect sizing often causes issues with attachments. Also, ensure that the lens and filter threads are clean and free from grime that could obstruct fitting.
Reduced Image Quality
- Ensure that both the lens and filter are clean. Smudges or particles on either surface can negatively impact image quality. High-quality filters generally do not affect image quality; if issues persist, consider upgrading your filter.
Installing a UV filter lens on your Sony Alpha camera is a straightforward yet vital process to protect your gear and improve image clarity in specific conditions. By understanding its practical benefits and following the guided steps, you can ensure prolonged lens life and enhanced photographic outcomes.
Remember to invest in a quality UV filter, clean it regularly, and address any issues promptly. This small accessory can make a significant difference in protecting your valuable equipment and achieving the highest possible image quality. So, the next time you are out capturing beautiful scenes, you can do so confidently, knowing your lens is well-protected and your images are clear and sharp.

















There are no comments for this blog.