What Is Polarized Filter Used For Camera?
Polarized filters are essential tools in the world of photography, offering a range of benefits that can significantly enhance the quality of your images. These filters are designed to manage reflections, reduce glare, and increase color saturation, making them indispensable for both amateur and professional photographers. In this article, we will delve into the various uses of polarized filters for cameras, how they work, and the practical benefits they offer. By the end, you will have a comprehensive understanding of why polarized filters are a must-have in your photography toolkit.

Understanding Polarized Filters
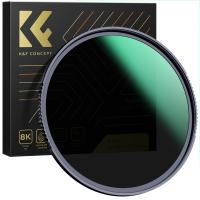
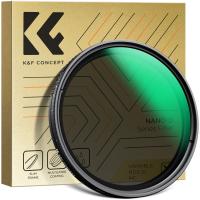
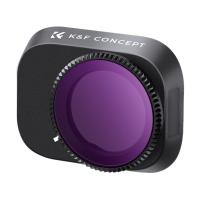
A polarized filter, often referred to as a polarizer, is a photographic filter that is placed in front of the camera lens. It works by filtering out certain light waves, specifically those that are polarized. Light waves can vibrate in multiple directions, but when they reflect off surfaces like water, glass, or even foliage, they often become polarized, meaning they vibrate in a single direction. Polarized filters are designed to block these specific light waves, thereby reducing reflections and glare.
Types of Polarized Filters
There are two main types of polarized filters: linear and circular.
1. Linear Polarizers: These are the original type of polarizers and are effective at reducing reflections and glare. However, they can interfere with the autofocus and metering systems of modern digital cameras, making them less suitable for contemporary photography.
2. Circular Polarizers (CPL): These are more advanced and are designed to work seamlessly with modern digital cameras. They consist of two layers: a linear polarizer and a quarter-wave plate that converts the polarized light into circularly polarized light. This ensures that the camera's autofocus and metering systems function correctly.
Practical Uses of Polarized Filters
1. Reducing Reflections and Glare
One of the most common uses of polarized filters is to reduce reflections and glare from non-metallic surfaces such as water, glass, and foliage. This is particularly useful in landscape photography, where reflections from water bodies or wet surfaces can be distracting. By rotating the polarizer, you can control the amount of reflection that is filtered out, allowing you to capture clearer and more detailed images.
2. Enhancing Color Saturation
Polarized filters can also enhance the color saturation of your images. By reducing the scattered light and reflections, colors appear more vibrant and saturated. This is especially noticeable in landscape photography, where the sky can appear bluer, and foliage can appear greener. The result is a more vivid and visually appealing image.
3. Improving Contrast
In addition to enhancing color saturation, polarized filters can improve the overall contrast of your images. By reducing the haze and scattered light, details in the shadows and highlights become more pronounced. This is particularly beneficial in high-contrast scenes, such as those with bright skies and dark foregrounds.
4. Minimizing Haze
Haze, often caused by atmospheric particles scattering light, can reduce the clarity and sharpness of your images. Polarized filters can help minimize this haze, resulting in clearer and sharper photographs. This is particularly useful in landscape photography, where distant objects can appear more defined.
5. Creating Artistic Effects
Polarized filters can also be used to create artistic effects. For example, by rotating the filter, you can control the amount of polarization, allowing you to experiment with different levels of reflection and saturation. This can add a creative touch to your images, making them stand out.
How to Use a Polarized Filter
Using a polarized filter is relatively straightforward, but there are a few tips to keep in mind to get the best results:
1. Attach the Filter: Screw the polarized filter onto the front of your camera lens. Make sure it is securely attached.
2. Rotate the Filter: Polarized filters are adjustable. Rotate the filter while looking through the viewfinder or at the LCD screen to see the effect. You will notice changes in reflections, glare, and color saturation as you rotate the filter.
3. Check the Angle: Polarized filters are most effective when the light source is at a 90-degree angle to the lens. This is often referred to as the "Brewster's angle." For example, if you are photographing a landscape with the sun to your side, the polarizer will have the maximum effect.
4. Monitor Exposure: Polarized filters can reduce the amount of light entering the lens, typically by 1-2 stops. Be mindful of this when setting your exposure, and adjust your camera settings accordingly.
5. Avoid Wide-Angle Lenses: When using wide-angle lenses, polarized filters can create uneven polarization, resulting in dark spots or bands in the sky. To avoid this, use the filter with standard or telephoto lenses.
When Not to Use a Polarized Filter
While polarized filters offer numerous benefits, there are situations where they may not be suitable:
1. Low Light Conditions: In low light conditions, the reduction in light caused by the polarizer can make it challenging to achieve the correct exposure. In such cases, it may be better to remove the filter.
2. Night Photography: Polarized filters are generally not needed for night photography, as there are no reflections or glare to reduce.
3. Panoramic Shots: When shooting panoramic images, polarized filters can create uneven polarization across the frame, resulting in inconsistent skies. It is best to avoid using them for panoramas.
Polarized filters are versatile tools that can significantly enhance the quality of your photographs. By reducing reflections and glare, enhancing color saturation, improving contrast, and minimizing haze, they offer a range of benefits that can elevate your photography to the next level. Whether you are a landscape photographer looking to capture stunning vistas or a portrait photographer aiming for vibrant and clear images, a polarized filter is a valuable addition to your camera gear. By understanding how to use them effectively and knowing when to avoid them, you can make the most of this powerful photographic tool.
















There are no comments for this blog.