Can Connect Wifi Camera To Android Phone?
In today’s connected world, security cameras are increasingly becoming a part of our daily lives, offering an effective way to monitor homes, businesses, or even pets. With the rise of smart home devices, Wi-Fi cameras have gained significant popularity due to their easy setup and remote access features. One of the most common questions people have when setting up these devices is whether they can connect a Wi-Fi camera to an Android phone. The good news is that it’s not only possible, but it’s also quite simple with the right steps.
In this article, we'll walk you through the process of connecting a Wi-Fi camera to an Android phone, explore common challenges, and provide helpful tips to ensure the setup is seamless. Whether you're setting up an indoor or outdoor Wi-Fi camera, you'll find all the information you need here.
Understanding Wi-Fi Cameras and Android Integration
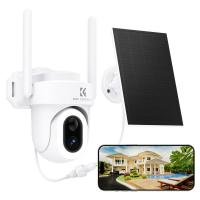
A Wi-Fi camera is essentially a security camera that connects to your home or office network via Wi-Fi. This enables the camera to stream live footage to your phone or other smart devices. When it comes to Android phones, most modern Wi-Fi cameras come with a companion app that facilitates the connection between the camera and the phone. These apps allow you to view live video, access recorded footage, set up motion detection, and receive alerts directly on your Android device.
Wi-Fi cameras can be used for a variety of purposes, such as:
- Home security: To monitor entrances, gates, or even inside rooms.
- Pet monitoring: To keep an eye on your pets when you're not around.
- Baby monitoring: Many parents use Wi-Fi cameras as baby monitors.
- Workplace surveillance: To monitor your office or business premises.
What You’ll Need to Connect Your Wi-Fi Camera to an Android Phone
Before diving into the connection process, it’s essential to ensure that you have everything in place:
1. A Wi-Fi Camera: Ensure that your camera is Wi-Fi enabled and compatible with mobile app connections.
2. A Stable Wi-Fi Network: Your Wi-Fi camera will rely on a stable internet connection to stream data to your Android phone. Ideally, you should have a Wi-Fi connection with sufficient bandwidth and minimal interference.
3. An Android Phone: Ensure your Android device is running a compatible version of the Android operating system (most modern Android versions support these connections).
4. The Camera’s Companion App: Most Wi-Fi cameras come with an app developed by the manufacturer for easy setup and control. You will need to download this app from the Google Play Store.
5. A Power Source: Ensure the camera is adequately powered, whether through a direct plug-in or battery, depending on the camera model.
Step-by-Step Guide to Connecting a Wi-Fi Camera to Your Android Phone
Once you’ve gathered the necessary equipment, follow these steps to connect your Wi-Fi camera to your Android phone:
Step 1: Set Up Your Wi-Fi Camera
Start by unpacking and setting up your camera according to the manufacturer's instructions. Most Wi-Fi cameras require the following basic steps:
1. Power on the camera: Plug in the camera or insert the required batteries, depending on the model.
2. Connect the camera to your Wi-Fi network: The camera should either have a dedicated QR code or a Wi-Fi pairing mode. Follow the prompts to connect it to your Wi-Fi network, ensuring the camera is within range of your router.
Step 2: Download and Install the Camera’s Companion App
Next, you need to install the app that will allow you to control and view the camera from your Android phone.
1. Go to the Google Play Store on your Android phone.
2. Search for the camera’s brand (e.g., “Nest,” “Ring,” “Wyze,” etc.) or check the manual for the app’s name.
3. Download and install the app.
4. Once installed, open the app and register for an account if required.
Step 3: Pair the Camera with the App
Once the app is installed on your Android phone, it's time to connect your camera to the app. This is usually done by:
1. Opening the app and signing into your account (or creating a new account if you’re using the camera for the first time).
2. Add a new device: Look for a button or menu option in the app that allows you to add a new camera. This is often labeled as “Add Device,” “+,” or “Set Up Camera.”
3. Follow the pairing instructions: The app will guide you through a series of prompts, which typically involve scanning a QR code on the camera or entering a unique device ID.
4. Connect to Wi-Fi: If the camera hasn’t been connected to your Wi-Fi network yet, you may be prompted to enter your Wi-Fi network details (SSID and password). Make sure the Wi-Fi network is 2.4 GHz as many cameras do not support 5 GHz Wi-Fi.
Once paired, the camera should be able to send a live feed directly to your Android phone.
Step 4: Customize Camera Settings
After successfully connecting the camera, you’ll want to customize your settings. Most apps will allow you to adjust the following:
- Video quality: Set the video resolution (typically 720p or 1080p).
- Motion detection: Enable or disable motion detection alerts, which will notify you when there is movement in the camera’s field of view.
- Night vision settings: If your camera has night vision, you can adjust its sensitivity or automatic activation.
- Cloud storage: Some apps offer cloud storage options for storing video footage; you may need to set this up if it’s part of the camera’s service.
Step 5: Test the Camera Feed
To ensure everything is working properly, test the camera feed. You should be able to see a live video feed directly from your Android phone. Move around the camera to ensure the image quality and motion detection features are working as expected.
Common Issues and Troubleshooting Tips
While the process of connecting a Wi-Fi camera to an Android phone is typically straightforward, issues can arise. Here are some common problems and how to address them:
1. Poor Wi-Fi Signal: If your camera is far from your Wi-Fi router or there are too many obstacles, the camera might fail to connect or experience lag. Try moving the camera closer to the router or adding a Wi-Fi extender.
2. Camera Not Showing Up in the App: If the app can’t find the camera, make sure the camera is powered on and in pairing mode. Restart the app and the camera and try again.
3. Connection Drops: If the live feed keeps dropping or buffering, it might be due to an unstable Wi-Fi connection. Check your internet speed and consider upgrading your plan if necessary.
4. Camera Not Compatible with Your Android Version: Some older camera models may not be compatible with the latest versions of Android. Make sure to check the manufacturer’s specifications for compatibility.
5. App Crashes or Freezes: If the app crashes or freezes, ensure you have the latest version installed. You can check for app updates in the Google Play Store, or uninstall and reinstall the app.
Advanced Tips and Features
Once you’ve successfully connected your Wi-Fi camera to your Android phone, here are some advanced features and tips to enhance your experience:
1. Multi-Camera Viewing: Many apps allow you to connect multiple cameras at once. This is especially useful for larger properties or businesses. You can typically switch between cameras within the app’s interface.
2. Two-Way Audio: Some Wi-Fi cameras come with a built-in microphone and speaker, allowing you to talk through the camera. This can be useful for communicating with family members or pets.
3. Cloud vs. Local Storage: Depending on your camera, you can store footage on the cloud or on a microSD card in the camera itself. Cloud storage often requires a subscription, but it can be more secure, as the footage is saved off-site.
4. Integration with Smart Home Systems: Many Wi-Fi cameras can be integrated with other smart home devices, such as voice assistants (Google Assistant or Amazon Alexa). For example, you could say, “Hey Google, show me the front door camera,” and view it on your Android phone or even on a smart display.
5. Energy-Saving Features: Some Wi-Fi cameras have motion sensors that trigger video recording only when they detect movement, helping save battery and data usage. Check the settings to optimize energy usage.
Conclusion
Connecting a Wi-Fi camera to your Android phone is a great way to keep an eye on your property, whether you're at home or away. The process is typically user-friendly, thanks to the intuitive apps provided by most camera manufacturers. By following the steps outlined above, you can enjoy remote access to your camera feed, customize your settings, and take full advantage of the features your camera offers.
While the setup process is relatively straightforward, ensuring that your Wi-Fi network is stable and that your camera is compatible with your Android phone are key factors in achieving a smooth experience. If any issues arise, troubleshooting steps like checking the Wi-Fi signal, updating the app, or adjusting camera settings can usually resolve them.
With the right camera, app, and settings, you can easily enhance your home security and peace of mind by staying connected to your camera through your Android phone.

















There are no comments for this blog.