Can You Use A Projector On The Ceiling?
Using a projector on the ceiling is a common and practical solution for both home theaters and professional settings. This setup can save space, provide a better viewing angle, and create a more immersive experience. However, there are several factors to consider to ensure optimal performance and user satisfaction. In this article, we will explore the key aspects of ceiling-mounted projectors, including installation, benefits, potential challenges, and tips for achieving the best results.
Benefits of Ceiling-Mounted Projectors

1. Space Efficiency: Mounting a projector on the ceiling frees up valuable floor space, making it ideal for smaller rooms or areas where space is at a premium. This setup also reduces the risk of the projector being knocked over or obstructed.
2. Improved Viewing Angles: A ceiling-mounted projector can be positioned to provide the best possible viewing angle for the audience. This ensures that everyone in the room has a clear and unobstructed view of the screen.
3. Aesthetics: Ceiling-mounted projectors can be more aesthetically pleasing, as they are less obtrusive and can be integrated seamlessly into the room's design. Cables can be hidden within the ceiling or walls, creating a cleaner look.
4. Security: In public or shared spaces, a ceiling-mounted projector is less likely to be tampered with or stolen compared to a portable unit.
Installation Considerations

1. Mounting Hardware: Choosing the right mounting hardware is crucial for a secure and stable installation. Ensure that the mount is compatible with your projector model and can support its weight. Adjustable mounts allow for fine-tuning the projector's position and angle.
2. Ceiling Type: The type of ceiling (e.g., drywall, drop ceiling, concrete) will determine the installation method and hardware required. For instance, concrete ceilings may require special anchors, while drop ceilings might need a different approach.
3. Projection Distance and Screen Size: Calculate the optimal distance between the projector and the screen based on the projector's throw ratio. This will help you determine the best mounting location to achieve the desired screen size and image quality.
4. Cable Management: Plan for proper cable management to avoid a cluttered appearance. Use cable conduits or raceways to conceal cables, and ensure that power and signal cables are long enough to reach the projector's location.
5. Ventilation and Heat Management: Projectors generate heat, so it's important to ensure adequate ventilation around the unit. Avoid mounting the projector in enclosed spaces or near heat sources.
Potential Challenges
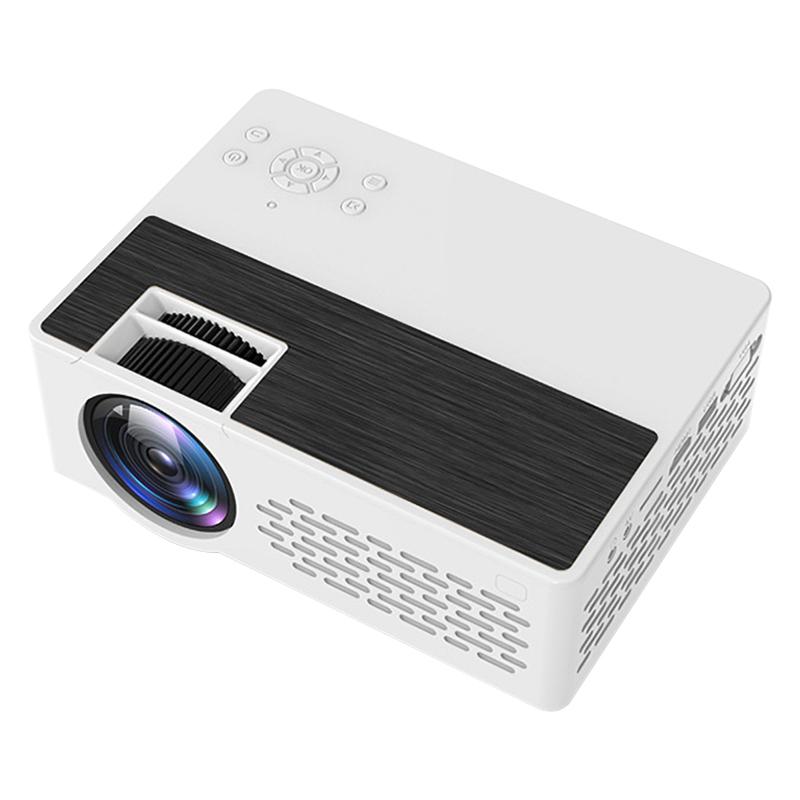
1. Alignment and Calibration: Achieving perfect alignment and calibration can be challenging, especially if the projector is not perfectly level or centered. Use the projector's built-in keystone correction and lens shift features to adjust the image as needed.
2. Maintenance and Accessibility: Ceiling-mounted projectors can be more difficult to access for maintenance, such as cleaning the lens or replacing the lamp. Consider using a mount that allows for easy removal and reinstallation of the projector.
3. Noise: Some projectors can be noisy, and mounting them on the ceiling may place them closer to the audience's ears. Look for projectors with low noise levels or consider installing soundproofing materials around the mount.
Tips for Optimal Performance

1. Choose the Right Projector: Select a projector that meets your specific needs, whether it's for home theater, business presentations, or classroom use. Consider factors such as resolution, brightness, contrast ratio, and connectivity options.
2. Screen Quality: Pair your projector with a high-quality screen to enhance image clarity and color accuracy. Fixed-frame screens are ideal for permanent installations, while retractable screens offer flexibility.
3. Lighting Control: Ambient light can wash out the projected image, so it's important to control the lighting in the room. Use blackout curtains or shades to minimize light intrusion, and consider installing dimmable lights.
4. Regular Maintenance: Keep the projector clean and well-maintained to ensure optimal performance. Dust the lens regularly and follow the manufacturer's guidelines for lamp replacement and other maintenance tasks.
5. Professional Installation: If you're not confident in your ability to install the projector yourself, consider hiring a professional. They can ensure that the projector is mounted securely and calibrated correctly for the best possible performance.
Mounting a projector on the ceiling can offer numerous benefits, from improved space efficiency and viewing angles to enhanced aesthetics and security. However, it's important to carefully consider the installation process, potential challenges, and tips for optimal performance to ensure a successful setup. By taking the time to plan and execute the installation properly, you can enjoy a superior viewing experience that meets your specific needs and preferences. Whether you're setting up a home theater, a business presentation space, or a classroom, a ceiling-mounted projector can be a valuable addition to your audiovisual setup.















There are no comments for this blog.