How To Build A Camera Lens?
Building a camera lens is a complex and intricate process that requires a deep understanding of optics, precision engineering, and materials science. Whether you are an aspiring optical engineer, a hobbyist, or simply curious about the inner workings of camera lenses, this article will guide you through the fundamental steps and considerations involved in creating a camera lens from scratch.
Understanding the Basics of Camera Lenses
Before diving into the construction process, it is essential to understand the basic components and principles of a camera lens. A camera lens is essentially a series of optical elements (lenses) arranged in a specific configuration to focus light onto a camera sensor or film. The primary components of a camera lens include:
1. Optical Elements: These are the individual lenses made of glass or plastic that bend and focus light.
2. Lens Barrel: The housing that holds the optical elements in place.
3. Aperture: A diaphragm that controls the amount of light entering the lens.
4. Focusing Mechanism: A system that adjusts the distance between the optical elements to focus the image.
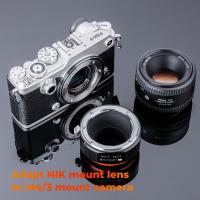
5. Mount: The interface that attaches the lens to the camera body.
Step-by-Step Guide to Building a Camera Lens
1. Define the Lens Specifications

The first step in building a camera lens is to define its specifications based on the intended use. Key specifications include:
- Focal Length: Determines the field of view and magnification.
- Aperture Size: Affects the depth of field and light-gathering ability.
- Lens Type: Prime (fixed focal length) or zoom (variable focal length).
- Image Circle: The diameter of the image projected by the lens onto the sensor.
2. Design the Optical System
Designing the optical system involves selecting and arranging the optical elements to achieve the desired specifications. This step requires knowledge of optical design software, such as Zemax or Code V, to simulate and optimize the lens performance. Key considerations include:
- Lens Elements: Choose the type and number of lens elements (e.g., convex, concave, aspherical) to correct for optical aberrations.
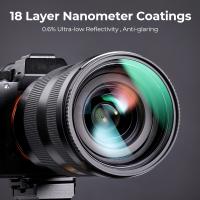
- Lens Coatings: Apply anti-reflective coatings to reduce glare and improve light transmission.
- Optical Path: Ensure the light path is free of obstructions and minimizes distortion.
3. Source the Materials
Once the optical design is finalized, the next step is to source the materials. High-quality optical glass or plastic is essential for the lens elements. The lens barrel and other mechanical components can be made from materials such as aluminum, brass, or high-strength plastic. Ensure that the materials meet the required tolerances and specifications.
4. Manufacture the Optical Elements
Manufacturing the optical elements involves precision grinding and polishing to achieve the desired shape and surface quality. This process is typically performed using CNC (Computer Numerical Control) machines and requires a high degree of accuracy. Key steps include:
- Grinding: Shape the raw material into the desired lens profile.
- Polishing: Smooth the lens surface to achieve optical clarity.
- Coating: Apply anti-reflective coatings to the lens surfaces.
5. Assemble the Lens
Assembling the lens involves carefully aligning and securing the optical elements within the lens barrel. This step requires precision and attention to detail to ensure optimal performance. Key steps include:
- Alignment: Use alignment tools and techniques to position the lens elements accurately.
- Securing: Use adhesives, screws, or retaining rings to hold the elements in place.
- Testing: Perform optical tests to verify the lens performance and make adjustments as needed.
6. Integrate the Aperture and Focusing Mechanism
The aperture and focusing mechanism are critical components that control the light entering the lens and the focus of the image. Key steps include:
- Aperture Assembly: Install the diaphragm blades and control mechanism to adjust the aperture size.
- Focusing Mechanism: Integrate the focusing ring or motor to adjust the distance between the lens elements.
7. Final Testing and Quality Control
The final step in building a camera lens is to perform comprehensive testing and quality control to ensure the lens meets the desired specifications. Key tests include:
- Optical Performance: Test for sharpness, contrast, and aberrations.
- Mechanical Performance: Verify the smooth operation of the aperture and focusing mechanisms.
- Environmental Testing: Ensure the lens can withstand various environmental conditions, such as temperature and humidity.
Practical Considerations and Challenges
Building a camera lens is a challenging and resource-intensive process that requires specialized knowledge and equipment. Here are some practical considerations and challenges to keep in mind:
- Precision: Achieving the required precision in the optical and mechanical components is critical for lens performance.
- Cost: High-quality materials and manufacturing processes can be expensive.
- Expertise: A deep understanding of optics, engineering, and materials science is essential.
- Prototyping: Iterative prototyping and testing are often necessary to refine the lens design.
Building a camera lens from scratch is a rewarding but complex endeavor that combines art and science. By understanding the fundamental principles and following a systematic approach, you can create a lens that meets your specific needs and preferences. Whether you are developing a lens for professional photography, scientific research, or personal projects, the process requires dedication, precision, and a passion for optics. With the right tools and knowledge, you can bring your vision to life and capture the world through your unique lens.











There are no comments for this blog.