How To Capture Video On Pc From Camcorder?
Unlocking the Full Potential of Your Camcorder: Capturing Video on PC
Capturing video on your PC from a camcorder is a practical skill that allows you to preserve memories, create professional-grade content, or digitize archival footage. Whether you're a hobbyist, content creator, or professional videographer, understanding how to transfer video from your camcorder to your computer efficiently is essential. This article provides a comprehensive guide to help you navigate the process, from preparation to troubleshooting.
---
## Understanding the Basics: Why Transfer Video from Camcorder to PC?
Camcorders are often equipped with high-quality optics and recording capabilities, but their onboard storage is limited, and their raw footage often requires editing for final use. Transferring video to a PC allows for:
1. Video Editing: Use professional software to enhance your footage.
2. Storage Management: Free up space on your camcorder.
3. Sharing and Distribution: Easily share videos on social media or send them to clients.
4. Archival: Store videos securely for long-term use.
---
## Preparation: Tools and Setup
Before you begin, gather the following tools:
1. Camcorder: Ensure it has functional playback capabilities.
2. Cables:
- USB Cable: Common for modern camcorders.
- FireWire (IEEE 1394): Used in older models.
- HDMI Cable: For real-time capture using a capture card.
3. Capture Card (Optional): For higher quality capture or camcorders without USB connectivity.
4. PC with Compatible Software:
- Pre-installed options like Windows Camera or macOS iMovie.
- Professional software like Adobe Premiere Pro or Final Cut Pro.
5. Storage Space: Ensure your PC has sufficient storage for large video files.
Checking Compatibility
Not all camcorders are the same, and their connectivity options may vary:
- Digital Camcorders: Typically use USB or HDMI.
- Analog Camcorders: May require a capture card to digitize video signals.
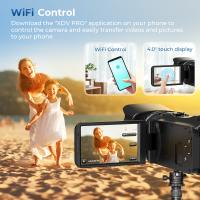
- Modern Features: Some camcorders support Wi-Fi transfer, reducing the need for physical cables.
---
## Step-by-Step Guide: Capturing Video on PC
1. Connect the Camcorder to the PC
- Turn off the camcorder before connecting.
- Use the appropriate cable (USB, FireWire, or HDMI) and connect it to your PC.
- If using an HDMI cable, ensure a capture card is installed and connected to your PC.
2. Power On and Set to Playback Mode
- Switch your camcorder to "Playback" or "VCR" mode.
- Some models may automatically detect the connection and prompt for a mode selection.
3. Launch the Video Capture Software
- Open your video capture software. For example:
- On Windows: Use the Camera app or Windows Movie Maker.
- On macOS: Use iMovie or QuickTime.
- Alternatively, open professional software like Adobe Premiere Pro and navigate to the "Capture" panel.
4. Configure the Software Settings
- Select the input source (USB, HDMI, or FireWire).
- Set the resolution and frame rate based on your camcorder's capabilities and the desired output quality.
- Choose the storage location and format for saving the files (e.g., MP4, AVI, or MOV).
5. Start the Capture Process
- Play the video on your camcorder and simultaneously click "Record" in your software.
- Monitor the capture process to ensure smooth recording.
6. Save and Verify the File
- Once the video has been captured, stop the recording in your software.
- Save the file in a designated folder and verify its playback to ensure quality and completeness.
---
## Advanced Options for Professional Users
For users with more complex requirements, consider these advanced techniques:
Real-Time Capture with a Capture Card
If your workflow demands high-definition, real-time capture (e.g., for live streaming), a capture card is indispensable. These devices convert raw video signals into formats your PC can process. Brands like Elgato or Blackmagic Design offer capture cards tailored to various needs.
Wireless Transfers
Many modern camcorders support Wi-Fi connectivity, allowing you to transfer video files wirelessly to your PC. This option is convenient but may be slower and less reliable for large files.
Editing Directly on External Drives
If your PC lacks storage space, consider saving directly to an external SSD or HDD. Ensure your editing software supports working with external drives to maintain a seamless workflow.
---
## Common Issues and Troubleshooting
Despite the straightforward process, issues can arise. Here’s how to address common problems:
1. Camcorder Not Detected
- Ensure the cable is securely connected.
- Check if the camcorder drivers are installed on your PC.
- Restart both the camcorder and PC to reset the connection.
2. Poor Video Quality
- Verify the resolution settings in your capture software.
- Use a high-quality cable and avoid overly long connections.
- For analog camcorders, ensure the capture card is functioning correctly.
3. Audio Out of Sync
- Check your software settings for audio capture.
- Synchronize audio and video tracks during editing if discrepancies persist.
4. Insufficient Storage Space
- Free up space on your PC or use an external storage device.
- Consider compressing large video files after editing.
---
## Tips for Optimal Results
1. Plan Ahead: Organize your footage before starting the transfer to streamline the process.
2. Use High-Quality Cables: Poor-quality cables can lead to connection issues or degraded video quality.
3. Regularly Update Software: Ensure your capture and editing software are up-to-date to avoid compatibility issues.
4. Back-Up Your Footage: Always create a backup of your video files on an external drive or cloud storage.
---
## Applications and Real-World Scenarios
Capturing video on a PC from a camcorder has various applications, including:
1. Content Creation: For YouTubers, vloggers, and educators.
2. Event Documentation: Archiving weddings, conferences, or live performances.
3. Digital Preservation: Transferring analog tapes to digital formats.
4. Professional Workflows: In filmmaking, where footage needs to be processed and edited quickly.
---
## Conclusion: Elevate Your Video Workflow
Capturing video from a camcorder to a PC is not merely a technical task but an opportunity to unlock creative potential. With the right tools, proper preparation, and adherence to the outlined steps, you can ensure a seamless transfer process. Whether you're digitizing old tapes or creating modern masterpieces, mastering this skill enhances your ability to produce, share, and preserve high-quality video content.
Explore your camcorder's capabilities, experiment with different software, and always prioritize organization and quality. With practice, you'll transform raw footage into polished visual stories, ready to inspire and engage your audience.







There are no comments for this blog.