How To Center A Microscope Stage?
Operating a microscope effectively requires attention to precision, especially when working with minute specimens and conducting detailed observations. One of the fundamental tasks in microscopy is centering the microscope stage. Properly centering the stage ensures that the specimen is correctly aligned with the optical path, making it easier to locate, observe, and analyze specific features. In this article, we'll explore the importance of centering a microscope stage, the step-by-step process, common challenges, and practical solutions.
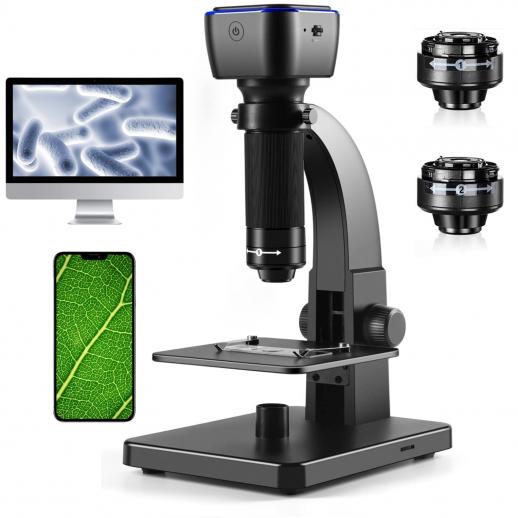
Why Centering the Microscope Stage Matters
Centering the microscope stage is crucial for several reasons:
1. Optimized Field of View: Centering ensures that the specimen is properly positioned under the objective lens, maximizing visibility and focus.
2. Accurate Alignment: Proper alignment minimizes distortion and ensures the optical axis aligns perfectly with the specimen's critical regions.
3. Efficiency in Observations: A centered stage allows for quicker navigation of the specimen, especially during systematic analyses or when switching between objectives.
4. Essential for Measurements: When using tools like micrometers or performing quantitative analysis, precise stage centering ensures measurement accuracy.
Failing to center the stage can lead to missed details, misaligned fields of view, and inefficient workflows.
---
Steps to Center a Microscope Stage
The process of centering a microscope stage involves careful manipulation of the stage controls and constant monitoring of the specimen. Here’s a systematic guide:
1. Initial Setup
- Adjust the Microscope: Place the microscope on a stable surface to prevent vibrations. Ensure the microscope is clean and free of dust or debris.
- Install the Specimen Slide: Place the slide securely in the stage clips or holder. Ensure the slide is positioned flat against the stage to avoid tilting.
2. Coarse Alignment
- Position the Slide: Use the stage controls to move the slide so that the area of interest is roughly in the center of the stage opening.
- Adjust Lighting: Align the light source or condenser to illuminate the field evenly. Proper lighting helps in identifying the region of interest during centering.
3. Focus Adjustment
- Select a Low-Power Objective: Begin with the lowest magnification objective to locate the specimen easily. This provides a broader field of view.
- Focus the Image: Use the coarse focus knob to bring the image into view, followed by the fine focus knob for clarity.
4. Fine-Tune Stage Centering
- Use the Mechanical Stage Controls: These knobs allow precise movement of the stage in the X (horizontal) and Y (vertical) axes.
- Center the Area of Interest: Adjust the stage controls until the specific region of interest is at the center of the field of view.
5. Confirm Alignment at Higher Magnifications
- Switch Objectives: Gradually move to higher magnifications, confirming that the area of interest remains centered with each increase.
- Refine Centering: If the area drifts out of view, re-adjust the stage using the mechanical controls.
6. Lock the Stage (Optional)
- Some microscopes have stage locking mechanisms to prevent unintentional movement. If your microscope includes this feature, lock the stage once centered.
---
Common Challenges and Solutions
Centering a microscope stage may seem straightforward, but various challenges can arise. Understanding these issues and their solutions can streamline the process:
1. Specimen Drift
- Problem: The slide moves slightly after adjustments, causing the specimen to shift out of the field.
- Solution: Ensure the slide is secured tightly in the stage clips. For highly sensitive observations, consider using adhesive corners or specialized stage holders.
2. Limited Stage Control Sensitivity
- Problem: Mechanical stage controls may lack the precision needed for fine adjustments.
- Solution: Use a combination of coarse and fine movements. Some advanced microscopes feature micrometer stage controls for enhanced precision.
3. Misaligned Optical Components
- Problem: Misaligned objectives, light sources, or condensers can make centering difficult.
- Solution: Perform regular maintenance and alignment checks on all optical components. Consult the user manual for calibration instructions.
4. Difficulty Locating the Specimen
- Problem: The specimen may be hard to locate, especially under low contrast or uneven lighting conditions.
- Solution: Enhance contrast using staining techniques or adjust the microscope’s diaphragm to optimize light intensity and distribution.
---
Tips for Enhanced Precision
1. Use Centering Aids
Some microscopes are equipped with centering tools such as crosshairs or stage calibration slides. These aids can simplify the centering process and improve accuracy.
2. Work Methodically
- Always start with low magnification for easier navigation.
- Perform adjustments systematically, moving incrementally in both X and Y axes.
3. Regular Maintenance
- Clean stage components to ensure smooth operation.
- Inspect mechanical controls for wear and replace damaged parts as needed.
4. Document the Position
For repeated observations of the same region, mark the slide or record the coordinates of the stage position.
---
When to Seek Professional Help
In some cases, achieving precise centering may require professional intervention. If your microscope stage exhibits excessive wobble, uneven movements, or damage to mechanical parts, consult a qualified technician for repairs or adjustments.
---
Real-World Applications and Importance
Centering a microscope stage is not merely a procedural task; it plays a pivotal role in various applications:
1. Medical Diagnostics: Ensuring the stage is centered aids in identifying pathological structures like cancer cells or microorganisms.
2. Research: In fields like cell biology or microbiology, stage centering is critical for consistent and repeatable observations.
3. Education: For students and educators, proper centering ensures clear visualization, enhancing learning experiences.
4. Industrial Quality Control: Microscopes used in materials science or semiconductor manufacturing rely on precise stage adjustments for defect detection.
---
Conclusion
Mastering the art of centering a microscope stage is essential for effective microscopy. By understanding the steps, addressing challenges, and applying practical tips, you can achieve accurate alignments and enhance your observational outcomes. Whether you're a student, researcher, or professional, investing time in learning and refining this skill will pay dividends in your work’s efficiency and accuracy.
Remember, precision is key in microscopy, and centering the stage is the foundation of precision. With regular practice and attention to detail, you’ll develop the expertise needed to make the most of your microscope and unlock the wonders of the microscopic world.


















There are no comments for this blog.