How To Change Video Camera On Laptop?
How to Change the Video Camera on a Laptop: A Comprehensive Guide
In today’s digital world, where video conferencing, live streaming, and content creation have become integral to both personal and professional lives, understanding how to switch or change the video camera on a laptop can be immensely helpful. Whether you’re upgrading to a better external webcam, troubleshooting camera issues, or simply toggling between multiple camera options, mastering this skill can save time and frustration. This article offers a detailed, step-by-step guide to changing the video camera on a laptop, along with practical insights for troubleshooting common issues.
Understanding Laptop Camera Options
Most laptops come equipped with a built-in webcam, but they may not always offer the best resolution or functionality. An external webcam often provides better video quality, more features, and higher resolution for tasks like video calls or streaming. In some cases, you might also have multiple camera options due to additional devices like USB webcams or built-in cameras on external monitors.
To change the video camera on your laptop, you need to know how to select, configure, and troubleshoot camera settings. Let’s dive into the details.
---
Step 1: Check Your Camera Hardware
Before you attempt to switch your video camera, make sure you know the available options:
1. Built-In Webcam:
- Most laptops have a built-in webcam located at the top of the screen.
- Check if it is functional by looking for an indicator light when activated.
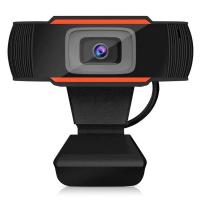
2. External Webcam:
- If you’ve connected an external webcam, ensure it is properly plugged into a USB port.
- Install any drivers or software that may be required for the external webcam to work.
3. Additional Devices:
- Monitors with built-in cameras or connected devices like smartphones (used as cameras via software) can also serve as alternatives.
---
Step 2: Change the Default Camera in Applications
Most applications that use a camera allow you to select your preferred device. This is where you’ll typically switch between the laptop’s built-in camera and any external webcams.
For Zoom:
1. Open Zoom and go to Settings (click the gear icon).
2. Navigate to the Video tab.
3. Under the Camera dropdown, select the desired device.
4. Preview the feed to ensure the correct camera is selected.
For Microsoft Teams:
1. Open Teams and go to Settings by clicking your profile picture.
2. Select Devices.
3. Under Camera, choose the camera you want to use from the dropdown menu.
For Google Meet:
1. During a call, click the three dots in the bottom-right corner and select Settings.
2. Under Video, use the dropdown menu to select the camera.
3. Save your settings.
This process is similar for other applications like Skype, OBS Studio, or Discord. Look for video settings in the application preferences and toggle between available cameras.
---
Step 3: Change the Default Camera System-Wide
If you want to set a specific camera as the default for your entire operating system, here’s how to do it:
On Windows:
1. Press `Win + I` to open Settings.
2. Navigate to Privacy & Security > Camera.
3. Ensure that Camera Access is enabled.
4. Scroll down to see the list of available cameras and their status.
5. Disable the built-in camera (optional) if you want to prioritize the external camera.
6. Open the Device Manager (search for it in the Start menu).
7. Expand the Imaging Devices or Cameras section.
8. Right-click the device you don’t want to use and select Disable Device.
On macOS:
1. Go to System Preferences > Security & Privacy.
2. Select the Privacy tab and choose Camera from the sidebar.
3. Enable or disable access to specific cameras for various applications.
4. macOS typically uses the last connected camera as the default. Disconnect the unwanted device if necessary.
---
Step 4: Troubleshooting Camera Issues
Switching cameras is usually straightforward, but sometimes technical issues can arise. Here’s how to handle common problems:
Problem 1: Camera Not Detected
- Solution: Ensure the camera is properly connected. For external webcams, check the USB port and cable. Update the camera driver via Device Manager (Windows) or reinstall the driver provided by the manufacturer.
Problem 2: Poor Video Quality
- Solution: Test the camera in different lighting conditions. Adjust video settings in the application to optimize resolution and frame rate. Upgrade to a higher-quality external camera if needed.
Problem 3: Conflict Between Cameras
- Solution: Disable the unused camera in the Device Manager (Windows) or unplug external devices if macOS is auto-selecting the wrong camera.
Problem 4: Camera Access Denied
- Solution: On Windows, check permissions in Settings > Privacy & Security > Camera. On macOS, ensure the correct permissions are enabled in System Preferences > Security & Privacy.
Problem 5: External Webcam Drivers Not Installed
- Solution: Download and install the necessary drivers from the webcam manufacturer’s website. Some cameras also come with proprietary software that enhances functionality.
---
Step 5: Advanced Configuration
If you’re using specialized software like OBS Studio or other streaming platforms, configuring the camera may require additional steps:
1. In OBS Studio:
- Add a new source by clicking the + in the Sources panel.
- Select Video Capture Device.
- Choose your camera from the dropdown list and adjust the resolution, frame rate, or other settings.
2. Multi-Camera Setup:
- If you use multiple cameras simultaneously, use software that supports switching between camera feeds, such as ManyCam, SparkoCam, or XSplit.
- Assign hotkeys for quick toggling between cameras.
3. Integrating Smartphone Cameras:
- Use apps like EpocCam or DroidCam to connect your smartphone as a webcam. Ensure both the app and corresponding drivers are installed on your laptop.
---
Step 6: Optimizing Your Video Experience
To get the best results from your chosen camera, follow these tips:
1. Lighting:
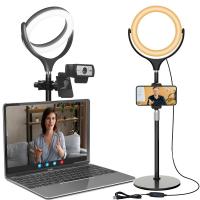
- Good lighting significantly improves video quality. Use natural light or a ring light to illuminate your face evenly.
2. Background:
- Opt for a clean, professional background. Use virtual backgrounds if needed, but ensure your camera supports them.
3. Positioning:
- Place the camera at eye level to create a more natural and engaging perspective.
4. Audio Setup:
- While not directly related to the camera, good audio quality enhances the overall experience. Use an external microphone if possible.
---
Switching or changing the video camera on a laptop is an essential skill in today’s digital era. Whether you’re upgrading to an external webcam, troubleshooting issues, or toggling between multiple cameras, this guide provides a thorough and practical approach. By following these steps, you can ensure a smooth and hassle-free experience, whether for professional meetings, live streaming, or personal video calls.
Mastering this process empowers you to adapt to various situations, making you more efficient and prepared for modern-day communication demands. So, explore your options, optimize your setup, and elevate your video presence to the next level!












There are no comments for this blog.