How To Create Your Own Ring Light?
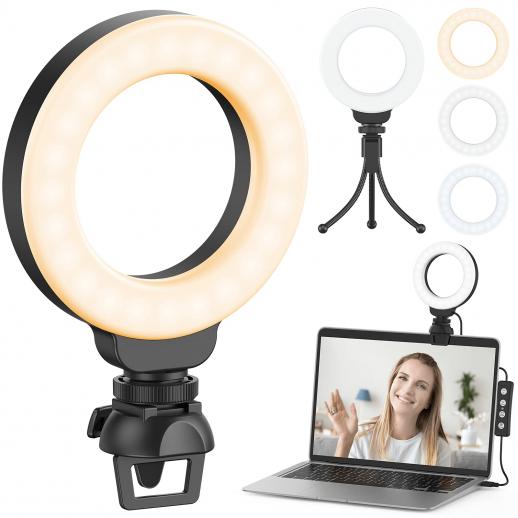
In the age of digital media, capturing the perfect photo or video can often depend on good lighting. Ring lights have become a popular tool for influencers, makeup artists, photographers, and videographers because they provide a uniform light source that reduces shadows and highlights your subject evenly. While you could purchase a ring light, building your own is a budget-friendly and fun DIY project.
Creating your own ring light can be tailored to your needs—whether that’s for filming YouTube tutorials, taking professional-grade photos, or simply augmenting your Zoom meetings. Here’s a complete guide on how to build a reliable and effective ring light at home.
Why Build Your Own Ring Light?
Building your own ring light offers several benefits:
1. Cost-Effective: Purchasing a professional-grade ring light can be expensive. By creating your own, you can significantly cut costs.
2. Customization: With a DIY ring light, you can adjust the size, brightness, and color temperature to suit your needs.
3. Learning Experience: Building a ring light can be an educational project that exposes you to basic electronics and crafting skills.
4. Sustainability: By using recyclable and upcycled materials, you can create an eco-friendly alternative.
Materials Needed
Before diving into the construction process, you'll need to gather the following materials:
- LED strip lights (preferably dimmable and with adjustable color temperature)
- A large circular object to act as the base (a plastic bucket lid or a pre-made ring)
- Aluminum foil
- A power source and connection cords for the LEDs
- A clear plastic diffuser (optional, for softening the light)
- Hot glue gun or strong adhesive
- Basic tools: ruler, scissors, and a pencil
Step-by-Step Guide
Step 1: Prepare Your Base
Choose the item that will serve as the frame for your ring light. This can be a plastic bucket lid, embroidery hoop, or any circular object large enough to house the LED strip lights. If you are using a solid object, cut out the center to create a hollow ring. This ring will be the structure around which your LED lights will wrap.
Step 2: Add a Reflective Surface
To enhance the light output, cover one side of your ring with aluminum foil. The shiny side should face outward to reflect the light effectively. This step ensures that the light is directed forward and not wasted on the back side.
Step 3: Attach the LED Strip
Carefully adhere your LED strip lights to the reflective surface. Start from one end and wrap the LED strip around the ring. Ensure the lights are equally spaced to provide uniform illumination. Use a hot glue gun or a strong adhesive tape to secure the strip, preventing any sections from sagging or peeling off over time.
Step 4: Wire the LEDs
Connect the LED strip lights to a power source as per the manufacturer’s instructions. Most LED strips come with connection cords, but you may need to solder the wires or use quick connectors. Ensure the power source is suitable for your LEDs to avoid overheating or malfunctioning.
Step 5: Diffuse the Light (Optional)
If the light from your LEDs is too harsh, you can add a plastic diffuser. This could be a plastic cake cover or any translucent material that fits over the ring. Cut it to the size of your ring and attach it using adhesive or zip ties to soften the light and reduce shadows.
Step 6: Add a Stand or Mount
Depending on how you plan to use your ring light, you might want to add a stand or some type of mounting system. You can screw the ring to a tripod mount or create a custom stand using PVC pipes. If you’re planning to use it as a desktop ring light, a simple clamp mount can suffice.
Step 7: Test Your Creation
Once assembled, plug in your ring light and test it. Make sure it lights up uniformly and adjust the position of the LED strips if necessary. If your LEDs have adjustable brightness and color temperature, experiment with these settings to see how they affect your lighting.
Practical Tips for Best Results
- Safety First: Always be cautious when working with electrical components. Double-check your connections to avoid short circuits.
- Choosing the Right LED Strip: Opt for an LED strip that offers color temperature control. This feature allows you to switch between cooler (blueish) and warmer (yellowish) light based on your needs.
- Portability: Consider how portable you need your ring light to be. Using a lightweight material for the frame and securing all components well will make it easier to move your ring light around.
- Environment: The environment you plan to shoot or work in will dictate how powerful your ring light needs to be. If you’re in a naturally dark room, you may need a brighter ring light.
- Maintenance: Periodically check the adhesive holding your LED strip and other components. Over time, the heat generated by the LEDs can weaken glue bonds.
Troubleshooting Common Issues
- Uneven Lighting: If the light isn't even, make sure your LED strip is evenly spaced and secure. A diffuser can also help in evening out the light.
- Flickering Lights: Flickering could be due to a power issue. Ensure the power source is stable and matches the LED strip’s requirements.
- Overheating: If the ring light gets too hot, check for proper ventilation. Ensure that the LEDs are not overdriven by making sure the power supply matches the LED strip's voltage and current specifications.
Building your own ring light can be a rewarding experience, offering both cost-efficiency and customization. While the initial setup may require some effort and basic understanding of electronics and crafting, the result is a bespoke lighting solution tailored to your exact needs. Whether you’re a budding YouTuber, an aspiring makeup artist, or simply someone who wants better lighting for video calls, a DIY ring light can significantly enhance your visual presentations.
Take your time to plan, choose quality materials, and carefully follow each step. The result will be a personalized piece of equipment that elevates the quality of your photos and videos, all while giving you the satisfaction of creating it yourself.



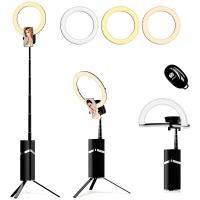
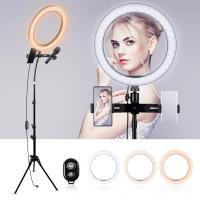
![K&F Concept Selfie Ring Light with Cell Phone Holder for Live Stream and Makeup, LED Light [3-Light Mode] [10-Level Brightness] with Remote Control and Flexible Hose Bracket for iPhone Android【Ship to the US Only】 K&F Concept Selfie Ring Light with Cell Phone Holder for Live Stream and Makeup, LED Light [3-Light Mode] [10-Level Brightness] with Remote Control and Flexible Hose Bracket for iPhone Android【Ship to the US Only】](https://img.kentfaith.com/cache/catalog/products/us/KF34.001/KF34.001-1-200x200.jpg)


![4K Digital Camera for Photography & Video [Autofocus and Stabilisation] 48MP 16X Digital Zoom 3” 180° Flip Screen Vlog Camera with 32G SD Card, Flash 4K Digital Camera for Photography & Video [Autofocus and Stabilisation] 48MP 16X Digital Zoom 3” 180° Flip Screen Vlog Camera with 32G SD Card, Flash](https://img.kentfaith.com/cache/catalog/products/us/GW41.0065/GW41.0065-1-200x200.jpg)








There are no comments for this blog.