How To Do Screen Recording With Sound?
Screen recording with sound is a vital tool in today's digital age, useful for creating tutorials, recording gameplay, capturing video calls, and more. However, some people might find it challenging to navigate through the different tools and settings for recording both the screen and audio. This article aims to clear the confusion and provide a comprehensive guide on how to do screen recording with sound across various devices and platforms.
Introduction to Screen Recording with Sound

Screen recording refers to capturing a video of your computer, smartphone, or tablet screen. Adding sound to these recordings can enhance their value significantly, whether you're demonstrating software, recording a webinar, or capturing in-game moments. Sound can include system audio (the sounds that your device makes) and/or microphone audio (your own voice or other external sounds). Let's break down how to achieve this on different devices.
Screen Recording on Windows
Windows users have several options for screen recording with sound, including built-in tools and third-party applications.
Using the Built-in Xbox Game Bar
1. Open Xbox Game Bar: Press `Win + G` to open the Game Bar.
2. Enable Voice Recording: If you want to record your voice, click the microphone icon.
3. Start Recording: Click on the 'Record' button (or press `Win + Alt + R`).
4. Stop Recording: Click the 'Stop' button or press `Win + Alt + R` again.
Using OBS Studio

OBS Studio is a powerful free tool for screen recording and streaming.
1. Download and Install OBS Studio: Available from [obsproject.com](https://obsproject.com/).
2. Set Up a New Scene: Click the '+' in the 'Scenes' box to create a new scene.
3. Add a Source: Click the '+' in the 'Sources' box, and choose 'Display Capture' for screen recording.
4. Add Audio Sources: Add 'Audio Input Capture' for microphone audio and 'Audio Output Capture' for system audio.
5. Start Recording: Click 'Start Recording' when ready.
Screen Recording on macOS
Mac users also have several built-in tools along with third-party applications to choose from.
Using the Built-in Screen Recording Tool
1. Open Screenshot Toolbar: Press `Cmd + Shift + 5` to open the Screenshot toolbar.
2. Select Record Entire Screen or Record Selected Portion.
3. Enable Audio: Click 'Options' to select the microphone you want to use.
4. Start Recording: Click the 'Record' button.
5. Stop Recording: Press `Cmd + Ctrl + Esc` or click the stop button in the menu bar.
Using QuickTime Player
1. Open QuickTime Player: Navigate to Applications > QuickTime Player.
2. New Screen Recording: Go to File > New Screen Recording.
3. Enable Microphone: Click the drop-down arrow next to the record button and select the microphone.
4. Start Recording: Click the record button and follow the prompts.
5. Stop Recording: Click the stop button in the menu bar.
Screen Recording on iOS and Android
Screen recording with audio is essential on mobile devices for various purposes.
On iOS
1. Enable Screen Recording: Go to Settings > Control Center > Customize Controls, then tap the '+' next to 'Screen Recording'.
2. Start Recording: Open Control Center and tap the screen recording icon.
3. Enable Audio: Long press the screen recording button and tap the microphone icon to enable or disable audio capture.
4. Stop Recording: Tap the red status bar at the top of the screen and select 'Stop'.
On Android
1. Built-in Recorder: Many Android devices have a built-in screen recorder. Pull down the notification shade and look for the 'Screen Recorder' option.
2. Enable Audio: Before starting, go into the screen recorder settings to select 'Record audio' and choose either 'Device audio', 'Microphone', or both.
3. Start Recording: Tap the record button.
4. Stop Recording: Pull down the notification shade and tap the stop button.
Third-Party Applications
For more advanced features, third-party applications can be very useful. Some of the most popular and reliable options include:
Camtasia (Windows & Mac)
1. Download and Install Camtasia: Available from [techsmith.com](https://techsmith.com/).
2. New Recording: Open Camtasia and click 'New Recording'.
3. Select Region and Audio: Choose the recording area and decide whether to include system audio, microphone audio, or both.
4. Start Recording: Click 'Start Recording'.
5. Stop Recording: Click the stop button when finished.
ScreenFlow (Mac)
1. Download and Install ScreenFlow: Available from [telestream.net](https://telestream.net/).
2. New Document: Open ScreenFlow and create a new document.
3. Configure Settings: Choose video, audio, and other recording settings.
4. Start Recording: Click 'Record'.
5. Stop Recording: Click the ScreenFlow icon in the menu bar and select 'Stop Record'.
Troubleshooting Common Issues
No Sound
1. Check Audio Input/Output Devices: Ensure the correct devices are selected in the recording software and system settings.
2. Update Drivers: Sometimes audio issues are due to outdated drivers. Check for updates.
3. Check Permissions: Ensure the app has permissions to access the microphone and system audio.
Poor Audio Quality
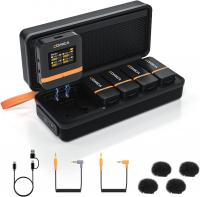
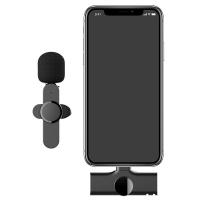
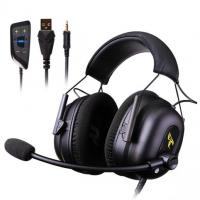
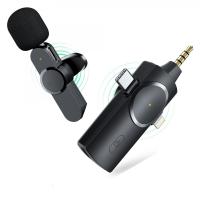
1. Use an External Microphone: Built-in microphones can capture background noise. External mics offer better quality.
2. Reduce Background Noise: Use noise-canceling features or a quiet environment.
3. Adjust Volume Levels: Ensure microphone and system audio levels are balanced.
Screen recording with sound has become an indispensable tool for various professional and personal tasks. Whether you are using a Windows PC, Mac, iOS, or Android device, multiple options are available to suit your needs. By understanding the tools and steps involved, you can effortlessly enhance your screen recordings with clear and high-quality audio. Happy recording!
















There are no comments for this blog.