How To Get My Outdoor Camera Working?
Outdoor security cameras are crucial for enhancing home safety and monitoring activities around your property. However, setting up these cameras and troubleshooting any issues can be challenging, especially for first-time users. This article provides a detailed guide on how to get your outdoor camera working efficiently, covering everything from installation to resolving common issues.
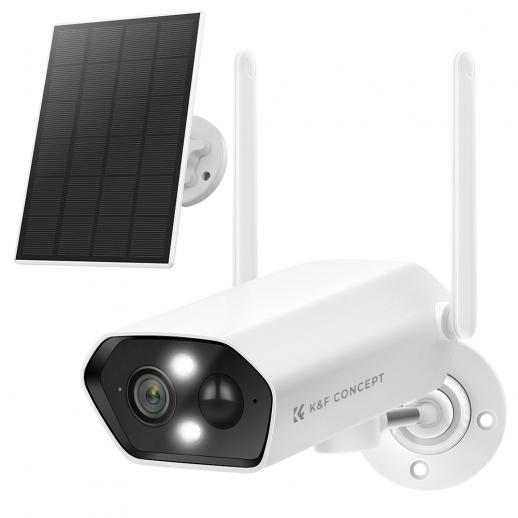
---
1. Unboxing and Preparation
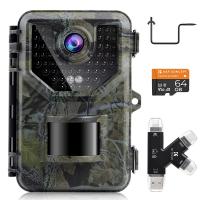
Before diving into installation, make sure you have all the components needed to set up the outdoor camera. Most camera kits include:
- The camera unit
- Mounting hardware
- Power cables or batteries
- User manual
- Optional extras (e.g., Wi-Fi extenders, protective casings)
Take time to read the manual. Familiarizing yourself with the device specifications, connectivity options, and installation guidelines will save you time later.
---
2. Planning Camera Placement
Proper placement is critical for maximizing the effectiveness of your outdoor camera. Here are key considerations:
- Coverage Area: Identify the areas you want to monitor, such as front doors, driveways, or backyard spaces.
- Height and Angle: Mount the camera at least 8–10 feet off the ground to prevent tampering while maintaining a clear field of view.
- Lighting: Avoid positioning the camera directly against bright lights or reflective surfaces to minimize glare.
- Wi-Fi Signal Strength: Ensure the camera's location is within your Wi-Fi router's range. If the signal is weak, consider using a Wi-Fi extender.
---
3. Installation Steps
a. Wired Cameras
1. Run Cables: Drill holes for cable management, ensuring they are protected from weather and tampering.
2. Mount the Camera: Use screws or mounting brackets provided in the kit.
3. Connect to Power: Plug the camera into a nearby power outlet or use a power-over-Ethernet (PoE) cable if supported.
4. Test Before Securing: Temporarily power the camera to check its angle and field of view before permanently securing it.
b. Wireless Cameras
1. Charge/Install Batteries: Fully charge the batteries or insert new ones as instructed.
2. Mount the Camera: Use the provided mounting kit.
3. Pair with the App: Connect the camera to your smartphone or computer app as per the manual.
4. Check Connectivity: Verify that the camera has a stable Wi-Fi connection.
---
4. Setting Up Software and Monitoring Tools
Most modern outdoor cameras come with dedicated apps or software for easy setup and monitoring. Here's how to set them up:
- Download the App: Use the app recommended by the manufacturer.
- Create an Account: Register with your email and set up a secure password.
- Connect the Camera: Follow the on-screen prompts to connect your camera to the app using Wi-Fi or Ethernet.
- Adjust Settings: Configure video quality, motion detection sensitivity, and notification preferences.
- Cloud Storage and Subscriptions: Check if your camera requires a subscription for cloud storage or advanced features.
---
5. Troubleshooting Common Issues
Even with proper installation, you may encounter challenges. Here’s how to resolve them:
a. Camera Not Powering On
- Check the power source or battery status.
- Inspect cables for any visible damage.
- Reset the camera to factory settings.
b. Connectivity Problems
- Ensure the Wi-Fi signal is strong at the camera’s location.
- Restart your router and reconnect the camera.
- Update the camera firmware through the app.
c. Poor Video Quality
- Verify that your internet speed meets the camera’s requirements.
- Clean the camera lens.
- Adjust resolution settings in the app.
d. Motion Detection Not Working
- Recalibrate motion zones and sensitivity settings.
- Ensure the camera firmware is up to date.
- Check if the issue is caused by environmental factors, such as extreme weather or obstructions.
---
6. Maintenance Tips
To ensure your outdoor camera continues to work efficiently:
- Regular Cleaning: Wipe the lens with a microfiber cloth to remove dirt and debris.
- Update Software: Keep the app and camera firmware up to date to access new features and security patches.
- Inspect Hardware: Periodically check cables, mounts, and power sources for wear and tear.
- Backup Recordings: Use external storage or cloud services to save important footage.
---
7. Enhancing Camera Performance
For optimal performance, consider the following upgrades and enhancements:
- Use a Dedicated Wi-Fi Extender: Boosts signal strength and reliability.
- Add Solar Panels: For battery-operated cameras, solar panels can eliminate the need for manual recharging.
- Invest in Smart Home Integration: Connect your camera to a smart home system for seamless automation and control.
---
8. When to Seek Professional Help
If your camera still doesn’t work despite following all troubleshooting steps, it might be time to contact professional support. Some scenarios where professional help is advisable include:
- Persistent power or connectivity issues
- Complex installations requiring extensive wiring
- Advanced configurations, such as integrating multiple cameras or connecting to a home automation system
---
9. FAQs
Q: Can outdoor cameras work without Wi-Fi?
Yes, some cameras operate on local storage (SD cards) or use cellular data. However, these options may limit remote monitoring capabilities.
Q: What’s the ideal camera resolution for outdoor use?
A resolution of at least 1080p is recommended for clear video quality.
Q: Are outdoor cameras weatherproof?
Most outdoor cameras are designed to withstand rain, dust, and extreme temperatures. Check the IP rating for specific details.
---
Setting up an outdoor camera requires careful planning, correct installation, and ongoing maintenance to ensure optimal functionality. Whether you’re installing a wired or wireless model, following this guide will help you avoid common pitfalls and maximize your camera’s performance. By addressing these practical steps, you can enhance your home’s security and enjoy peace of mind.













There are no comments for this blog.