How To Install Camera Outside House?
Installing a security camera outside your house is a practical and effective way to enhance the safety and security of your property. Whether you want to deter potential intruders, monitor deliveries, or keep an eye on your surroundings, a well-placed outdoor camera can provide peace of mind. This article will guide you through the process of installing an outdoor security camera, covering everything from selecting the right camera to ensuring it is properly set up and maintained.
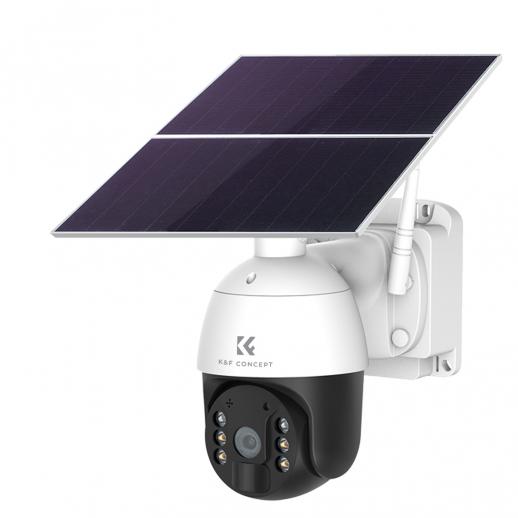
Choosing the Right Camera
Before you begin the installation process, it’s crucial to select the right type of camera for your needs. Here are some factors to consider:
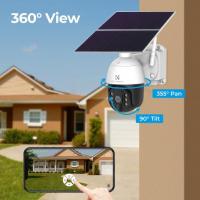
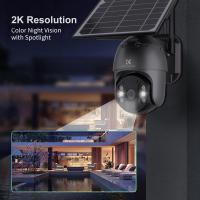
1. Camera Type: There are various types of outdoor cameras, including bullet cameras, dome cameras, and PTZ (pan-tilt-zoom) cameras. Bullet cameras are typically easier to install and are good for covering specific areas. Dome cameras are more discreet and vandal-resistant, while PTZ cameras offer the flexibility to cover larger areas with their ability to pan, tilt, and zoom.
2. Resolution: Higher resolution cameras provide clearer images, which can be crucial for identifying faces or license plates. Look for cameras with at least 1080p resolution.
3. Night Vision: Ensure the camera has good night vision capabilities, as many incidents occur during low-light conditions. Infrared (IR) LEDs are commonly used for night vision.
4. Weather Resistance: Outdoor cameras should be weatherproof to withstand various environmental conditions. Look for cameras with an IP66 or higher rating.
5. Power Source: Decide whether you want a wired or wireless camera. Wired cameras are generally more reliable but require more effort to install. Wireless cameras are easier to install but may require regular battery changes or recharging.
6. Storage Options: Consider how the camera stores footage. Options include local storage (SD cards), network-attached storage (NAS), or cloud storage. Each has its pros and cons in terms of accessibility and security.
Planning the Installation
Proper planning is essential for effective camera placement and coverage. Here are some steps to follow:
1. Identify Key Areas: Determine the areas you want to monitor, such as entry points (doors and windows), driveways, and backyards. Make sure the camera covers these areas without any obstructions.
2. Height and Angle: Install the camera at a height that is out of reach to prevent tampering but low enough to capture clear images. An angle of 30-45 degrees downward is usually effective.
3. Lighting Conditions: Consider the lighting conditions in the area. Avoid pointing the camera directly at bright lights, as this can cause glare and reduce image quality. If necessary, install additional lighting to improve visibility.
4. Wi-Fi Signal: For wireless cameras, ensure that the installation location has a strong Wi-Fi signal. You may need to install a Wi-Fi extender if the signal is weak.
Installing the Camera
Once you have planned the installation, follow these steps to install your outdoor camera:
1. Mounting the Camera:
- Tools Needed: Drill, screws, anchors, screwdriver, and a ladder.
- Mounting Bracket: Attach the mounting bracket to the wall or ceiling using the screws and anchors provided. Make sure it is securely fastened.
- Attach the Camera: Attach the camera to the mounting bracket and adjust the angle as needed.
2. Wiring (for Wired Cameras):
- Power Source: If the camera requires a wired power source, run the power cable to the nearest electrical outlet. You may need to drill holes and use conduit to protect the cables.
- Video Cable: If the camera uses a wired connection for video, run the video cable to your recording device (DVR/NVR). Use cable clips to secure the cables and prevent them from dangling.
3. Connecting Wireless Cameras:
- Power Up: Insert the batteries or connect the camera to a power source.
- Wi-Fi Setup: Follow the manufacturer’s instructions to connect the camera to your Wi-Fi network. This usually involves using a mobile app or web interface.
4. Testing the Camera:
- Initial Test: Before finalizing the installation, test the camera to ensure it is working correctly. Check the live feed on your smartphone or computer.
- Adjustments: Make any necessary adjustments to the camera angle and focus to ensure optimal coverage.
Configuring the Camera
After installing the camera, you need to configure it to ensure it operates effectively:
1. Software Setup: Install the camera’s software or app on your smartphone or computer. Follow the setup instructions to connect the camera to your network and configure settings.
2. Motion Detection: Enable motion detection to receive alerts when movement is detected. Adjust the sensitivity settings to avoid false alarms from pets or passing cars.
3. Recording Schedule: Set up a recording schedule based on your needs. You can choose continuous recording, motion-triggered recording, or a specific time schedule.
4. Notifications: Configure notifications to receive alerts via email or push notifications on your smartphone. This allows you to respond quickly to any suspicious activity.
5. Privacy Zones: If your camera covers areas that you do not want to monitor (e.g., neighbor’s property), set up privacy zones to block out those areas.
Maintaining the Camera
Regular maintenance is essential to ensure your camera continues to function properly:
1. Cleaning: Clean the camera lens regularly to remove dirt, dust, and spider webs that can obstruct the view. Use a soft cloth and lens cleaner.
2. Firmware Updates: Check for firmware updates from the manufacturer and install them to ensure your camera has the latest features and security patches.
3. Battery Check: For wireless cameras, check the battery level regularly and recharge or replace the batteries as needed.
4. Inspect Mounts: Periodically inspect the camera mounts and brackets to ensure they are secure and have not been tampered with.
Installing an outdoor security camera is a valuable investment in the safety and security of your home. By carefully selecting the right camera, planning the installation, and following the proper steps, you can ensure that your camera provides reliable and effective surveillance. Regular maintenance and configuration adjustments will help you get the most out of your security system, providing peace of mind and protection for your property.












There are no comments for this blog.