How To Make A Cheap Photography Light Box?
In the realm of photography, particularly product photography, a light box (or light tent) is an indispensable tool. It ensures consistent, diffuse lighting, minimizes shadows, and enhances the clarity of the subject. While professional light boxes can be costly, creating one at home is straightforward, economical, and yields excellent results. In this article, we'll explore a step-by-step guide to constructing a budget-friendly photography light box and the techniques to maximize its effectiveness.
---
Why Use a Light Box?
Before diving into the construction process, let’s understand why a light box is so critical:
1. Consistent Lighting: It eliminates harsh shadows and uneven lighting by diffusing light around the subject.
2. Focus on the Subject: A neutral background enhances the prominence of the object being photographed.
3. Cost-Effective Solution: A DIY light box is not only budget-friendly but also customizable to your specific needs.
---
Materials Needed
Creating a light box requires readily available, inexpensive materials:
- A Large Cardboard Box: Size depends on the subject; ensure it's sturdy and proportional to the objects you intend to photograph.
- White Tissue Paper or Thin Fabric: For diffusing light.
- White Poster Board or Sheet: As the background.
- Tape or Glue: To secure materials.
- Utility Knife or Scissors: For cutting the box.
- Desk Lamps or LED Lights: Two to three lights for consistent illumination.
- Clothespins or Binder Clips: Optional, for securing fabric.
The total cost of these items typically ranges between $10 and $30, depending on what you already have at home.
---
Step-by-Step Guide to Building a Light Box
1. Prepare the Cardboard Box
- Choose a sturdy cardboard box that fits your needs.
- Remove the top flaps for an open top.
- Using a utility knife, cut large rectangular openings on three sides of the box (leaving the base and one side intact). These openings will be covered with diffusing material.
2. Attach Diffusing Material
- Cut white tissue paper or fabric slightly larger than the openings.
- Secure the paper or fabric over the openings using tape or glue. This material softens and disperses light, eliminating harsh shadows.
3. Install the Background
- Cut a piece of white poster board that fits snugly inside the box.
- Curve the poster board from the top to the bottom inside the box to create a seamless, infinity-style backdrop.
- Secure it at the edges with tape or clips.
4. Set Up Lighting
- Position two or three desk lamps or LED lights outside the box, directing them through the tissue-covered openings.
- Use daylight-balanced bulbs (5000K–6500K) for consistent, natural lighting.
- Adjust the angle and distance of the lights to achieve optimal diffusion.
---
Using the Light Box
After assembling the light box, follow these tips to achieve professional-quality photos:
1. Stabilize Your Camera: Use a tripod to prevent blur caused by hand movement.
2. Adjust Camera Settings:
- Use a low ISO (100–200) to reduce noise.
- Set the aperture to a medium or high value (f/8–f/16) for maximum sharpness.
- Experiment with shutter speed for proper exposure.
3. Position the Subject: Place the object in the center of the light box for even illumination.
4. Experiment with Angles: Adjust the camera angle to find the most flattering perspective for your subject.
---
Enhancing Results with Post-Processing
Even with the best DIY setup, some post-editing can elevate your images. Consider these tools and techniques:
- Crop and Adjust Composition: Align the subject and remove unwanted elements.
- Brightness and Contrast: Fine-tune for balanced exposure.
- Color Correction: Ensure the colors appear natural and vibrant.
- Sharpening: Enhance details, especially for intricate products.
Popular photo editing tools include Adobe Lightroom, Photoshop, and free alternatives like GIMP or Snapseed.
---
Advantages of a DIY Light Box
1. Cost Savings: Professional-grade light boxes can cost upwards of $100, while a DIY version can be made for a fraction of the price.
2. Customization: Tailor the size and design to suit your specific needs.
3. Portability: Lightweight and easy to assemble or disassemble.
4. Sustainability: Upcycle materials such as old boxes or fabric scraps.
---
Practical Applications
A light box isn’t just for product photography. It’s versatile and can be used for:
- E-commerce: Enhance product photos for online stores.
- Hobbyists: Showcase handmade crafts, collectibles, or jewelry.
- Content Creators: Improve social media visuals with consistent and polished imagery.
---
Troubleshooting Common Issues
1. Overexposed or Underexposed Photos:
- Adjust the distance or angle of the lights.
- Modify camera settings like shutter speed and ISO.
2. Uneven Lighting:
- Ensure all light sources are evenly distributed.
- Double-check the integrity of the tissue or fabric for tears or uneven coverage.
3. Distracting Reflections:
- Use matte-finish objects or adjust the position of the light sources.
4. Crinkled Background:
- Replace or smooth out the poster board to maintain the seamless effect.
---
Expanding Your DIY Knowledge
Once you master the basics of a light box, you can innovate further:
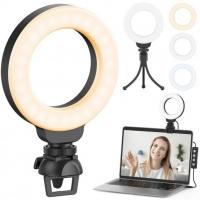
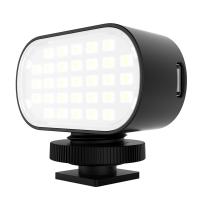
- Upgrade Lighting: Add more advanced LED panels or ring lights for better control.
- Experiment with Colored Backdrops: Use different shades of poster board to suit your subject’s aesthetic.
- Add a Rotating Platform: Create dynamic 360° shots for videos or animations.
---
Final Thoughts
A photography light box is a game-changer for anyone looking to capture high-quality, professional-looking images on a budget. By following the steps outlined above, you can create a versatile tool that not only saves you money but also allows you to produce stunning photos with minimal effort. Whether you’re an aspiring photographer, an e-commerce seller, or a hobbyist, this DIY solution ensures that great photography is within everyone’s reach.
Mastering the art of using a light box takes practice, but the results are worth the effort. With creativity and resourcefulness, even the most budget-conscious photographers can elevate their work. So grab your tools, set up your light box, and start capturing images that truly shine.











There are no comments for this blog.