How To Make A Flash Ring?
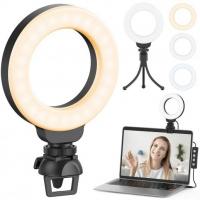
Creating a flash ring, also known as a ring light, can be a rewarding DIY project that enhances your photography and videography by providing even, diffused lighting. This article will guide you through the process of making your own flash ring, covering the materials needed, step-by-step instructions, and tips for achieving the best results. Whether you're a professional photographer, a hobbyist, or someone who enjoys DIY projects, this guide will help you create a functional and effective flash ring.
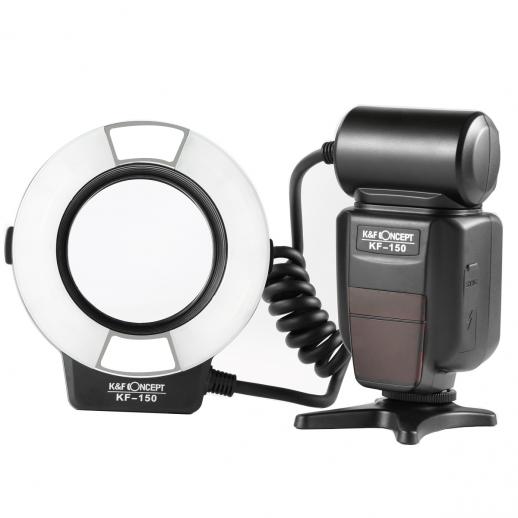
Materials Needed
Before you start, gather the following materials:
1. LED Strip Lights: These are the primary light source for your flash ring. Choose LED strips that are bright, energy-efficient, and have a color temperature suitable for photography (around 5500K for daylight balance).
2. Circular Base: This can be a plastic or metal ring, or even a repurposed item like an embroidery hoop or a cake pan.
3. Power Supply: Ensure it matches the voltage and current requirements of your LED strip.
4. Diffuser Material: This can be a white plastic sheet, parchment paper, or any translucent material to soften the light.
5. Adhesive: Double-sided tape or hot glue to attach the LED strip to the base.
6. Wire and Soldering Kit: For connecting the LED strip to the power supply.
7. Switch: Optional, but useful for turning the flash ring on and off easily.
8. Tools: Scissors, wire cutters, and a soldering iron.
Step-by-Step Instructions
Step 1: Prepare the Circular Base
Choose a circular base that matches the size you want for your flash ring. If you're using an embroidery hoop or a cake pan, ensure it's sturdy enough to hold the LED strip. Clean the surface to ensure the adhesive will stick properly.
Step 2: Attach the LED Strip
Measure the circumference of your circular base and cut the LED strip to the appropriate length. Most LED strips have cut points where you can safely cut them without damaging the circuit. Use double-sided tape or hot glue to attach the LED strip to the base, ensuring it's evenly spaced around the circle.
Step 3: Connect the Power Supply
If your LED strip doesn't come with a pre-attached power supply, you'll need to connect it yourself. Strip the ends of the wires on the LED strip and the power supply. Solder the wires together, matching the positive and negative terminals. If you're using a switch, solder it in line with one of the wires. Insulate the connections with electrical tape or heat shrink tubing.
Step 4: Add the Diffuser
Cut your diffuser material to fit over the LED strip on the circular base. Attach it using tape or glue, ensuring it covers the LEDs completely. The diffuser will soften the light, reducing harsh shadows and creating a more even illumination.
Step 5: Test the Flash Ring
Plug in the power supply and turn on the switch (if you added one) to test your flash ring. Ensure all the LEDs light up and the diffuser is effectively softening the light. Make any necessary adjustments to the positioning of the LEDs or the diffuser.
Tips for Best Results
1. Choose the Right LEDs: The quality of your flash ring largely depends on the LEDs you use. Opt for high CRI (Color Rendering Index) LEDs to ensure accurate color representation in your photos and videos.
2. Use a Dimmer: Adding a dimmer switch allows you to adjust the brightness of your flash ring, giving you more control over your lighting setup.
3. Portable Power: If you plan to use your flash ring on the go, consider using a battery pack instead of a plug-in power supply.
4. Mounting Options: Think about how you'll mount your flash ring. You can attach it to a tripod, a light stand, or even directly to your camera, depending on your needs.
5. Experiment with Diffusers: Different diffuser materials can produce varying effects. Experiment with different options to find the one that works best for your style of photography or videography.
Practical Applications
A DIY flash ring can be used in various scenarios to improve your lighting setup:
1. Portrait Photography: A flash ring provides even, flattering light that reduces shadows and highlights facial features.
2. Macro Photography: The circular light source is ideal for close-up shots, illuminating small subjects evenly.
3. Videography: Use a flash ring to achieve consistent lighting for vlogs, tutorials, or any video content.
4. Product Photography: Enhance the details and colors of products by using a flash ring to eliminate harsh shadows.
Troubleshooting Common Issues
1. Uneven Lighting: If your flash ring produces uneven lighting, check the spacing of the LEDs and the placement of the diffuser. Ensure the LEDs are evenly distributed and the diffuser is not too close to the LEDs.
2. Flickering Lights: Flickering can be caused by a poor connection or an inadequate power supply. Double-check your soldering and ensure your power supply matches the LED strip's requirements.
3. Overheating: LEDs can overheat if they're not properly ventilated. Ensure your flash ring has adequate airflow and consider using a heat sink if necessary.
Creating your own flash ring is a cost-effective and customizable way to enhance your photography and videography lighting. By following the steps outlined in this guide, you can build a flash ring that meets your specific needs and preferences. Remember to choose high-quality materials, take your time with the assembly, and experiment with different setups to achieve the best results. With a little effort and creativity, you'll have a professional-grade lighting tool that can significantly improve the quality of your visual content.











There are no comments for this blog.