How To Make A Photo Studio Light Box?
How to Make a Photo Studio Light Box: A Step-by-Step Guide
Setting up a DIY photo studio light box is a fantastic way to create professional-looking product photos at home or in your own studio. Whether you're an e-commerce seller, a hobbyist photographer, or simply someone who wants to capture better images of small objects, a light box can significantly improve the quality of your photos. In this guide, we'll walk you through the process of building your own photo studio light box, ensuring you get well-lit, sharp, and visually appealing images.
What is a Photo Studio Light Box?
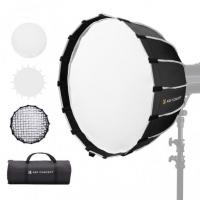
A photo studio light box, often called a light tent, is a box that diffuses light to evenly illuminate small objects for photography. It typically consists of a white or neutral-colored interior to minimize color distortion and provide even light distribution. The sides and top are usually made of a translucent material that diffuses light to reduce harsh shadows, and it often features a backdrop that can be changed to suit your subject.
A light box creates a controlled lighting environment, which is ideal for taking close-up or macro shots. These photos often require soft, diffused light to minimize shadows and achieve the necessary clarity and detail.
Why Should You Use a Photo Studio Light Box?
Before diving into the process of making your own light box, it's important to understand the benefits it can bring to your photography:
1. Improved Lighting Control: A light box gives you greater control over how light is distributed, eliminating harsh shadows and creating a soft, even glow around your subject.
2. Enhanced Image Quality: With even lighting, your photos will be sharper, with accurate colors and fewer unwanted reflections.
3. Convenience and Versatility: Whether you're photographing jewelry, small electronics, artwork, or any other product, a light box provides the perfect environment for crisp, clear photos.
4. Cost-Effective: A DIY light box is much more affordable than buying professional-grade studio equipment, and you can make one using inexpensive materials.
Now that you understand the purpose of a light box, let's get started on building one.
Materials You’ll Need
The materials required for making a photo studio light box are simple and easy to source. Here’s a basic list of what you’ll need:
1. Cardboard Box: A medium to large-sized box, preferably a square or rectangular one. A shoebox or any sturdy box with a solid shape will work well.
2. White Fabric or Tissue Paper: This will be used to diffuse the light. It can be a plain white bedsheet, a shower curtain, or even a couple of layers of tissue paper.
3. White Poster Board or Foam Board: These will serve as the backdrop and the base of your light box, providing a smooth, reflective surface for your subject.
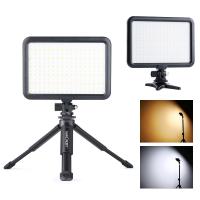
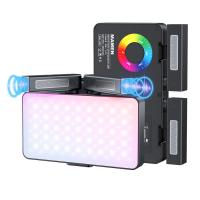
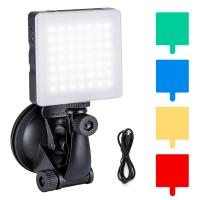
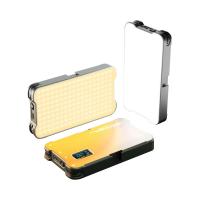
4. LED Strip Lights or Desk Lamps: These will act as your light sources. LED lights are ideal because they provide consistent light and don’t generate too much heat.
5. Scissors or a Utility Knife: To cut the cardboard and fabric.
6. Tape or Glue: To assemble the box and attach the fabric or tissue paper.
7. Ruler or Measuring Tape: For accurate measurements and cuts.
8. Optional – Clamps or Clothespins: These can be used to hold the fabric or paper in place while assembling.
Step-by-Step Guide to Building Your Own Photo Studio Light Box
Step 1: Prepare the Cardboard Box
The first step in constructing your light box is to prepare the cardboard box. This will be the main structure for your light box.
1. Choose a box: Select a box with a size appropriate for the objects you plan to photograph. A 12-inch x 12-inch (30 cm x 30 cm) box is a good size for most small to medium products.
2. Cut out the sides: Use your scissors or utility knife to cut out the top and the two sides of the box. Leave the bottom and the other side intact. The goal is to create open sides for light to pass through and diffuse around the object.
3. Smooth the edges: Once the sides are cut, smooth the edges with tape to avoid any sharp corners that could tear the fabric or scratch your subject.
Step 2: Apply the Diffusing Material
After the basic structure of your box is cut, the next step is to apply diffusing material to the open sides. This material will soften the light, reducing harsh shadows and creating a more even light source.
1. Cut fabric or tissue paper: Measure the size of the openings you’ve made in the box. Cut the fabric or tissue paper to match the size of each opening. If you’re using fabric, make sure it is thin and white to allow light to pass through without altering the color of your subject.
2. Attach the fabric: Using tape or glue, attach the fabric or tissue paper to the openings. Make sure it’s taut and covers the entire opening. If you're using fabric, stretch it gently to avoid wrinkles, which could distort the light.
3. Multiple layers for more diffusion: If you find that the light is still too harsh after the first layer, you can add additional layers of tissue paper or fabric. Just ensure it’s not too dense, as you still need the light to penetrate through.
Step 3: Create the Background and Base
Now that your box is ready, it’s time to add the background and base to complete the light box. The background should be smooth and non-reflective to avoid distracting elements in your photos.
1. Cut the white poster board: Measure and cut the poster board or foam board to fit the bottom and back of the box. This will serve as your backdrop. If you’re using a foam board, it will also help reflect light back onto your subject, enhancing its visibility.
2. Attach the backdrop: Use tape or glue to secure the white board to the inside back and bottom of the box. If you want a seamless backdrop effect, position the board so it curves smoothly from the back to the bottom, creating an "infinity" effect with no visible edges.
Step 4: Set Up Your Lighting
Now comes the most important part of the process: setting up your lighting.
1. Position your lights: If you’re using LED strip lights, you can attach them to the inside of the box. You can place the strips along the top and the two sides. If you’re using desk lamps, place them at a 45-degree angle on either side of the box, ensuring they shine through the diffusing fabric.
2. Adjust the distance: The closer your light sources are to the object, the brighter the light will be. However, this can also create harsh shadows. Experiment with the distance until you achieve the desired lighting balance.
3. Use a reflector: If you feel one side of your object isn’t illuminated enough, you can use a small white reflector (like a piece of white foam board) to bounce light back onto the shadowed side.
Step 5: Test Your Setup
Once everything is set up, it's time to test your light box. Place your product or object inside the box and take a few test shots.
1. Adjust the light: Pay attention to the shadows and highlights in your photos. If certain areas are too dark, adjust the lighting or reposition the product.
2. Check the background: Ensure that the background is smooth and free of wrinkles or seams. If it’s distracting, try adjusting your lighting or background material.
3. Experiment with angles: Take photos from different angles to see how the light is interacting with your subject. This can help you determine the best position for your object inside the box.
Step 6: Take Your Photos
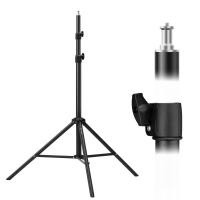
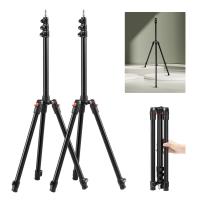
Once you're satisfied with the lighting and setup, it’s time to start taking your product photos. Use a camera with manual controls to adjust the exposure, white balance, and focus for the best results. For close-up shots, make sure your camera is on a tripod to avoid any blur from shaking.
Tips for Better Photos
1. Use a Tripod: To avoid camera shake, use a tripod, especially for close-up shots or low light conditions.
2. Natural Light: If possible, position the light box near a window where natural light can supplement your artificial lighting for a softer effect.
3. Post-Processing: After taking your photos, use photo-editing software like Adobe Lightroom or Photoshop to enhance the colors, brightness, and sharpness.
4. Experiment with Different Backgrounds: While white is classic, try experimenting with different colors or textures for your backdrop to complement your subject.
5. Consistent Lighting: Ensure that your lighting setup remains consistent for all photos to maintain uniformity across a product shoot or catalog.
Creating your own photo studio light box is a cost-effective and straightforward way to dramatically improve the quality of your product photography. With a bit of time and effort, you can create a professional-looking setup that helps you achieve crisp, well-lit photos for any project. Whether you're shooting for an online store, social media, or personal projects, this DIY light box will elevate your photography game and help you capture your products in the best light possible.





There are no comments for this blog.