How To Make An Underwater Wireless Camera?
How to Make an Underwater Wireless Camera: A Step-by-Step Guide
Creating an underwater wireless camera is a fascinating and rewarding project for anyone interested in electronics, photography, or diving. Whether for recreational use, scientific exploration, or industrial applications, having a wireless camera system that works underwater presents unique challenges due to the harsh environment. However, with the right components and careful design, you can build a functional system that delivers high-quality video or images from beneath the surface. In this guide, we’ll explore the key steps in making an underwater wireless camera, covering the required materials, the science behind wireless signals underwater, and practical tips for assembling the system.
Understanding the Challenges of Underwater Wireless Communication
Before diving into the process of building an underwater wireless camera, it's important to understand the challenges posed by the underwater environment. Wireless communication, particularly radio frequencies (RF), suffers dramatically underwater. Water, especially saltwater, is a good conductor of electricity, which leads to rapid attenuation of radio waves. The deeper you go, the harder it becomes for traditional RF signals like Wi-Fi or Bluetooth to transmit.
To overcome these issues, specialized technology is required, such as:
- Acoustic waves: These use sound waves for communication underwater and are much more effective at longer distances in aquatic environments.
- Optical waves: These can carry data using visible or infrared light. However, optical communication can be disrupted by murkiness, limited visibility, and water turbulence.
- Wired solutions: While not strictly wireless, some underwater camera systems use fiber optics or tethered cables to provide high-speed data transmission without significant signal loss.
For this guide, we’ll focus on a hybrid approach using wireless communication for short distances, where the camera is intended for use in relatively shallow waters, such as pools or lakes. We’ll combine acoustic communication with optical signals, which should provide a reasonable balance of reliability and functionality.
Key Components for Building the Underwater Wireless Camera
To build a functioning underwater wireless camera system, you’ll need a few essential components. Each of these has a specific role in ensuring the camera works effectively underwater.
1. Waterproof Camera Housing
The first consideration is the housing for your camera. Any camera used underwater must be protected from water damage. There are a few options here:
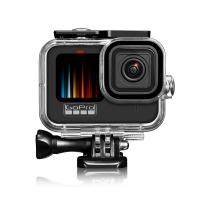
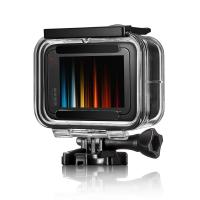
- Ready-made waterproof camera housings: Many companies produce camera housings designed specifically for action cameras (like GoPro) or custom camera modules. These are often rated to withstand pressure at various depths.
- Custom housing: For DIY projects, you can build a custom waterproof enclosure using materials like acrylic or polycarbonate. Ensure it’s sealed properly to prevent water ingress.
Remember that the housing must also have ports for the lens, power cables, and communication lines, so precision is key.
2. Wireless Communication Module
As mentioned, RF signals don’t travel well underwater, so you’ll need to use alternatives like acoustic modems for reliable communication. Acoustic modems use sound waves to transmit data underwater and are ideal for short to medium-range communication. Here are some options:
- Acoustic modem: These devices are designed for underwater communication and can transmit video signals or low-resolution images at various frequencies. You can connect them to your camera and then use a receiver above water to get the footage.
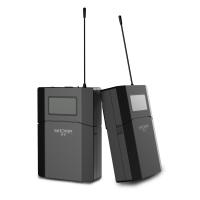
- Wireless video transmitters (for short distances): If you're working in shallow water, you can use a wireless video transmitter such as Wi-Fi or Bluetooth, which will have better range and signal clarity in clear water.
A typical range for acoustic modems is between 10 to 500 meters, depending on the model and water conditions. Bluetooth can work in shallow or calm water, but its range is usually much shorter, up to 10 meters or so. Opt for the best communication method depending on your project requirements.
3. Camera (Image Sensor)
Choosing the right camera for underwater use is critical. Go for a camera that has:
- Low-light capabilities: Underwater conditions often lead to poor lighting, so cameras that perform well in low-light situations are preferable.
- Small form factor: Since you'll need to fit the camera into a waterproof housing, the camera should be compact and lightweight.
- Good resolution: Ideally, the camera should have at least 1080p resolution, though higher resolutions like 4K would provide better clarity.
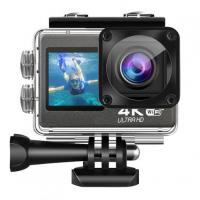
You could use an off-the-shelf action camera, or a DIY option such as a Raspberry Pi with a compatible camera module. If you're using the latter, ensure that it has good low-light performance, as this will affect image quality underwater.
4. Power Supply
Since you’ll be working underwater, you must choose a power source that’s both reliable and long-lasting. You’ll typically be dealing with rechargeable lithium-ion or lithium-polymer (LiPo) batteries that are:
- Waterproof or enclosed: Ensure the battery is protected from water exposure.
- High-capacity: Underwater cameras tend to consume a lot of power, especially when transmitting video wirelessly. Consider high-capacity batteries (like 3000mAh or higher).
- Long runtime: For longer usage, opt for batteries with a longer runtime or plan to incorporate charging ports into your housing.
5. Power Regulation and Management
Underwater wireless cameras require a reliable power supply, and voltage regulation ensures that the camera and wireless systems receive stable power. You’ll need a DC-DC converter to step up or step down voltage as necessary for the camera and transmitter. An efficient power management system is crucial to prevent the battery from draining too quickly.
6. Floating or Mounting Mechanism
To use the camera effectively underwater, you’ll also need a way to position it. You can use:
- Floating platforms: These can be designed to keep the camera upright and at the desired depth.
- Mounting systems: If you’re planning on mounting the camera to a drone or a diving rig, ensure the mount is secure and able to handle the camera’s weight.
Steps to Assemble the Underwater Wireless Camera
Step 1: Camera Setup and Enclosure
Start by setting up your camera inside the waterproof enclosure. If you're using a GoPro or similar camera, you can simply place it in the housing. For custom camera systems (e.g., Raspberry Pi), mount the camera securely inside a clear acrylic or polycarbonate housing. Make sure that all the wiring is sealed, and that the lens is properly aligned with the housing opening.
Step 2: Wireless Communication Integration
Connect the wireless communication module to your camera system. This could involve wiring the camera to a wireless video transmitter or integrating an acoustic modem. Ensure that all cables are properly sealed and insulated to prevent water from damaging the components. If you are using an acoustic modem, it may need to be mounted separately from the camera to ensure optimal performance.
For short-range applications (less than 10 meters), you can use Wi-Fi or Bluetooth to transmit data above the water. For longer-range communication, especially in deeper water, acoustic modems are the better choice.
Step 3: Power System Integration
Next, wire your power system to the camera and communication module. If you’re using a LiPo battery, ensure that it's properly sealed and that the battery connections are safe from water damage. You can connect the battery to a DC-DC converter to ensure stable power for all components. Securely place the power system inside the housing, leaving enough space for ventilation and heat dissipation.
Step 4: Test the System Above Water
Before taking your camera underwater, it’s important to test it above water. Check the camera’s video quality, the range of the wireless transmission, and the functionality of the power system. Test for overheating issues or connectivity problems.
Step 5: Deploy the Camera Underwater
Once the system works perfectly above water, it's time to test it underwater. Drop the camera into your testing area (a pool, shallow lake, or ocean) and monitor the wireless transmission. Ensure the signal quality and the camera feed are consistent, even as you move the camera around. If using an acoustic modem, be mindful of signal degradation due to water turbidity or surface noise.
Conclusion
Building an underwater wireless camera system requires careful planning and the right combination of components. The key challenge is ensuring that the camera, power system, and wireless communication modules are properly protected from the harsh underwater environment while still delivering high-quality performance. By using specialized acoustic modems or short-range wireless technologies like Bluetooth or Wi-Fi, you can achieve a working system that allows you to capture stunning video and images from beneath the surface.
While the challenges are significant, the ability to capture live underwater footage opens up exciting possibilities for both hobbyists and professionals alike. Whether you're exploring marine life, conducting underwater surveys, or simply trying to capture unique footage, this DIY project can lead to impressive results when done right.












There are no comments for this blog.