How To Make Video Look White Light?
In the world of video production, lighting plays a crucial role in determining the overall look and feel of your footage. One of the most common goals in achieving professional-looking video is ensuring that your scenes have the correct lighting temperature. In particular, “white light” refers to a lighting setup that gives off a natural or neutral light tone, neither too warm nor too cool. This type of light is ideal for creating a realistic, true-to-life look in your videos, especially when shooting subjects like interviews, product shots, or tutorials.

If you want your video to have that crisp, clear white light feel, here’s everything you need to know, from understanding white light to practical tips on achieving it with proper gear, camera settings, and post-production techniques.
What is White Light?
In simple terms, white light is light that appears to have no color hue, typically mimicking natural daylight. It’s a balanced combination of all the colors in the visible spectrum, which is why it can look “neutral” or colorless.
White light is characterized by a color temperature of around 5500K to 6500K on the Kelvin scale. The lower the Kelvin number, the warmer the light (more yellow/orange). The higher the Kelvin number, the cooler or bluer the light becomes. Daylight typically falls within this range, so to achieve a natural look in your video, you’ll want to replicate that same light temperature.
Why Is White Light Important in Video?
The color of light affects how your video will look. Using the wrong type of light can make your footage feel off, either too warm and cozy or too harsh and cold. White light, specifically, helps ensure that your subjects’ colors appear true-to-life without any unwanted color cast.
Here’s why getting white light right is important for your video:
1. Accurate Color Representation: White light ensures that the colors of your subject matter, including skin tones, fabrics, and props, appear natural. If your video lighting is too warm or too cool, it can distort these colors.
2. Professional Appeal: Videos shot under well-balanced, neutral lighting appear more polished and professional, as they mimic the lighting you would see in real life.
3. Universal Look: White light is versatile and can be used across different settings — whether indoors or outdoors. It’s especially useful when you need a consistent look across a variety of shots or locations.
Step-by-Step Guide to Achieving White Light in Your Videos
1. Choose the Right Light Source
The first step in achieving white light in your video is selecting the right light sources. Not all light bulbs or fixtures emit the same color temperature. For true white light, opt for:
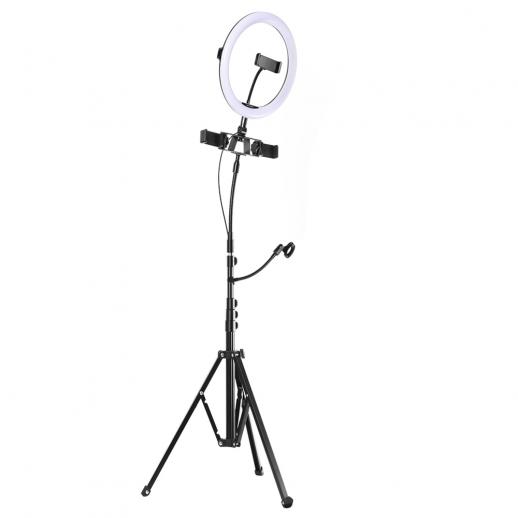
- LED Panels: High-quality LED lights often come with adjustable color temperatures, allowing you to fine-tune them to the exact shade of white light you need. Many LED lights also come with built-in diffusers, which help soften the light and reduce harsh shadows.
- Daylight Bulbs: If you’re using traditional bulbs, daylight bulbs with a color temperature of around 5000K to 6500K are the best choice. They emit a bright, neutral light that mimics daylight.
- Fluorescent Lights: Fluorescent tubes are another option, though they can sometimes introduce a slight greenish hue. Be sure to check the color temperature on the packaging before purchasing.
2. Set the Right Color Temperature on Your Camera
Once you’ve set up the correct lighting, it’s time to adjust your camera to ensure it matches the white light. Cameras have a setting known as white balance, which controls the color temperature in your footage.
- Auto White Balance (AWB): Most modern cameras, including smartphones, come with an auto white balance feature that automatically adjusts to the lighting in the environment. However, this can sometimes be unreliable, especially under mixed lighting conditions or artificial lights that aren’t purely white.
- Manual White Balance: For more control, set the white balance manually. On most cameras, you can do this by either selecting a preset white balance (e.g., "Daylight," "Tungsten," or "Fluorescent") or by using a custom white balance setting. To set a custom white balance:
1. Place a white or gray card in the scene.
2. Use your camera’s white balance tool to adjust until the card appears neutral, not too warm or too cool.
- Kelvin Settings: Some high-end cameras allow you to adjust the Kelvin temperature manually. Set your camera’s white balance to a range between 5500K and 6500K for a neutral, natural look.
3. Control the Intensity and Direction of Light
While having the correct color temperature is key, the way light interacts with your subject also matters. Here are some tips on controlling the intensity and direction:
- Use Diffusers: If your lighting setup is too harsh, use a diffuser (a translucent fabric or plastic sheet) to soften the light. Diffusers help to scatter light more evenly across the subject, reducing harsh shadows and creating a softer, more flattering look.
- Key Light Positioning: Place your key light (the primary light source) at a 45-degree angle to your subject. This ensures that the light is illuminating the subject without causing flatness or unflattering shadows.
- Fill Lights: Use fill lights (weaker secondary lights) to soften shadows created by the key light. This will ensure that details aren’t lost in the shadows, and the video looks evenly lit.
4. Avoid Mixed Lighting
One of the most common mistakes when shooting videos is mixing different light sources that have different color temperatures. For example, using both tungsten (warm) and daylight (cool) lights in the same shot can result in a disjointed look where some parts of the scene have a warm cast while others appear cooler.
To avoid mixed lighting:
- Stick to one type of light source for all of your lights, whether that’s daylight-balanced LEDs or softboxes with daylight bulbs.
- If you must mix light sources, use gels (colored filters) to correct the light temperature of one or more of the light sources.
5. Check the White Balance in Post-Production
Even if you set everything up perfectly, there may still be slight discrepancies between what you see on set and what the camera captured. This is where post-production tools come in.
Using software like Adobe Premiere Pro, DaVinci Resolve, or Final Cut Pro, you can fine-tune the color balance of your video. These tools allow you to adjust the temperature and tint sliders, which can help correct any minor color imbalances and get your footage closer to the ideal white light look.
6. Monitor Your Footage in Real-Time
To get the best results, monitor your footage in real-time while you shoot. Using an external monitor with accurate color reproduction will help you see if the lighting is giving off the desired effect. This is especially useful if you're shooting in a large room or under dynamic lighting conditions.
Many external monitors come with built-in tools like waveform monitors or RGB parade scopes, which can help you evaluate the color balance and exposure of your footage in real time.
Troubleshooting Common Issues
Even with the best equipment, achieving perfect white light can sometimes be tricky. Here are a few common issues and how to fix them:
- Tint Issues: If your video has a noticeable green or magenta hue, adjust the tint control on your camera or in post-production. It may be that the white balance was slightly off.
- Overexposure or Underexposure: White light can often result in overexposure if the light is too intense, or underexposure if the light is too weak. Use the camera’s exposure settings (aperture, shutter speed, ISO) to find the optimal balance.
- Light Flicker: Some artificial lights, especially cheap fluorescent or LED lights, can flicker or pulse in a way that’s invisible to the naked eye but noticeable on camera. Use lights rated for video production to avoid this issue, or adjust your shutter speed to sync with the light frequency.
Final Thoughts
Achieving that clean, white light look in your video can significantly improve the quality of your production, making it appear more professional and true to life. Whether you’re shooting an interview, a tutorial, or a product demo, lighting is key to creating a polished result.
By choosing the right light sources, adjusting your camera settings, and monitoring the results throughout the process, you can ensure that your videos look crisp, neutral, and flattering. Keep experimenting with different lighting setups and pay attention to the nuances of white balance—soon, you'll master the art of shooting under perfect white light.


