How To Make Your Video Lighter?
Mastering the Art of Making Videos Lighter: A Practical Guide

Videos are powerful tools for communication, whether you're a content creator, marketer, or simply capturing memories. However, poorly lit videos can detract from your message and engagement. Lightening your videos effectively is both an art and a science, requiring the right combination of techniques and tools. This article breaks down the key strategies, tools, and tips you need to ensure your videos are vibrant and well-lit.
---
Why Lighter Videos Matter
Light is fundamental to how we perceive images. A well-lit video enhances clarity, draws attention to your subject, and conveys professionalism. Poor lighting can result in:
- Low Engagement: Dark videos are harder to watch, reducing viewer retention.
- Unclear Visuals: Important details may be obscured.
- Lower Perception of Quality: Videos that appear too dark or poorly lit can seem unprofessional.
To create lighter videos, focus on enhancing brightness during production and post-production while maintaining a natural appearance.
---
Production Techniques for Better Lighting
Effective video lighting begins during the filming process. Addressing lighting issues at this stage minimizes the work required in post-production and ensures better results.
1. Utilize Natural Light
Natural light is a cost-effective and readily available resource. Follow these guidelines to make the most of it:
- Timing is Key: Shoot during the "golden hours" (early morning or late afternoon) when natural light is soft and diffused.
- Positioning: Place your subject facing the light source to avoid shadows on their face.
- Diffusers: Use sheer curtains or white fabric to soften harsh sunlight if shooting indoors.
2. Invest in Artificial Lighting
Artificial lighting allows for greater control over your video's brightness and ambiance. Common lighting setups include:
- Three-Point Lighting: Use a key light, fill light, and backlight to illuminate your subject evenly and reduce shadows.
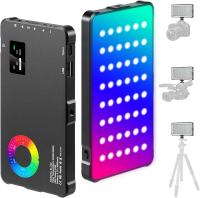
- Ring Lights: Ideal for close-up shots or creating an even glow on the subject's face.
- Softboxes: These provide diffused, even lighting, mimicking natural light.
3. Adjust Camera Settings
Your camera’s settings significantly influence the brightness of your video. Adjust the following parameters to optimize light capture:
- ISO: Increase the ISO for brighter footage in low-light settings, but avoid overdoing it to prevent grainy visuals.
- Aperture: Use a wider aperture (smaller f-number) to let in more light.
- Shutter Speed: A slower shutter speed allows more light to enter, but be cautious of motion blur.
4. Use Reflectors
Reflectors bounce light onto your subject, reducing shadows and enhancing brightness. They are inexpensive and easy to use, making them a must-have tool for any video production.
---
Post-Production Techniques for Lightening Videos
Even with careful planning, videos might require brightness adjustments during editing. Modern editing software provides powerful tools to fine-tune lighting.
1. Adjust Brightness and Contrast
These are the most straightforward settings for lightening a video:
- Brightness: Increases the overall light level of your video.
- Contrast: Enhances the distinction between light and dark areas to avoid a washed-out look.
2. Work with Color Grading
Color grading involves adjusting the colors and tones of your video to achieve a balanced, natural appearance. Key adjustments include:
- Exposure: Controls how much light is perceived in your video.
- Highlights and Shadows: Brighten the highlights while maintaining detail in the shadows.
- Midtones: Adjust midrange brightness for a balanced result.
3. Use LUTs (Look-Up Tables)
LUTs are pre-configured color grading presets that can instantly enhance your video's brightness and tone. Choose a LUT designed for lightening footage while maintaining color accuracy.
4. Apply Noise Reduction
Brightening a video can sometimes introduce noise (grainy textures). Most video editing software includes noise reduction tools to clean up the footage without sacrificing quality.
---
Software Tools for Video Lightening
Numerous software options cater to varying skill levels and budgets. Here are some of the best tools for lightening videos:
Beginner-Friendly Tools
- iMovie (Mac): Offers intuitive brightness and contrast controls.
- Windows Photos App (Windows): Simple editing features for basic light adjustments.
Intermediate Tools
- Filmora: Provides user-friendly tools for brightness, contrast, and color grading.
- Adobe Premiere Elements: A simplified version of Premiere Pro, ideal for intermediate editors.
Professional Tools
- Adobe Premiere Pro: Advanced color grading features for precise light and tone adjustments.
- DaVinci Resolve: Renowned for its powerful color correction capabilities.
- Final Cut Pro: Combines professional-grade editing with intuitive controls.
---
Common Mistakes to Avoid
While lightening videos can improve visual quality, improper techniques can result in unwanted side effects. Avoid these common pitfalls:
1. Overexposure
Excessively brightening a video can wash out details, making the footage look artificial. Aim for a balanced light level that retains texture and depth.
2. Uneven Lighting
Inconsistent light levels across different shots can disrupt the flow of your video. Ensure that all scenes are evenly lit during production or corrected during editing.
3. Ignoring Context
Not all videos require bright visuals. For example, darker tones may be appropriate for dramatic or moody content. Lighten your video according to its intended style and message.
4. Relying Solely on Editing
While post-production tools are powerful, they cannot fully compensate for poor lighting during filming. Always prioritize good lighting during production.
---
Advanced Techniques for Creative Lighting
For those looking to add a professional or artistic touch, consider these advanced strategies:
1. High Dynamic Range (HDR) Videos
HDR technology captures a broader range of light and color, resulting in videos with greater detail and vibrancy. Ensure your editing software supports HDR if you opt for this technique.
2. Light Effects and Gradients
Add light overlays or gradient effects during editing to create a dreamy or cinematic look. Use sparingly to maintain a natural aesthetic.
3. Lighting Gels and Filters
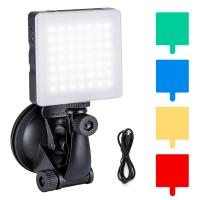
During production, colored gels and filters can modify the tone of your light source, adding warmth or coolness to your video.
---
Practical Tips for Lightening Videos
To ensure success, follow these practical tips:
- Test Shots: Take sample footage to assess lighting conditions before shooting.
- Monitor During Editing: Use a calibrated monitor to accurately gauge brightness and colors.
- Export Settings: Ensure your final video format preserves the brightness and color grading achieved during editing.
---
Conclusion
Creating lighter videos involves a combination of thoughtful planning, technical adjustments, and creative techniques. By optimizing lighting during production and refining brightness in post-production, you can produce videos that captivate and engage your audience. Remember to tailor your approach to your specific video style and goals.
Whether you're a beginner or a seasoned professional, these strategies empower you to elevate your video quality and achieve the perfect balance of light and shadow. Embrace the process, experiment with different techniques, and watch your videos shine—both literally and figuratively!














There are no comments for this blog.