How To Open Switch Sd Card Slot?
The Nintendo Switch is a hugely popular gaming console, but it's not without its quirks and complexities. One of the simplest yet occasionally confounding aspects of the device is locating and opening the SD card slot. This task, while elementary to some, can be challenging for new users or those who are not as tech-savvy. In this article, we'll delve into a detailed guide on how to open the SD card slot on a Nintendo Switch, troubleshoot common issues, and provide some contextual insights to ensure a seamless experience.
Understanding the Importance of the SD Card

Before diving into the specifics of opening the SD card slot, it's vital to understand the importance of securing an SD card for your Nintendo Switch. The SD card primarily serves to expand the storage capacity of your console, allowing you to store more games, downloadable content (DLCs), screenshots, and videos. Given that the Nintendo Switch's internal storage is just 32 GB, which can be consumed rapidly, an SD card is essential for any serious gamer.
Locating the SD Card Slot
The SD card slot on the Nintendo Switch is ingeniously hidden to preserve the aesthetic and functional design of the console. You can find it behind the kickstand on the back of the device. The kickstand is a small, removable piece which you can pry open gently. Here's a step-by-step guide on how to locate and open the SD card slot:
1. Turn Off the Console: Always ensure the console is entirely powered down before attempting to insert or remove the SD card. This prevents any potential data corruption.
2. Position the Switch: Lay the console flat on a stable surface. Ensure the screen of the Nintendo Switch is facing downwards for better accessibility.
3. Open the Kickstand: Locate the kickstand at the back of the console. Gently lift it from the bottom until it is fully open. You don’t need to force it; gentle pressure should suffice.
4. Access the SD Card Slot: Beneath the kickstand, you will see a small slot designated for the microSD card. This is where you will insert your SD card to expand your storage.
Inserting the SD Card

With the SD card slot exposed, the next step involves inserting the SD card correctly.
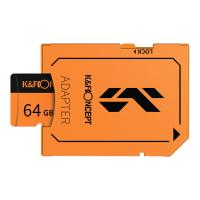
1. Check for Compatibility: Ensure that your SD card is compatible with the Nintendo Switch. The console supports microSD, microSDHC, and microSDXC cards.
2. Insert the Card: With the connector side facing down, gently insert the SD card into the slot until it clicks into place. If it does not go in smoothly, do not force it; make sure it’s aligned correctly and try again.
3. Close the Kickstand: Once in place, carefully close the kickstand to cover the SD card slot.
4. Power On the Console: Turn on the Nintendo Switch and navigate to 'System Settings' > 'System' > 'System Update' to ensure that the console recognizes the new SD card.
Troubleshooting Common Problems

Several issues might arise and can be easily resolved with a bit of troubleshooting:
1. SD Card Not Recognized: If the console fails to recognize the SD card, first verify if the card is properly inserted and is compatible. You may need to format the SD card using the Switch’s system settings.
2. Kickstand Issues: If the kickstand is not opening smoothly, check for any obstructions or dirt lodged in the slot. Cleaning it with a soft brush can help.
3. Data Corruption: If data seems to be corrupt, ensure you turn off the console before removing the SD card. From time to time, it’s also advisable to back up your data.
Formatting the SD Card
When an SD card is newly inserted, the Nintendo Switch may prompt you to format it. Formatting is a crucial step to ensure compatibility and optimum performance:
1. Backup Data: Always backup important data if you are using an already-utilized SD card, as formatting will erase everything on it.
2. Navigate to Settings: From the Home menu, go to 'System Settings', then scroll down to 'System'.
3. Select 'Format SD Card': Follow the on-screen instructions, which will lead you through the formatting process.
Best Practices for Using SD Cards
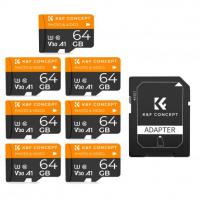
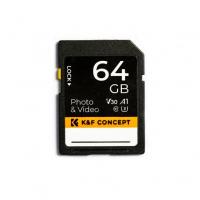
1. Choose a Reliable Card: Invest in a high-quality SD card from reputed manufacturers like SanDisk or Samsung. Performance and durability are crucial.
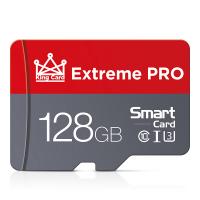
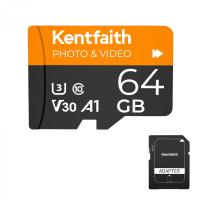
2. Capacity Considerations: Opt for a high-capacity card such as 128GB or 256GB, keeping future storage needs in mind.
3. Regular Updates: Ensure your console’s system software is constantly updated to avoid compatibility issues.
4. Proper Handling: Always power down the console when inserting or removing the SD card to prevent data corruption.
Using the Nintendo Switch with the SD card
The most significant advantage of using an SD card is the enhanced storage capacity:
1. Installing Games and Updates: Games and updates can consume significant storage. With an SD card, you can ensure seamless installation without worrying about capacity.
2. Saving Screenshots and Videos: The Switch allows you to capture screenshots and video clips of your favorite gaming moments. These can be stored efficiently on an SD card.
3. Transfers and Saves: In situations where you get a new Switch, you can easily transfer game data and backups using the SD card.
Though the task of locating and using the SD card slot on a Nintendo Switch may initially seem trivial, it can be a bit tricky for newcomers. However, with this comprehensive guide, the process should be more approachable. Remember to handle your device and the SD card with care, ensuring your console remains in optimal condition. By following best practices for inserting, formatting, and maintaining your SD card, you can significantly enhance your gaming experience by leveraging expanded storage capabilities. Enjoy your uninterrupted and expanded gaming sessions!














There are no comments for this blog.