How To Put The Battery In My Camera?
When it comes to maintaining and using your camera efficiently, one of the first and most fundamental skills you need to learn is how to insert the battery properly. This seemingly simple task is crucial for the proper functioning of your camera. Whether it's for casual photography, professional shoots, or vlogging, knowing how to handle your camera's battery is essential.
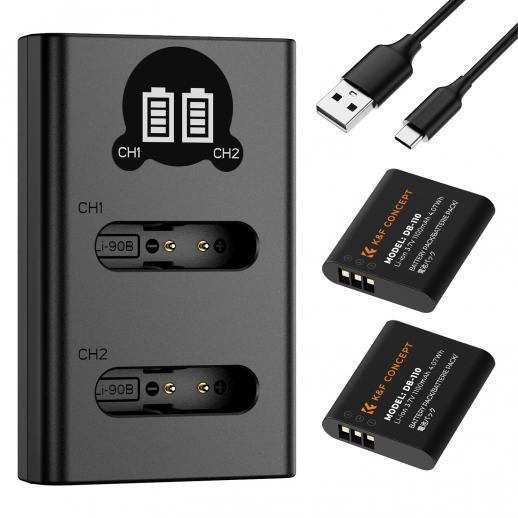
Importance of Correct Battery Handling
One might wonder why it's necessary to focus on the proper insertion of a battery. The main reasons are:
1. Avoiding Damage: Incorrectly inserting the battery can lead to terminal damage either to the battery or the camera’s internal components.
2. Efficiency and Performance: A loosely fitted battery can result in power issues, causing the camera to turn off suddenly or fail to power up.
3. Battery Life: Proper handling and insertion can prolong the battery’s life, ensuring it serves you well for longer periods.
Identifying Your Camera Battery Compartment
The first step in this process is identifying where the battery compartment is located. This can vary considerably depending on the camera model:
1. DSLR Cameras: Typically, the battery compartment is found at the bottom of the camera. There is usually a sliding latch or a hinge with a locking mechanism.
2. Mirrorless Cameras: These often have their battery slots at the bottom as well but may sometimes be found on the side if they have a compact body.
3. Compact Cameras: In many compact or point-and-shoot cameras, the battery compartment is also found at the bottom or sometimes alongside the memory card slot.
Steps to Insert the Battery Correctly
Once you've identified the battery compartment, follow these steps to insert the battery properly:
1. Turn Off the Camera: Always make sure that the camera is turned off before inserting or removing the battery. This minimizes the risk of short circuits and other potential issues.
2. Open the Battery Compartment: Slide the latch or press the button to open the battery compartment. This will vary based on your camera model, so if unsure, refer to the user manual.
3. Check Battery Orientation: Most modern camera batteries are designed to fit only in the correct orientation. Determine this by looking at the terminals; they will need to align with the contacts inside the battery compartment. Batteries often have an indicator such as an arrow or a plus/minus sign showing the direction in which they should be inserted. Ensure proper alignment with these indicators.
4. Insert the Battery: Gently push the battery into the compartment. You should hear a click as it locks into place. Avoid using excessive force as this can damage both the battery and the camera.
5. Close the Battery Compartment: Secure the compartment door by sliding the latch back or closing the hinge until it locks. Make sure it is properly closed to avoid the battery coming loose.
6. Power On the Camera: Once the battery has been inserted and the compartment is securely closed, turn on the camera to ensure that it’s receiving power.
Troubleshooting Battery Issues
Even with the correct handling, you might still encounter issues. Here are some common problems and their solutions:
1. Camera Not Powering On: Double-check that the battery is fully charged. If the camera still doesn’t power on, try removing the battery and reinserting it.
2. Battery Not Fitting: Ensure you are using the correct battery model as prescribed by the manufacturer. Some third-party batteries might not fit perfectly.
3. Battery Life Drastically Reduced: If you notice that the battery life is significantly shorter than usual, it might be time to replace your battery. Rechargeable batteries generally have a finite life span.
4. Camera Shuts Off Unexpectedly: This could be due to a poor contact between the battery terminal and the camera. Remove the battery, clean the contacts with a dry cloth, and try inserting it again.
Maintaining and Extending Battery Life
Here are some tips to maintain and extend your camera battery life:
1. Store Properly: When not in use for long periods, store the battery in a cool, dry place and consider using a battery case.
2. Regular Use: Batteries tend to degrade if not used for extended periods, so ensure you regularly use and recharge your battery.
3. Avoid Extreme Temperatures: Very high or low temperatures can affect battery performance and lifespan.
4. Complete Charge Cycles: Occasionally let your battery run down completely before recharging it again. This helps in recalibrating the battery’s ability to hold a charge.
Brand-Specific Instructions
Different camera brands might have slight deviations in battery handling procedures. Here are generalized steps for some popular brands:
- Canon: Most Canon cameras have a battery release latch that you need to press to insert or remove the battery.
- Nikon: Nikon cameras generally come with a compartment door latch that you need to slide to open and close.
- Sony: Sony mirrorless cameras often feature a locking mechanism inside the battery compartment which needs to be engaged for the battery to sit correctly.
- Fujifilm and Panasonic: These brands often have more compact designs, so ensure you’re handling the battery carefully due to tighter compartments.
Concluding Remarks
Understanding the importance of correctly handling and installing your camera’s battery can save you from a plethora of issues down the line. Proper battery care ensures that both your camera and battery last longer, perform better, and give you a consistent photography experience. While it might seem trivial, the act of inserting the battery correctly is a foundational skill that every camera user must master.
Remember, always refer to your camera’s user manual for model-specific instructions, and if ever in doubt, seek professional help to avoid damaging your valuable equipment. Happy shooting!






![K&F Concept Selfie Ring Light with Cell Phone Holder for Live Stream and Makeup, LED Light [3-Light Mode] [10-Level Brightness] with Remote Control and Flexible Hose Bracket for iPhone Android【Ship to the US Only】 K&F Concept Selfie Ring Light with Cell Phone Holder for Live Stream and Makeup, LED Light [3-Light Mode] [10-Level Brightness] with Remote Control and Flexible Hose Bracket for iPhone Android【Ship to the US Only】](https://img.kentfaith.com/cache/catalog/products/us/KF34.001/KF34.001-1-200x200.jpg)











There are no comments for this blog.