How To Record Audio During Screen Recording?
Recording audio during screen recording has become an essential skill in today’s digital age. Whether you're creating tutorial videos, documenting software issues, or simply sharing gameplay moments, high-quality audio adds significant value to your content. In this article, we'll delve into various methods and tools that can help you record audio effectively during your screen recording sessions. We've broken down the complete process to cater to a variety of devices and operating systems, including Windows, macOS, iOS, and Android. Let's get started.

1. Understanding Your Requirements
Before jumping into the technical aspects, it's crucial to understand your recording needs:
- Internal Audio vs. External Audio: Are you looking to capture the system sounds or narrate with your microphone?
- Quality of Audio: Quality matters a lot. Decide whether you need studio-grade audio or normal audio will suffice.
- Length of Recording: Longer recordings need better file management and storage considerations.
- Software Compatibility: Ensure the screen recording software you select is compatible with your operating system.
2. Screen Recording on Windows
Using Built-in Tools
Xbox Game Bar:
- Step 1: Press `Windows Key + G` to open the Xbox Game Bar.
- Step 2: Click on the microphone icon to enable external audio recording.
- Step 3: Navigate to the 'Capture' tab and click on the 'Record' button to start recording both your screen and audio.
Voice Recorder App: For internal audio, you might need to use an additional app like the Voice Recorder app to capture audio separately and then merge it during editing.
Third-Party Tools
Several third-party tools can simplify the process:
- OBS Studio: Open Broadcaster Software (OBS) Studio is free and open-source. It's a powerful tool for screen recording and streaming, with comprehensive audio capture options.
- Step 1: Install and open OBS Studio.
- Step 2: Add a new source for screen capture and an audio input source.
- Step 3: Start recording by pressing the 'Start Recording' button.
3. Screen Recording on macOS
QuickTime Player:
- Step 1: Open QuickTime Player and select 'New Screen Recording' from the File menu.
- Step 2: Click on the arrow next to the Record button to select your microphone.
- Step 3: Hit 'Record' to start capturing both your screen and audio.
For internal audio, QuickTime does not natively support recording system audio. You can use additional software like Soundflower to route system audio to QuickTime.
Third-Party Tools
Tools like Camtasia or ScreenFlow offer advanced options:
- Camtasia: Known for its user-friendly interface, Camtasia can record both internal and external audio seamlessly.
- Step 1: Open Camtasia and create a new project.
- Step 2: Select 'Screen Recording' and configure the audio settings.
- Step 3: Click 'Start Recording' to capture your screen with audio.
4. Screen Recording on iOS
Built-in Screen Recording:
- Step 1: Go to 'Settings' > 'Control Center' > 'Customize Controls' and add 'Screen Recording'.
- Step 2: Open Control Center by swiping down from the upper-right corner.
- Step 3: Long-press the record button, turn on the 'Microphone Audio', and tap 'Start Recording'.
For internal audio, iOS captures system audio automatically if enabled.
5. Screen Recording on Android
Built-in Options:
- Most Android devices now come with built-in screen recorders that can capture both internal and external audio.
- Step 1: Pull down the notification panel and tap on the screen recorder icon.
- Step 2: Choose to record with microphone audio.
- Step 3: Start your screen recording.
Third-Party Apps
Applications such as AZ Screen Recorder:
- Step 1: Download and install AZ Screen Recorder from the Play Store.
- Step 2: Open the app, go to settings, and enable 'Record audio'.
- Step 3: Start recording your screen by tapping the screen capture button.
6. Enhancing Audio Quality
Regardless of the platform, enhancing your audio quality can significantly boost the overall value of your recording:
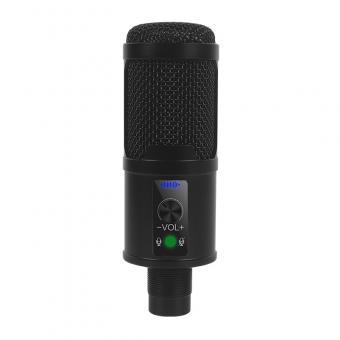
- Use External Microphone: A good quality external microphone can reduce background noise and improve sound clarity.
- Soundproofing: Record in a quiet room, preferably one with soundproofing to minimize external noise.
- Post-production: Tools like Audacity or Adobe Audition can be used to edit and clean up your audio after recording.
7. Troubleshooting Common Problems
Audio Out of Sync:
- Ensure that your recording software is updated.
- Use lower resolution settings if experiencing lag.
Poor Audio Quality:
- Verify that the correct microphone is selected.
- Check connections and perform a test recording to ensure everything works fine.
No Audio Recorded:
- Ensure microphone permissions are enabled for the recording software.
- Check sound settings to confirm that input and output devices are correctly configured.
Recording audio during screen recording is an essential skill for creating engaging and informative content. Whether you're a novice or a professional, the right tools and techniques can significantly impact the quality of your recordings. By understanding your specific needs and choosing the right software, you can ensure clear and effective audio capture. Additionally, addressing common issues and using enhancement techniques can elevate your final output to a professional level. So, choose your tools wisely, and start creating content that truly resonates with your audience.


