How To Record Audio On My Macbook Pro?
Audio recording on a MacBook Pro is a seamless and efficient process, thanks to its robust hardware and user-friendly macOS ecosystem. Whether you're a budding podcaster, a professional musician, or simply looking to record voice notes, the MacBook Pro offers tools and features to meet your needs. This guide delves into the practical steps, tools, and tips for recording audio on your MacBook Pro, ensuring high-quality results.
---
Understanding the Basics of Audio Recording
Before diving into the steps, it’s important to understand the fundamental requirements for audio recording on your MacBook Pro:
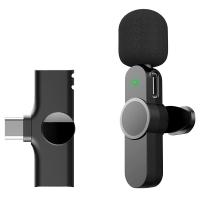
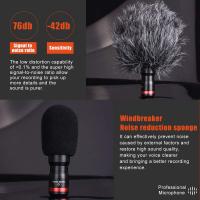
1. Microphone: Every MacBook Pro comes equipped with a built-in microphone, sufficient for basic recordings. For higher-quality audio, consider using an external microphone.
2. Recording Software: macOS provides native apps like Voice Memos and GarageBand for audio recording. Third-party apps such as Audacity and Logic Pro X are also popular for advanced needs.
3. Audio Settings: Properly configuring your MacBook Pro's audio input settings ensures optimal recording performance.
With these essentials in mind, let’s explore how to start recording audio on your MacBook Pro.
---
Step 1: Choosing the Right Tool for Recording
The first step in recording audio is selecting the tool that best matches your requirements. Here are some options:
1. Voice Memos (Native App)
Voice Memos is pre-installed on macOS and is ideal for simple recordings like voice notes, interviews, or quick memos.
Steps to Record Using Voice Memos:
1. Open the Voice Memos app from your Applications folder or Spotlight search.
2. Click the red Record button to start recording.
3. Speak clearly into the built-in microphone or an external mic.
4. Press the Pause button if you need a break, or click Done to stop and save the recording.
5. Your recording will appear in the list, where you can rename, edit, or share it.
2. GarageBand (Native App for Musicians)
GarageBand is a powerful digital audio workstation (DAW) included with macOS. It’s perfect for music production, podcasts, or multi-track audio projects.
Steps to Record Using GarageBand:
1. Open GarageBand and select a new project, such as "Empty Project."
2. Choose an Audio Track for recording and set the input to your desired microphone.
3. Click the Record button (red circle) in the control bar and start speaking or playing your instrument.
4. Use the timeline to organize, edit, and layer your recordings.
5. Export your project in your preferred format by selecting Share > Export Song to Disk.
3. Audacity (Free Third-Party App)
Audacity is a free and open-source audio editor available for macOS. It’s well-suited for professional-quality recordings and editing.
Steps to Record Using Audacity:
1. Download and install Audacity from its official website.
2. Open Audacity and configure your microphone input under Preferences > Devices.
3. Click the red Record button to start recording.
4. Stop the recording by pressing the Stop button or using the spacebar.
5. Edit your audio directly in the app and export it in formats like MP3 or WAV.
4. Logic Pro X (Advanced Tool for Professionals)
Logic Pro X is Apple’s professional-grade DAW for advanced users. It offers sophisticated tools for music production and audio editing.
Steps to Record Using Logic Pro X:
1. Install and launch Logic Pro X.
2. Create a new project and add an audio track.
3. Connect your external microphone, then configure the input in the track settings.
4. Press the Record button to begin recording, and use the timeline to manage multiple tracks.
5. Mix and master your audio before exporting the final file.
---
Step 2: Configuring Audio Settings
To achieve the best results, you must configure the audio input settings on your MacBook Pro. Here’s how:
1. Access System Preferences:
- Open System Preferences and go to Sound.
- Select the Input tab and choose your microphone (e.g., internal or external).
2. Adjust Input Levels:
- Drag the input volume slider to adjust the sensitivity of the microphone.
- Speak into the microphone to ensure the input levels are neither too low nor peaking.
3. Test Your Setup:
- Use the Test Audio Input option to verify that your microphone is functioning correctly.
---
Step 3: Tips for High-Quality Audio Recording
Even with the best tools, poor practices can compromise the quality of your recordings. Follow these tips for optimal results:
1. Choose the Right Environment:
- Record in a quiet space to minimize background noise.
- Use a room with soft furnishings to reduce echo and reverb.
2. Position Your Microphone Correctly:
- Maintain a consistent distance from the microphone, typically 6–12 inches.
- Use a pop filter to reduce plosive sounds (e.g., “P” and “B” sounds).
3. Monitor Your Audio:
- Use headphones to monitor your recording in real time and catch issues early.
4. Optimize Your MacBook’s Performance:
- Close unnecessary applications to prevent CPU overload during recording.
- Ensure sufficient storage space for saving large audio files.
---
Step 4: Editing and Enhancing Your Recording
Once you’ve recorded your audio, the next step is editing and enhancing it for clarity and quality. Here’s what you can do:
1. Noise Reduction
- Use noise reduction tools in GarageBand, Audacity, or Logic Pro X to eliminate background noise.
2. Equalization (EQ)
- Adjust EQ settings to balance frequencies and enhance the overall sound quality.
3. Trimming and Splitting
- Cut out unwanted parts or split the recording into segments for better organization.
4. Adding Effects
- Apply effects like reverb, compression, or delay for a professional touch.
5. Exporting in the Right Format
- Save your audio in a high-quality format (e.g., WAV for uncompressed audio or MP3 for compressed audio).
---
Step 5: Sharing and Storing Your Recordings
Once your recording is polished, decide how to store and share it. Here are some options:
1. Cloud Storage:
- Use iCloud, Google Drive, or Dropbox to store your recordings securely.
2. Sharing Options:
- Share directly from the recording app or upload to platforms like SoundCloud, YouTube, or podcasting services.
3. Backup Your Files:
- Regularly back up your recordings to an external drive to prevent data loss.
---
Troubleshooting Common Issues
Even with a streamlined process, you may encounter challenges. Here’s how to address common issues:
1. Microphone Not Detected:
- Ensure the microphone is properly connected and selected as the input device in System Preferences.
2. Poor Audio Quality:
- Check your recording environment and use an external microphone if needed.
3. Lag or Delays:
- Reduce CPU usage by closing background apps and adjusting buffer size in the recording software.
4. File Format Compatibility:
- Convert files using tools like Audacity if they’re incompatible with your intended platform.
---
Final Thoughts
Recording audio on a MacBook Pro is both versatile and accessible, whether you’re a beginner or a professional. By leveraging the built-in tools like Voice Memos and GarageBand or opting for third-party apps like Audacity and Logic Pro X, you can produce high-quality recordings tailored to your needs. Always prioritize good audio practices, optimize your settings, and refine your recordings during the editing process for the best results.
With the knowledge and steps outlined in this guide, you’re now equipped to turn your MacBook Pro into a powerful recording studio. Whether it’s for personal use or professional projects, let your creativity flow, and make the most of your MacBook Pro’s recording capabilities!


