How To Record External Audio On Pc?
Recording High-Quality External Audio on a PC: A Comprehensive Guide
Recording external audio on a PC can be a necessity for various purposes, ranging from creating podcasts and voiceovers to recording instruments or external devices. With advancements in technology, capturing high-quality audio has become easier and more accessible, even for those without professional equipment or experience. This article will delve into the methods, tools, and tips required to successfully record external audio on a PC, ensuring clarity and performance in your recordings.
Understanding Your Needs and Objectives
Before diving into the technical details, it’s crucial to outline your specific needs and objectives. Here are some common scenarios and associated considerations:
1. Voice Recording (Podcasts, Voiceovers):
- Microphone Quality: A good-quality condenser microphone is preferred for crisp and clear sound.
- Software: User-friendly DAWs (Digital Audio Workstations) like Audacity or Adobe Audition can be quite beneficial.
2. Instrument Recording (Guitars, Keyboards):
- Interface: An Audio Interface to connect your instruments to the PC is necessary.
- Software: DAWs with lower latency and multi-track capabilities, such as GarageBand or Pro Tools.
3. External Playback Devices (Cassettes, Vinyl):
- Connections: RCA or 3.5mm connections to link playback devices with the PC.
- Software: Software that can handle long recording sessions and has good noise reduction features, such as Audacity.
Knowing the end goal helps in picking the right equipment and settings, optimizing the result based on the audio type and quality required.
Essential Hardware and Software for High-Quality Audio Recording
To achieve the best results, you’ll need a combination of hardware and software. Here’s a breakdown of the essential components:
1. Microphones
Choosing the right microphone is crucial for clear audio. There are several types to consider:
- Dynamic Microphones: Durable and good for high-pressure sound levels, ideal for live performances and loud instruments.
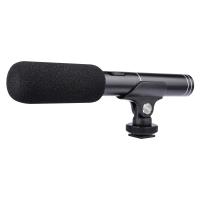
- Condenser Microphones: More sensitive and detailed, making them ideal for studio recordings, vocals, and acoustic instruments.
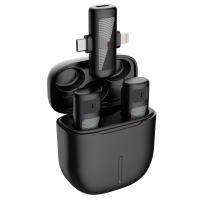
- USB Microphones: Easy to use, connects directly to the PC, suitable for beginners or simple recording needs.
2. Audio Interfaces
An audio interface serves as the bridge between your microphone/instrument and the PC, converting analog signals to digital data. Look for features like:
- Low Latency: Ensures there’s no delay between playing/speaking and hearing the sound in the recording.
- Multiple Inputs/Outputs: Useful if you plan to record several sources simultaneously.
- Phantom Power: Necessary for condenser microphones that require additional power.
3. Headphones
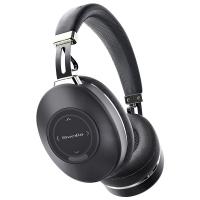
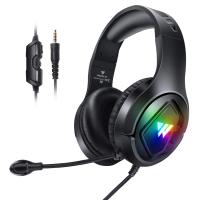
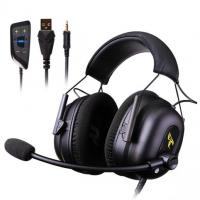
Quality headphones help monitor the audio in real-time to catch any issues instantly. Closed-back headphones are preferred for recording as they prevent sound leak into the microphone.
4. Software (DAWs)
Digital Audio Workstations (DAWs) are essential for recording, editing, and mixing audio. Popular options include:
- Audacity: Free, open-source, and beginner-friendly.
- Adobe Audition: Professional-grade with advanced editing features.
- GarageBand: User-friendly interface, suitable for Mac users.
Steps to Record External Audio on PC
Now that you have the necessary hardware and software, follow these steps to record audio effectively:
Step 1: Set Up Your Equipment
- Connect Your Microphone/Instruments to the Audio Interface: Ensure all cables are securely plugged and the audio interface is connected to your PC via USB or any supported connection.
- Select the Correct Input Source in Your DAW: Open your DAW, go to preferences/settings, and choose the audio interface as your input and output device.
Step 2: Configure Software Settings
- Sample Rate and Bit Depth: Higher sample rates (44.1 kHz or 48 kHz) and bit-depths (16-bit or 24-bit) offer better quality.
- Buffer Size: Lower buffer sizes reduce latency but may cause glitches if your PC isn't powerful enough. Typically, 128 to 256 samples is a good starting point.
Step 3: Test Your Setup
- Monitor Levels: Speak or play the instrument while watching the input levels in the DAW to ensure they aren’t peaking into the red, indicating distortion.
- Test Recording: Perform a quick test recording to check for any issues like noise or latency. Adjust your settings accordingly.
Step 4: Record the Audio
- Hit Record: Start recording in your DAW, keeping an eye on levels to ensure consistency.
- Use Markers: If your DAW supports it, use markers to separate different takes or highlight sections that may need editing later.
Step 5: Edit and Export
- Trim and Clean: Remove any unwanted sections, background noise, and apply EQ or other effects as needed.
- Mix and Master: Adjust levels, pan, and apply any required enhancements to polish the audio.
- Export: Once satisfied, export the file in your desired format (WAV, MP3, etc.).
Tips for Enhancing Your Audio Recording
- Environment: Record in a quiet, acoustically treated space to minimize background noise and echo.
- Pop Filters: Use pop filters or windshields for microphones to reduce plosive sounds (“P” and “B” sounds).
- Dose of Patience: Don’t rush through the process. Patience and experimentation with settings and placements yield better results.
Troubleshooting Common Issues
1. Background Noise: Use noise reduction plugins and ensure a quiet recording environment.
2. Latency Issues: Reduce buffer size and close unnecessary applications to free up system resources.
3. Distorted Sound: Lower the gain on the audio interface or microphone to prevent peaking.
Recording external audio on a PC can seem daunting at first, but with the right equipment, software, and a bit of practice, it becomes a straightforward task. Whether you aim to start a podcast, lay down tracks for a song, or digitize old tapes, following the steps outlined will help you achieve high-quality recordings. Remember, the key to great audio is not just the tools but how you use them. Experiment, tweak settings, and most importantly, listen closely to ensure your audio is as clear and impactful as possible.


