How To Record Sounds From Your Computer?
Recording sounds from your computer can be useful for a variety of purposes—whether you're looking to capture audio for a podcast, save a memorable conversation, record sound effects for a project, or even capture streaming content. Fortunately, there are several methods to do this, whether you’re using built-in software or third-party tools. In this guide, we’ll explore the different ways to record audio from your computer, breaking down each approach and helping you understand the best methods for your needs.
Understanding Sound Recording on a Computer
Before diving into specific methods, it's important to understand how sound is handled on a computer. When you play sound on your computer, whether from a video, music, or an application, it's routed through the computer's sound card. To record this sound, you need to capture it before it’s converted into a final output.
There are two main types of audio you might want to record:
1. Microphone input (from your built-in or external microphone)
2. System audio (the audio output from your computer, such as music, videos, or game sounds)
In most cases, the goal is to record system audio (what you hear through the speakers or headphones). However, the method varies depending on the operating system and available tools.
Let’s walk through the ways to record audio on both Windows and macOS platforms, and then look at some additional tips for improving your recordings.
1. Recording System Audio on Windows
Method 1: Using Built-in Sound Settings (Stereo Mix)
In many versions of Windows, there’s an option called Stereo Mix, which allows you to record all sounds being output by your computer. It’s an efficient and simple method, but it may not be available on all computers, as some manufacturers disable it by default.
How to Enable Stereo Mix:
1. Right-click the speaker icon in your system tray (bottom-right corner).
2. Select Sounds from the context menu.
3. In the Sound window, go to the Recording tab.
4. Right-click on an empty area in the window and check Show Disabled Devices.
5. If Stereo Mix appears, right-click on it and choose Enable.
6. Set Stereo Mix as the default recording device.
7. Open your preferred recording software (e.g., Audacity or Windows Voice Recorder) and start recording.
Stereo Mix will capture all the sounds that are played through your speakers or headphones. This method is straightforward and doesn’t require additional software. However, if Stereo Mix isn’t available, you may need a third-party solution.
Method 2: Using Third-Party Software
If Stereo Mix isn’t available or you want more control over your recordings, third-party software can help. Some of the most popular and effective tools include:
Audacity (Free)
Audacity is a powerful open-source audio editor and recorder that works well for both microphone and system audio. To record system audio on Windows, you can use the WASAPI loopback feature, which captures the audio output directly from the system.
How to Use Audacity for System Audio:
1. Open Audacity.
2. In the Audio Host dropdown, select Windows WASAPI.
3. In the Recording Device dropdown, choose the speaker or headphone device that you're using.
4. Hit the Record button to start capturing audio from your computer’s output.
Audacity is highly customizable, and it supports a wide range of audio formats, making it one of the best choices for both novice and advanced users.
OBS Studio (Free)
OBS Studio is a powerful recording and streaming tool, primarily used for video streaming but also capable of recording system audio. It’s ideal for recording games, live streams, or any other on-screen activities along with audio.
How to Use OBS Studio for Audio Recording:
1. Download and install OBS Studio.
2. Open OBS, and under Sources, click the plus icon and select Audio Output Capture.
3. Choose your output device (typically your speakers or headphones).
4. Click Start Recording to capture the audio.
OBS Studio can record high-quality system audio while allowing you to mix multiple audio sources, which is useful for more advanced recording setups.
2. Recording System Audio on macOS
macOS does not have an equivalent to Windows’ Stereo Mix feature, so to record system audio, you’ll need to use third-party software. Fortunately, there are some great tools available for macOS that make this process easy.
Method 1: Using Soundflower and Audacity
Soundflower is a popular virtual audio driver for macOS that can route audio between applications. When paired with Audacity, you can easily record system audio.
How to Set Up Soundflower:
1. Download and install Soundflower from a trusted source.
2. Open Audio MIDI Setup (found in Applications > Utilities).
3. Set Soundflower (2ch) as the Output device for your system sound.
4. Open Audacity and set the recording device to Soundflower (2ch).
5. Hit Record to start capturing system audio.
Using Soundflower with Audacity gives you full control over the recording process, and it allows you to capture clear, high-quality system audio.
Method 2: Using Loopback
Loopback is another popular tool for macOS users, especially those who need a more user-friendly, premium solution. It allows you to route audio from applications and your microphone into a single stream that can be captured by recording software.
How to Use Loopback:
1. Download and install Loopback (paid app).
2. Create a new virtual device in Loopback and add the applications or system output that you want to record.
3. Open your preferred recording software (e.g., Audacity or GarageBand) and select the virtual device as your recording input.
4. Start recording.
Loopback offers a clean, straightforward interface and is great for professional use, but it comes with a price.
3. Recording Microphone Input
If your goal is to record from your microphone (such as for a podcast or voiceover), the process is generally simpler. Most operating systems have built-in tools for microphone recording, and the quality can be enhanced with external microphones or dedicated software.
On Windows:
1. Open the Voice Recorder app or use Audacity.
2. Set the Microphone as the input device.
3. Hit Record to capture your voice.
On macOS:
1. Use the Voice Memos app, or download a third-party app like Audacity or GarageBand.
2. Select the microphone as the input device.
3. Start recording.
4. Recording Streaming Audio or Internet Radio
Recording streaming audio or internet radio from services like Spotify or YouTube requires capturing the system audio, as described earlier. However, keep in mind that many streaming services have legal restrictions about recording or distributing their content, so be mindful of copyright laws in your region.
Tools like Audacity and OBS Studio can help you record this content for personal use. Just make sure you're following the rules for your specific situation.
5. Tips for Quality Sound Recording
Regardless of which method you choose, a few tips can help improve your recording quality:
- Choose the Right Format: Always record in high-quality formats, such as WAV or FLAC, for lossless quality. You can always convert to MP3 later for smaller file sizes.
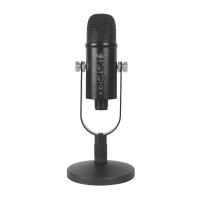
- Use External Microphones: If you’re recording voice audio, external microphones provide much better sound quality than built-in laptop mics.
- Monitor Your Levels: Ensure the input levels aren’t too high or too low, which can result in distorted or quiet recordings. Use the gain control in your software to adjust the input levels.
- Eliminate Background Noise: Close unnecessary applications, reduce background noise, and use noise reduction tools (many are available in Audacity and other software).
Recording sounds from your computer can serve a wide range of purposes, from professional audio production to personal projects. Whether you're recording system audio or microphone input, there are tools and methods for both Windows and macOS that can provide high-quality results.
For Windows users, Stereo Mix (if available) and software like Audacity or OBS Studio are excellent choices for recording system audio. On macOS, Soundflower combined with Audacity or a premium solution like Loopback provides seamless audio capture.
By understanding the tools available and following best practices for audio quality, you can create professional-sounding recordings on your computer, regardless of the content you're capturing.


