How To Record Voice Audio On Mac?
Recording voice audio on a Mac is a common task that many users need to accomplish for various reasons, such as creating podcasts, recording lectures, or capturing voice memos. Fortunately, macOS offers several built-in tools and third-party applications that make this process straightforward and efficient. In this article, we will explore different methods to record voice audio on a Mac, providing step-by-step instructions and tips to ensure high-quality recordings.
Using QuickTime Player
QuickTime Player is a versatile media player that comes pre-installed on all Macs. It is not only useful for playing videos but also for recording audio. Here’s how you can use QuickTime Player to record voice audio:
1. Open QuickTime Player: You can find QuickTime Player in the Applications folder or by using Spotlight search.
2. Start a New Audio Recording:
- Click on "File" in the menu bar.
- Select "New Audio Recording" from the dropdown menu.
3. Adjust Recording Settings:
- A new window will appear with a red record button. Next to the record button, there is a small arrow. Click on it to select your microphone (built-in or external).
- Adjust the volume slider to set the input level.
4. Begin Recording:
- Click the red record button to start recording.
- Speak clearly into the microphone.
5. Stop Recording:
- Click the stop button (a square inside a circle) to end the recording.
6. Save the Recording:
- Go to "File" and select "Save."
- Choose a location and file name for your recording, then click "Save."
Using Voice Memos
Voice Memos is another built-in application on macOS designed specifically for recording audio. It is simple to use and syncs with your iOS devices via iCloud. Here’s how to use Voice Memos:
1. Open Voice Memos: You can find Voice Memos in the Applications folder or by using Spotlight search.
2. Start a New Recording:
- Click the red record button at the bottom of the window.
3. Record Your Voice:
- Speak clearly into the microphone.
- You can pause the recording by clicking the pause button and resume by clicking the record button again.
4. Stop and Save the Recording:
- Click the done button (a square inside a circle) to stop the recording.
- The recording will be automatically saved with a default name (e.g., "New Recording"). You can rename it by clicking on the name and typing a new one.
Using GarageBand
GarageBand is a powerful audio editing software that comes pre-installed on Macs. It offers more advanced features for those who need more control over their recordings. Here’s how to use GarageBand to record voice audio:
1. Open GarageBand: You can find GarageBand in the Applications folder or by using Spotlight search.
2. Create a New Project:
- Select "Empty Project" and click "Choose."
- In the new window, select "Audio" and then "Create."
3. Set Up Your Microphone:
- Ensure your microphone is connected and selected as the input device.
- You can adjust the input settings by clicking on the track header and selecting "Smart Controls."
4. Start Recording:
- Click the red record button in the control bar at the top of the window.
- Speak clearly into the microphone.
5. Stop Recording:
- Click the stop button (a square inside a circle) to end the recording.
6. Edit and Save the Recording:
- You can edit your recording using the various tools available in GarageBand.
- To save, go to "Share" in the menu bar and select "Export Song to Disk."
Using Third-Party Applications
While the built-in tools are sufficient for most users, some may require additional features offered by third-party applications. Here are a few popular options:
1. Audacity: A free, open-source audio recording and editing software. It offers a wide range of features and is suitable for both beginners and advanced users.
2. Adobe Audition: A professional-grade audio editing software that offers advanced features for recording, mixing, and mastering audio.
3. Logic Pro X: A comprehensive digital audio workstation (DAW) for professional music production and audio recording.
Tips for High-Quality Voice Recordings
Regardless of the method you choose, here are some tips to ensure high-quality voice recordings:
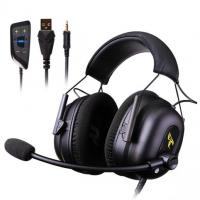
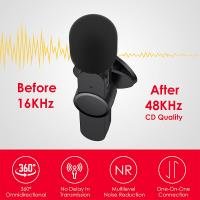
1. Use a Good Microphone: While the built-in microphone on your Mac is convenient, an external microphone will provide better sound quality.
2. Find a Quiet Environment: Background noise can significantly affect the quality of your recording. Choose a quiet room and consider using soundproofing materials if necessary.
3. Adjust Input Levels: Ensure that your input levels are set correctly to avoid distortion or low volume.
4. Speak Clearly: Articulate your words clearly and maintain a consistent distance from the microphone.
5. Monitor Your Recording: Use headphones to monitor your recording in real-time and make adjustments as needed.
Recording voice audio on a Mac is a simple process, thanks to the variety of built-in tools and third-party applications available. Whether you are using QuickTime Player, Voice Memos, GarageBand, or a third-party app, the key to a successful recording lies in proper setup and attention to detail. By following the steps outlined in this article and implementing the tips for high-quality recordings, you can ensure that your voice audio projects are clear, professional, and effective.

















There are no comments for this blog.