How To Remove Ambient Light Photography?
Photography is an art that requires a keen understanding of light and how it interacts with the subject. One of the common challenges photographers face is dealing with ambient light, which can sometimes interfere with the desired outcome of a photograph. Whether you are shooting indoors or outdoors, ambient light can create unwanted shadows, highlights, or color casts that detract from the quality of your images. In this article, we will explore various techniques and tools to effectively remove or control ambient light in photography, ensuring that you achieve the perfect shot every time.
Understanding Ambient Light
Ambient light refers to any natural or artificial light that is not intentionally added by the photographer. This can include sunlight, streetlights, or even the light from a nearby room. While ambient light can sometimes enhance a photograph by adding a natural feel, it can also create challenges by introducing unwanted elements into the scene.
Why Remove Ambient Light?
There are several reasons why a photographer might want to remove or control ambient light:
1. Control Over Lighting: Removing ambient light allows you to have complete control over the lighting in your scene. This is particularly important in studio photography where precise lighting is crucial.
2. Consistency: Ambient light can change rapidly, especially outdoors. Removing it ensures that your lighting remains consistent throughout the shoot.
3. Eliminating Unwanted Shadows and Highlights: Ambient light can create harsh shadows or unwanted highlights that detract from the subject.
4. Color Accuracy: Different light sources have different color temperatures, which can affect the color balance of your photos. Removing ambient light helps maintain accurate colors.
Techniques to Remove Ambient Light
1. Use of Flash
One of the most effective ways to overpower ambient light is by using a flash. A powerful flash can illuminate your subject sufficiently to make the ambient light negligible. Here are some tips for using flash to remove ambient light:
- Manual Mode: Set your camera to manual mode to have full control over the exposure settings.
- High-Speed Sync: Use high-speed sync to allow your flash to work at higher shutter speeds, which can help reduce the impact of ambient light.
- Flash Power: Increase the power of your flash to ensure it is the dominant light source.
2. Adjusting Camera Settings
Your camera settings play a crucial role in controlling ambient light. Here are some adjustments you can make:
- Shutter Speed: A faster shutter speed will reduce the amount of ambient light that reaches the sensor. However, be mindful of the sync speed of your flash.
- Aperture: A smaller aperture (higher f-number) will reduce the amount of light entering the lens, thus minimizing ambient light.
- ISO: Lowering the ISO will make the sensor less sensitive to light, helping to reduce the impact of ambient light.
3. Neutral Density (ND) Filters
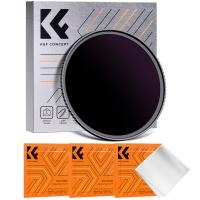
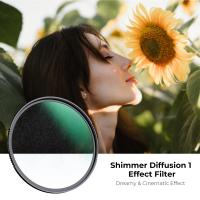
ND filters are a great tool for controlling ambient light, especially in outdoor settings. These filters reduce the amount of light entering the lens without affecting the color balance. This allows you to use wider apertures or slower shutter speeds without overexposing the image.
4. Light Modifiers
Using light modifiers such as softboxes, umbrellas, and reflectors can help control the direction and quality of light, reducing the impact of ambient light. These tools allow you to shape the light to your liking and minimize unwanted shadows and highlights.
5. Blocking Ambient Light
Physically blocking ambient light can be an effective way to control it. This can be done using flags, gobos, or even black foam boards. By strategically placing these objects, you can block unwanted light from reaching your subject.
6. Post-Processing
While it is always best to get the lighting right in-camera, post-processing can help correct any remaining issues caused by ambient light. Software like Adobe Lightroom and Photoshop offer tools to adjust exposure, shadows, highlights, and color balance, allowing you to fine-tune your images.
Practical Scenarios
Indoor Portrait Photography
Indoor portrait photography often involves dealing with ambient light from windows, lamps, or overhead lights. Here’s how you can manage it:
- Close Curtains or Blinds: This will block out natural light from windows.
- Turn Off Overhead Lights: Rely on your own lighting setup to control the scene.
- Use Flash with Modifiers: A flash with a softbox can provide soft, even lighting, minimizing the impact of ambient light.
Outdoor Photography
Outdoor photography presents unique challenges due to the variability of natural light. Here’s how to handle it:
- Golden Hour: Shoot during the golden hour (shortly after sunrise or before sunset) when the light is softer and more manageable.
- Use ND Filters: These can help control the intensity of natural light, allowing for more creative control.
- Flash with High-Speed Sync: This can help overpower the sun and reduce harsh shadows.
Removing or controlling ambient light in photography is essential for achieving professional-quality images. By understanding the nature of ambient light and employing techniques such as using flash, adjusting camera settings, utilizing ND filters, and employing light modifiers, you can take full control of your lighting environment. Whether you are shooting indoors or outdoors, these strategies will help you eliminate unwanted shadows, highlights, and color casts, ensuring that your photographs are both visually stunning and technically sound.
Remember, the key to mastering light in photography is practice and experimentation. Don’t be afraid to try different techniques and tools to see what works best for your specific needs. With time and experience, you will develop a keen eye for lighting and the skills necessary to create the perfect shot every time.















There are no comments for this blog.