How To Remove Camera Lens Protector Iphone 13 Pro ?
The iPhone 13 Pro went viral among mobile photograph lovers for its excellent camera performance. For protecting the camera lens, many users choose to install a lens protection cover. However, when it is time to clean or replace it, how to properly remove the lens protection cover becomes a problem. So, let’s dive into this problem and solve it.
1. Hardware requirements and preparation
Before you start removing the lens cap, make sure you have the necessary tools and equipment ready:
iPhone 13 Pro: Ensure that the device is fully charged in case it loses power during operation.
Clean work area: Choose a well-lit and clean work area to avoid dust and contaminants from entering the lens.
Microfiber Cloth: For cleaning the lens and protective cover to prevent scratches.
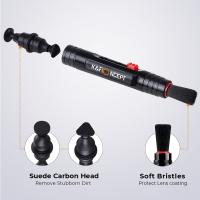
Lens Cleaning Solution: A cleaning solution specifically designed to clean the camera lens, avoid using ordinary cleaners.
Anti-static gloves (optional): to prevent fingerprints or oil stains during operation.
2. Steps to Remove the Lens Protective Cover
Below are the detailed steps to remove the protective cover for the iPhone 13 Pro camera lens:
Prepare the device: Place iPhone 13 Pro on a smooth work surface and make sure the device is turned off to avoid accidental operation.
Inspect the cover: Look carefully at the way the cover is installed. Most lens covers are secured by either a snap-on design or a stick-on method.
Use your fingernail or a tool: If it is a snap-on design, you can use your fingernail to gently pry up the corner of the protective cover. If the cover is tight, you can use a plastic pry bar (usually used for cell phone repair) instead of your fingernail to prevent scratching the device.
Gradually remove the cover: After gently prying off a corner, move slowly along the edge of the cover and gradually remove the entire cover. Be careful not to use too much force to avoid damaging the lens or phone case.
Remove adhesive: If the protective cover is pasted on, some adhesive may remain. Use a microfiber cloth and a small amount of lens cleaning solution to gently wipe to remove the adhesive.
3. Cleaning and Maintaining the Lens
After removing the protective cover, you can clean and maintain the lens:
Clean the lens: Use a microfiber cloth to gently wipe the lens surface to remove fingerprints, dust, and smudges. Avoid using paper towels or other rough materials that may scratch the lens.
Use Lens Cleaning Solution: If there are stubborn stains on the lens, put a few drops of special lens cleaning solution on a microfiber cloth and gently wipe the lens.
Check the condition of the lens: Make sure the surface of the lens does not have any scratches or damage. If you find any damage to the lens, it is recommended to contact Apple after-sales service as soon as possible for overhaul.
4. Tips to avoid damage
When removing and cleaning the protective lens cover, you should pay attention to the following points to avoid damaging the device:
Avoid excessive force: When prying up the protective cover, do not use excessive force to prevent damage to the lens or housing.
Use the right tool: If your fingernails are not sharp enough, it is recommended to use a plastic pry bar or special tool, avoid using metal tools.
Keep clean: wash your hands before operation to avoid contamination of the lens by oil and dust on your hands.
5. Frequently Asked Questions and Solutions
When removing the lens protective cover, you may encounter some common problems. Below are the solutions:
The protective cover is sticking too tightly: Instead of a pry bar, you can use a thin piece of plastic (e.g. credit card) and gently insert it between the protective cover and the lens to loosen the protective cover gradually.
Sticky adhesive residue: Use lens cleaning solution and a microfiber cloth to gently wipe the lens, if there is still residue, you can use a small amount of isopropyl alcohol (90% or higher concentration) to clean it.
Blurred lens: After cleaning the lens, if the shooting image is still blurred, there may be dust or damage inside the lens, we recommend contacting Apple after-sales service.
6. Security and privacy protection
The following security and privacy protection measures should be observed when handling and cleaning the lens protective cover:
Power off operation: Keep the device off during operation to avoid data loss or device damage due to misuse.
Regular Inspection and Cleaning: Regularly inspect and clean the lens and protective cover to ensure that the device is in optimal condition while protecting privacy and security.
To summarize, removing the iPhone 13 Pro camera lens cover and performing cleaning and maintenance is not complicated, you just need to follow the steps mentioned above and you will be able to do it successfully. Meanwhile, by using the cover wisely and cleaning it regularly, you can effectively protect the camera lens and extend the life of your device. We hope the guidance in this article can help you solve the related problems and realize a more efficient device management and usage experience.













There are no comments for this blog.