How To Remove The Selfie Stick From Video?
Removing the selfie stick from a video can be a crucial step in enhancing the visual aesthetic and overall polish of your content. Whether you are an amateur videographer capturing your travels or a professional creator, knowing how to seamlessly remove a selfie stick can elevate your production quality. In this guide, I'll take you through various techniques and tools to achieve this task effectively.
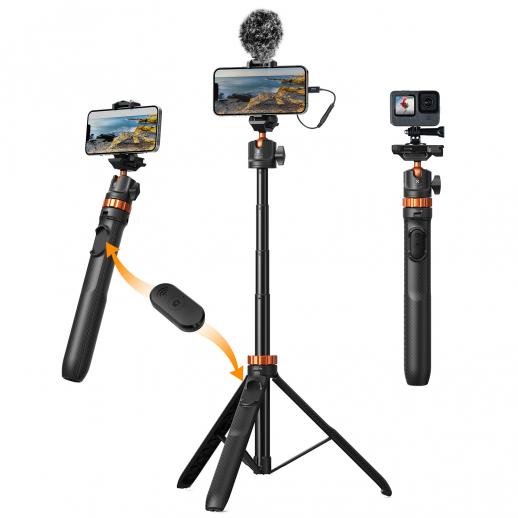
Understanding the Challenge
The selfie stick is often an eyesore in an otherwise captivating video. Unlike photos where you can easily crop or use cloning tools, videos demand a more sophisticated approach. The process involves frame-by-frame editing, use of advanced software, and sometimes even creating new video content to fill in the gaps left by the removed object.
Techniques for Removing the Selfie Stick
1. Using Video Editing Software
Advanced video editing software such as Adobe After Effects, Final Cut Pro, and DaVinci Resolve offers comprehensive tools for object removal.
- Adobe After Effects: Utilize the Content-Aware Fill for Video. This feature intelligently removes objects by analyzing the surrounding pixels and filling in the area. Mask the area where the selfie stick is visible and apply the Content-Aware Fill to generate a clean frame.
- Final Cut Pro: Use the Clone Tool or the Patch Tool. You can manually cover the selfie stick by copying pixels from adjacent areas or use automated tools for tracking and hiding objects.
- DaVinci Resolve: Leverage the Object Removal tool in the Fusion tab. Combine it with masking and tracking to seamlessly erase the selfie stick from each frame.
2. Manual Frame-by-Frame Editing
For those meticulous about detail, manually editing each frame can yield excellent results. This method is labor-intensive but ensures precision.
- Step-by-step Workflow:
1. Import your video into a video editing software.
2. Set keyframes for every frame or a group of frames.
3. Use masking tools to hide the selfie stick.
4. Clone or copy pixels from adjacent areas.
5. Manually adjust each frame to ensure the background looks natural.
3. Utilizing Specialized Object Removal Software
Software like Mocha Pro specializes in planar tracking and object removal. It offers advanced tools to track the motion of the selfie stick and remove it seamlessly from the video.
- Steps Using Mocha Pro:
1. Import your video and launch the Planar Tracker.
2. Track the selfie stick in motion across the frames.
3. Create a mask around the selfie stick.
4. Apply the Remove Module to fill the tracked area with surrounding pixels.
4. AI-Powered Apps
Recent advancements in AI have led to the development of specialized apps that make object removal from videos more accessible.
- Top AI Apps:
- Filmora: Features an AI Portrait mode which can isolate and remove objects from video.
- Inpaint: While primarily a photo editor, Inpaint's new video capabilities can help in removing redundant objects from videos.
- Runway ML: An innovative tool that uses machine learning to remove moving objects such as selfie sticks.
Practical Applications and Tips
1. Planning the Shoot:
- When shooting a video where you'll need to remove the selfie stick later, plan your shots carefully. Ensure the background maintains a consistent pattern and texture.
- Use a uniform background whenever possible to simplify the editing process.
2. Filming Techniques:
- While shooting, try to keep the selfie stick and your hand steady and in consistent motion to make tracking and masking easier.
- Avoid sudden movements that can complicate the removal process.
3. Post-Production:
- Always make a copy of your original footage before starting the editing process.
- Use high-resolution video as it provides better data for editing and more seamless object removal.
- Pay attention to lighting and shadows. Ensure the area filled after removing the stick matches the surrounding in terms of light and color.
Challenges and Solutions
1. Complex Backgrounds:
- Backgrounds with intricate details can pose a challenge. Use advanced features in After Effects or Mocha Pro to track and replace the stick area with as much precision as possible.
- In cases where the software struggles, consider using manual frame-by-frame editing to ensure continuity.
2. Moving Camera Shots:
- Stabilize the footage if the camera motion is making tracking difficult. Many software have stabilization tools that can help.
- Be prepared for more extensive editing if the camera constantly changes angles.
3. Consistent Editing:
- Ensure that the transition from the frame with the selfie stick to the frame without it is smooth. Review the edited sequence multiple times to catch any inconsistencies.
- Blend any color discrepancies with color grading tools to get a consistent look.
Conclusion
Removing a selfie stick from a video requires a blend of strategic planning, technical skill, and the right software tools. While the process can be meticulous, mastering these techniques can significantly enhance the quality of your video content. Whether you opt for advanced software like Adobe After Effects, specialized tools like Mocha Pro, or AI-powered apps, each method brings unique advantages. By applying these steps and tips, you can effectively remove the selfie stick and achieve a polished, professional-looking video. Encourage experimentation with different techniques to discover what works best for your unique footage and style. With practice, the tasks that initially seem daunting will become second nature, allowing you to focus more on your creative vision and less on technical hurdles.




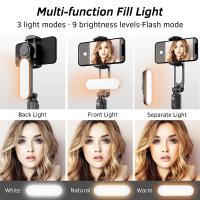
![K&F Concept Selfie Ring Light with Cell Phone Holder for Live Stream and Makeup, LED Light [3-Light Mode] [10-Level Brightness] with Remote Control and Flexible Hose Bracket for iPhone Android【Ship to the US Only】 K&F Concept Selfie Ring Light with Cell Phone Holder for Live Stream and Makeup, LED Light [3-Light Mode] [10-Level Brightness] with Remote Control and Flexible Hose Bracket for iPhone Android【Ship to the US Only】](https://img.kentfaith.com/cache/catalog/products/us/KF34.001/KF34.001-1-200x200.jpg)









There are no comments for this blog.