How To Setup Dslr As Webcam?
In today's digital age, the use of high-quality video communication has become increasingly essential for both professional and personal interactions. To achieve superior video quality, many people are choosing to utilize DSLR cameras as webcams. DSLR cameras provide significantly better image quality compared to traditional webcams, making them a great option for video conferencing, live streaming, content creation, and more. This article will guide you through the steps to set up a DSLR as a webcam, covering necessary equipment, software requirements, and best practices.
Equipment and Software Requirements
1. DSLR Camera
The first and most important component is, of course, your DSLR camera. It is crucial to ensure that your camera supports video output via HDMI or USB. Most modern DSLR cameras do, but it is always best to verify this in your camera's manual or manufacturer specifications.
2. HDMI Capture Card or USB Interface
If your camera uses HDMI output, you will need an HDMI capture card to convert the video signal into a format that your computer can use. Popular options include the Elgato Cam Link, AVerMedia capture cards, and budget-friendly alternatives like the capture cards found on eCommerce platforms.
For cameras that can be connected via USB and support direct video output (also known as UVC – USB Video Class), you might not need a capture card. Many recent models from manufacturers like Canon, Nikon, and Sony provide compatible software for this functionality.
3. HDMI Cable or USB Cable
Depending on the connection type you are using (HDMI or USB), you will need the appropriate cable to connect your camera to your computer.
4. Software
Most camera manufacturers offer specific software to facilitate the use of DSLRs as webcams. Canon, for example, provides the EOS Webcam Utility, while Sony offers the Imaging Edge Webcam software. Make sure to download and install the software specific to your camera model and operating system.
5. Power Supply
Using your DSLR for extended periods can quickly drain its battery. Consider using an AC power adapter or a dummy battery to keep your camera powered during long sessions.
Step-by-Step Setup Process
Step 1: Install Necessary Software
Begin by downloading and installing the required software for your DSLR camera. Visit the manufacturer’s official website to find the appropriate webcam utility software. Follow the installation instructions provided by the manufacturer.
Step 2: Connect Your Camera to the Computer
Depending on your setup, connect your camera to the computer using the HDMI cable and capture card or via a USB cable.
- HDMI Setup: Connect one end of the HDMI cable to your camera and the other end to the capture card. Plug the capture card into a USB port on your computer.
- USB Setup: Connect the USB cable directly from your camera to your computer.
Step 3: Configure Camera Settings
Power on your DSLR camera and switch it to video mode. Adjust the settings for optimal video quality:
- Set the resolution to at least 720p or 1080p.
- Ensure that auto-focus is enabled to stay sharp during movement.
- Adjust the exposure, white balance, and ISO to suit your lighting conditions.
Step 4: Configure Software Settings
Open the webcam utility software you installed in Step 1. Ensure that your camera is detected by the software. Many utilities offer a “live view” mode to let you see how your video feed will look.
Step 5: Select Camera in Video Conferencing Software
Open your preferred video conferencing or live streaming software (e.g., Zoom, Skype, OBS Studio). Navigate to the video settings and select your DSLR camera (or the capture card) as the video source.
Tips for Optimal Performance
1. Lighting
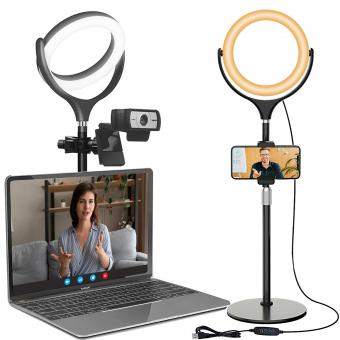
Good lighting dramatically impacts video quality. Ensure your face is well-lit using natural light from windows or additional lighting such as ring lights or softboxes. Avoid overhead lighting that can create shadows and make sure to position lights in front of you.
2. Audio Quality
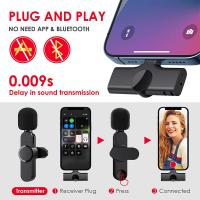
While a DSLR camera provides superior video quality, its built-in microphone may not be adequate for professional audio. Consider using an external microphone or a dedicated audio setup to complement your video feed.
3. Camera Placement
Position the camera at eye level for the most flattering angle. Use a tripod or a stable surface to keep the camera steady.
4. Clean Background
A clean and uncluttered background keeps the focus on you rather than any distractions behind you. Consider using a plain or aesthetically pleasing backdrop.
Troubleshooting Common Issues
No Signal Detected
If your computer is not detecting the camera, check all connections and ensure your camera is set to output video via HDMI or USB. Restart your camera and computer, and try different USB ports if necessary.
Poor Video Quality
Double-check your camera settings to ensure the resolution is set to 720p or higher. Verify that your lighting setup is adequate and that the lens is clean.
Sync Issues
Sometimes, video feeds might lag or go out of sync with audio. This is often due to a slow computer or insufficient USB power. Closing background applications and using a powered USB hub can help.
Setting up your DSLR as a webcam can be highly beneficial, providing superior video quality for all your video communication needs. By following the guidelines outlined in this article, you can easily configure your DSLR to function as a webcam. Remember to ensure optimal lighting, audio, and camera placement to achieve the best possible results. With these steps and tips, you'll be well on your way to creating professional-quality video content or simply enjoying clearer, more engaging video calls.

