How To Share Voice Recorder Files?
Sharing voice recorder files can be a crucial task for many professionals, students, and everyday users who need to distribute audio recordings for various purposes. Whether it's a lecture, a meeting, a podcast, or a personal memo, knowing how to efficiently share these files can save time and ensure that the intended recipients receive the information promptly. In this article, we will explore the different methods available for sharing voice recorder files, the tools and platforms that can be used, and some best practices to ensure a smooth and effective sharing process.
Methods for Sharing Voice Recorder Files

There are several methods to share voice recorder files, each with its own set of advantages and limitations. The choice of method often depends on the size of the file, the urgency of the sharing, and the technical proficiency of both the sender and the recipient. Here are some common methods:
1. Email Attachments
2. Cloud Storage Services
3. Messaging Apps
4. File Transfer Protocol (FTP)
5. Physical Media
Email Attachments
Email is one of the most straightforward methods for sharing voice recorder files. Most email services allow users to attach files to their messages. However, there are some limitations to this method:
- File Size Limitations: Most email services have a maximum attachment size limit (usually around 25 MB). If your voice recorder file exceeds this limit, you will need to use another method.
- Compression: To fit within the size limits, you may need to compress the file, which can sometimes reduce the audio quality.
To share a voice recorder file via email, follow these steps:
1. Open your email client.
2. Compose a new email.
3. Click on the attachment icon (usually represented by a paperclip).
4. Select the voice recorder file from your device.
5. Add the recipient's email address and a subject line.
6. Send the email.
Cloud Storage Services
Cloud storage services like Google Drive, Dropbox, and OneDrive offer a convenient way to share large voice recorder files. These platforms allow you to upload your files to the cloud and share a link with your recipients. Here’s how you can do it:
1. Upload the File: Log in to your cloud storage account and upload the voice recorder file.
2. Generate a Shareable Link: Once the file is uploaded, generate a shareable link. This link can be sent to anyone, and they can access the file without needing an account on the cloud storage service.
3. Set Permissions: You can set permissions to control who can view, comment, or edit the file.
4. Share the Link: Copy the link and send it via email, messaging apps, or any other communication platform.
Messaging Apps
Messaging apps like WhatsApp, Telegram, and iMessage also support file sharing. These apps are particularly useful for quick and informal sharing. Here’s how you can share a voice recorder file using a messaging app:
1. Open the messaging app.
2. Select the contact or group you want to share the file with.
3. Tap on the attachment icon.
4. Choose the voice recorder file from your device.
5. Send the file.
Keep in mind that some messaging apps may compress the file, which could affect the audio quality.
File Transfer Protocol (FTP)
For more technical users, FTP offers a robust method for sharing large files. FTP requires setting up a server where the files can be uploaded and then shared with others who have access to the server. Here’s a basic outline of how to use FTP:
1. Set Up an FTP Server: You can use software like FileZilla to set up an FTP server.
2. Upload the File: Use an FTP client to upload the voice recorder file to the server.
3. Share Access Details: Provide the recipient with the server address, username, and password to download the file.
FTP is ideal for sharing large files and for situations where you need to share files regularly.
Physical Media
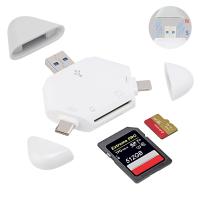
In some cases, sharing voice recorder files via physical media like USB drives, CDs, or external hard drives may be the best option. This method is particularly useful when dealing with very large files or when internet access is limited. Here’s how you can do it:
1. Copy the File: Transfer the voice recorder file to the physical media.
2. Deliver the Media: Physically deliver the media to the recipient.
Best Practices for Sharing Voice Recorder Files
Regardless of the method you choose, there are some best practices to follow to ensure a smooth sharing process:
1. Check File Size: Before sharing, check the file size to determine the best method for sharing.
2. Compress if Necessary: If the file is too large, consider compressing it using software like WinRAR or 7-Zip.
3. Ensure Compatibility: Make sure the file format is compatible with the recipient’s device. Common formats include MP3, WAV, and M4A.
4. Test the File: Before sharing, play the file to ensure it is not corrupted and the audio quality is acceptable.
5. Provide Instructions: If the recipient is not tech-savvy, provide clear instructions on how to access and play the file.
Sharing voice recorder files is a common task that can be accomplished through various methods, each with its own set of advantages and limitations. Whether you choose to use email, cloud storage services, messaging apps, FTP, or physical media, understanding the best practices and potential challenges can help ensure a smooth and effective sharing process. By following the guidelines outlined in this article, you can confidently share your voice recorder files with colleagues, friends, and family, ensuring that your important audio recordings reach their intended recipients without any hassle.

















There are no comments for this blog.