How To Take Video Without Tripod?
Creating high-quality video content usually conjures images of smooth, steady scenes. Many content creators rely on a tripod to achieve this stability and ensure that their shots are free from shakes and stumbles. However, what if you find yourself without a tripod? Perhaps you forgot it, don't have one, or are in a scenario where using it is impractical. No need to worry; with the right methods, you can still capture professional-looking video footage in such situations. The art of taking video without a tripod can be mastered through some clever alternatives and practical techniques.
1. Embrace Your Body as a Stabilizer:
---
Your body can be an excellent natural stabilizer. By using your body weight effectively, you can reduce the impact of subtle movements and achieve relatively stable footage. Here's how to maximize this:
Hold Your Camera Properly: Use both hands to grip your camera firmly. Tuck your elbows into your sides to create a stable foundation. By doing so, you form a natural tripod with your body.
Controlled Breathing: Minimize unintended movements by controlling your breathing. Exhale gently as you shoot to reduce shakiness.
Stable Stance: Plant your feet shoulder-width apart to improve balance and minimize sway. Bending your knees slightly can also help.
Lean Against Solid Structures: Use nearby walls, trees, or other firm structures to stabilize your body. Leaning against something sturdy can significantly reduce camera shake.
2. Utilize Household Items and Everyday Objects:
---
When a tripod is unavailable, many ordinary objects can serve as makeshift stabilizers. These can help you stabilize your shots and achieve professional results:
Tables and Chairs: Rest your camera on a stable surface, such as a table or chair. This simple solution can help you achieve a steady base for your shots.
Books and Bags: Stack books or a bag at the desired height and rest your camera on top. Adjust and improvise until you get the right angle.
Car Windows and Railings: Use the car window frame, or railings as supports for your camera, ensuring it remains steady while you shoot.
3. Practice the Art of Panning and Tracking:
---
Learning to execute panning and tracking shots manually can substantially improve the quality of handheld footage. Here are some techniques:
Follow Through with Your Entire Body: Instead of just moving your arms, use your entire body to pan or track a subject. This smoother, more controlled motion reduces jerky movements.
Slow and Steady Movements: Move slowly and steadily to avoid rapid, shaky transitions. Panning slowly gives your footage a cinematic feel and a professional finish.
Predict the End Point: Before you start panning or tracking, visualize your endpoint to execute your movement fluidly without abrupt stops.
4. Use Software Stabilization Tools:
---
Even with these techniques, achieving perfect stability solely through manual methods can be challenging. Software can come to the rescue:
In-Camera Stabilization: Modern cameras and smartphones often come equipped with in-body or optical stabilization systems. Make sure this feature is turned on to help reduce handshake effects.
Post-Production Stabilization: Editing software like Adobe Premiere Pro, Final Cut Pro, or even some smartphone apps offer stabilization tools that can smooth out your footage. Though not a perfect solution, it can significantly enhance the stability of your shots.
5. Adopt the String Tripod Technique:
---
One relatively simple but effective DIY stabilization method is the "String Tripod." It involves a piece of string, a screw fitting your camera’s tripod socket, and a weight or your foot to create a tension-based stabilizer.
Prepare the String Tripod: Secure one end of the string to a bolt that will fasten into your camera’s tripod socket. The other end should either have a weight attached or loop through something stable like your foot.
Adjust the Length: Extend the string to your desired height so that when you pull it tight from the camera to your foot, it creates tension.
Create Stability: While shooting, hold the camera and maintain tension on the string by pressing down with your foot. This tension helps stabilize the camera, reducing the chances of a shaky shot.
6. Employ the Warp Stabilizer Effect:
---
For those with access to professional editing software, the Warp Stabilizer effect available in Adobe Premiere Pro can be a lifesaver:
Applying Warp Stabilizer: Import your footage into Adobe Premiere Pro, apply the Warp Stabilizer effect from the effects panel, and let the software analyze and stabilize your footage.
Fine-Tune Settings: Adjust the parameters, such as Smoothness and Crop settings, to balance between stabilization and maintaining the original framing.
Rendering: Render your final video to see the impact of the stabilization and make any necessary tweaks.
7. Opt for Monopods and Gimbals:
---
If you're willing to invest in some equipment but still want to travel light, consider using a monopod or a gimbal:
Monopods: While not as stable as tripods, monopods can significantly reduce camera shake and are highly portable. Plant the monopod's foot against your body or the ground for added stability.
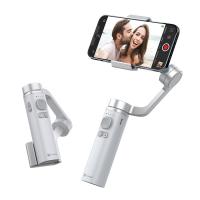
Gimbals: These electronic stabilizers can be incredibly effective in creating smooth, cinematic shots with handheld motion. They are more expensive but worth the investment for serious videographers.
8. Practice, Practice, Practice:
---
Ultimately, the key to mastering video without a tripod lies in practice. Develop your handholding techniques, experiment with different stabilization methods, and consistently evaluate your results to improve.
Regular Drills: Set aside time to practice panning and tracking shots. Experiment with various holds, grips, and stabilizing tricks to discover what works best for you.
Analyze Footage: Review your footage critically to identify areas of improvement. Look for patterns in your shooting style and adjust accordingly.
Stay Patient: Achieving smooth, tripod-like shots without the tripod takes time and perseverance. Stay patient with your progress, and gradually, your skills will refine.
In Conclusion:
---
The absence of a tripod doesn't mean you can't capture high-quality video. By leveraging your body, using household items, mastering panning techniques, utilizing software stabilization, exploring the string tripod method, learning post-production tools, and even investing in lighter stabilization gear like monopods and gimbals, you can achieve impressive results. Remember, practice is paramount. With dedication and creativity, you can take stable, professional-looking videos no matter the circumstances.













There are no comments for this blog.