How To Transfer Photos By Wifi Via Camera?
Transferring photos from your camera to other devices via WiFi is a game-changer for photographers looking to save time and streamline their workflow. Gone are the days of dealing with tangled cables and card readers; with WiFi-enabled cameras, the process is simplified and efficient. This article will delve into the various methods and steps involved in transferring photos by WiFi, cover common issues, practical tips, and best practices to ensure smooth transfers.
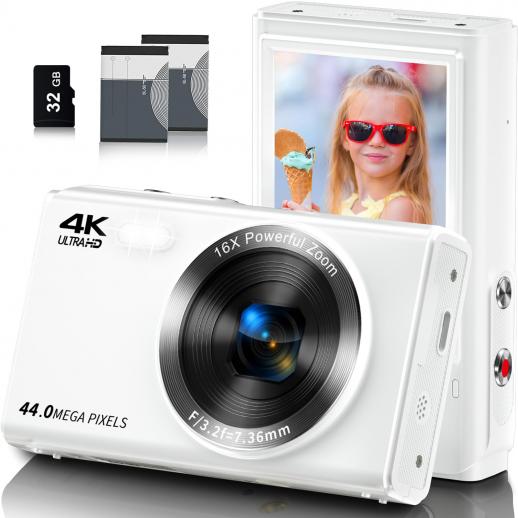
The Basics of WiFi-Enabled Cameras
A WiFi-enabled camera allows photographers to wirelessly transfer photos and videos to other devices such as smartphones, tablets, or computers. This technology is built into most modern cameras and can also be added to older models via WiFi-enabled memory cards like Eye-Fi or Toshiba FlashAir. The integration of WiFi in cameras can significantly enhance the ease of sharing and backing up files directly from the camera, reducing the risk of losing valuable photos due to misplaced memory cards.
Setting Up WiFi Connectivity
Step 1: Check Camera Compatibility
Before you start, ensure that your camera has WiFi capabilities. Refer to the user manual or visit the manufacturer’s website for confirmation. If your camera isn't inherently WiFi-enabled, consider purchasing a WiFi SD card.
Step 2: Install Necessary Apps
Manufacturers often provide proprietary apps for photo transfer. For instance, Canon uses the Canon Camera Connect app, Nikon uses SnapBridge, and Sony has PlayMemories Mobile (replaced by Imaging Edge Mobile). Download the appropriate app from your device’s app store.
Step 3: Connect to WiFi
Turn on the WiFi function on your camera. You'll typically find this option in the camera’s network or wireless settings. Once enabled, your camera will broadcast a WiFi network that you can connect to using your smartphone or computer.
Step 4: Pair Your Device
Open the camera's app on your smartphone or tablet, and follow the on-screen instructions to pair your device with the camera. This usually involves selecting the camera’s WiFi network from your device’s WiFi settings and entering a password if prompted.
Transferring Photos
Method 1: Direct Transfer to Smartphone/Tablet
1. Open the App: Launch the camera’s companion app on your mobile device.
2. Browse Photos: Use the app to browse the photos stored on your camera.
3. Select Photos: Choose the images you wish to transfer.
4. Initiate Transfer: Start the transfer process by selecting the appropriate option within the app.
This method is excellent for quick transfers and on-the-go editing or sharing on social media.
Method 2: Transfer to Computer
1. Install Desktop Software: Some manufacturers offer desktop applications that facilitate WiFi transfers. Install the relevant software from the manufacturer’s website.
2. Connect to Camera’s WiFi: As you would with a mobile device, connect your computer to the camera’s WiFi network.
3. Initiate Transfer: Use the desktop software to access and download the photos from your camera.
This method is suitable for those who need to transfer large batches of photos for extensive editing.
Troubleshooting Common Issues
Connectivity Problems
If your device fails to connect to the camera’s WiFi, ensure that:
- You are within a decent range of the camera.
- The camera’s WiFi is active.
- You have entered the correct password.
- There is no interference from other WiFi networks.
Slow Transfer Speeds
Slow transfer speeds can be frustrating. To mitigate this:
- Ensure strong WiFi signal strength.
- Transfer photos in smaller batches.
- Update your camera's and app’s firmware/software to the latest version.
App Crashes
If the app crashes frequently:
- Try reinstalling the app.
- Restart your device.
- Check for updates for both the app and your device’s operating system.
Practical Tips for Smooth Transfers
Optimize WiFi Settings
Change the WiFi channel on your camera if you experience interference from other networks. This can be done through the camera’s network settings.
Regular Firmware Updates
Manufacturers frequently release firmware updates that enhance camera performance and fix bugs. Regularly check for and install these updates.
Use 5GHz Band if Available
If your camera supports it, use the 5GHz WiFi band instead of the more common 2.4GHz to reduce interference and improve transfer speeds.
Best Practices
Organizing Photos
Proper photo organization is vital for efficient transfers. Use the camera’s built-in features to sort and filter photos before transferring.
Batch Transfers
For larger projects, consider transferring photos in batches rather than all at once to prevent overwhelming the transfer process and device memory.
Data Backup
Always back up your photos immediately after transfer. Use cloud services like Google Photos, Dropbox, or OneDrive, and maintain a local backup on an external hard drive.
Transferring photos by WiFi from your camera to other devices is an invaluable feature for modern photographers. It allows for quick, cable-free transfers, enhancing efficiency and ensuring that your photos are readily available for editing and sharing. Understanding how to set up and troubleshoot your WiFi-enabled camera can significantly improve your workflow and reduce headaches. By following the outlined steps and best practices, you can ensure smooth and effective photo transfers, freeing up more time to focus on capturing the perfect shot.






















There are no comments for this blog.