How To Use Old Rangefinder Camera?
Rangefinder cameras hold a special place in the hearts of photography enthusiasts. Known for their precision, compact size, and distinctive method of focusing, these vintage cameras are not only a piece of history but also provide a unique shooting experience in the age of digital photography. This comprehensive guide delves into the practical aspects of using an old rangefinder camera, offering valuable insights for both seasoned and novice photographers eager to explore the timeless charm of these classic devices.
Understanding the Basics
To use a rangefinder camera effectively, it’s crucial to understand its fundamental components and functionalities. These cameras differ from modern SLRs (Single-Lens Reflex) and DSLRs (Digital Single-Lens Reflex) primarily in the way they focus and compose images. Instead of looking directly through the lens, rangefinder users look through a viewfinder that is separate from the lens.
Key parts of a rangefinder camera include:
1. Viewfinder: The window you look through to compose your image.
2. Rangefinder Patch: A small, sometimes semi-transparent patch where an image is doubled when out of focus.
3. Focus Ring: The ring on the lens used to adjust the focus.
4. Shutter Speed Dial: Adjusts the amount of time the shutter remains open.
5. Aperture Ring: Controls the size of the lens aperture, affecting the depth of field.
6. Film Advance Lever: Moves the film to the next frame after taking a photo.
7. Rewind Crank: Used to roll the film back into the canister after all frames are exposed.
Loading Film
Loading film into an old rangefinder camera can be a delicate task, but it’s relatively straightforward once you get the hang of it. Start by opening the back of the camera. Place the film canister in the chamber, pull the film leader across to the take-up spool, and insert the leader into the spool's slot. Wind the advance lever to ensure the film is securely in place. Close the back and advance the film to the first frame by continuing to wind the lever while releasing the shutter as needed.
Focusing with the Rangefinder
The rangefinder mechanism is what sets these cameras apart from others. To focus:
1. Look through the viewfinder and identify the rangefinder patch.
2. Align the double image within the patch by adjusting the focus ring on the lens.
3. When the images coincide perfectly into a single image, your focus is set.
Rangefinder focusing requires a bit of practice but offers remarkable precision once mastered. This method is especially beneficial for street photography and candid shots where rapid focusing is required.
Setting Exposure
Achieving proper exposure involves setting the correct shutter speed and aperture. Most rangefinders lack built-in light meters, so it’s advisable to use an external light meter or a smartphone app to determine the ideal settings. The general rule is to use the Sunny 16 rule: on a sunny day, the correct exposure for a subject lit by the sun is F/16 at a shutter speed closest to the reciprocal of the ISO film speed.
Composing Your Shot
Composing through a rangefinder’s viewfinder can be challenging because of parallax error—discrepancies between what you see in the viewfinder and what the lens captures, especially at close distances. To mitigate this:
1. Practice framing your subjects at different distances.
2. Be mindful of the parallax correction marks often found in the viewfinder.
Taking the Shot
Once your frame is composed and focused, press the shutter release gently to avoid camera shake. Immediately advance the film using the film advance lever to prepare for the next shot. Rewinding the film after it’s finished is done by pressing the release button (typically located on the bottom of the camera) and turning the rewind crank until the film is fully rewound into the canister.
Developing the Film
Developing photos from a rangefinder camera requires either a dedicated darkroom setup or the services of a professional film developing lab. If you choose to develop your own film, ensure you have all necessary chemicals and equipment, and follow precise steps for developing, fixing, and washing your film.
Maintaining Your Camera
Given their age, old rangefinder cameras require regular maintenance to function properly:
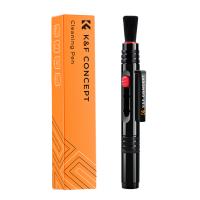
1. Cleaning: Use a soft brush to remove dust from the camera body and lens. A lens cloth can help keep the optics clear.
2. Storage: Store your camera in a dry, cool place to prevent mold and mildew.
3. Check Light Seals: Over time, foam seals around the film door can degrade, leading to light leaks. Inspect and replace them if necessary.
Conclusion
Using an old rangefinder camera is not just about capturing images; it’s about embracing a different, often more deliberate, approach to photography. The tactile feedback of winding film, the manual adjustments of focus and exposure, and the anticipation of seeing your developed film contribute to a rewarding and authentically vintage photographic experience. By understanding the basics, practicing the nuances of focusing and exposure, and maintaining your camera, you'll be able to make the most of your rangefinder, capturing moments with timeless charm and precision. Whether you are looking to reconnect with the roots of photography or simply explore a new hobby, mastering an old rangefinder camera can be an immensely satisfying endeavor.














There are no comments for this blog.