How To View Photos In Akaso Action Camera?
When it comes to action cameras, AKASO has carved out a niche for itself with its high-quality yet cost-effective devices. As a proud owner of an AKASO action camera, you’ll want to maximize its utility and capture thrilling moments whether you are diving into the ocean or biking through forest trails. However, one key aspect, other than recording those moments, is being able to view the photos you have taken. This article will comprehensively guide you on how to view photos on your AKASO action camera, which can be incredibly useful for instantaneous feedback and ensuring you’ve got the perfect shot.
Understanding Your AKASO Action Camera
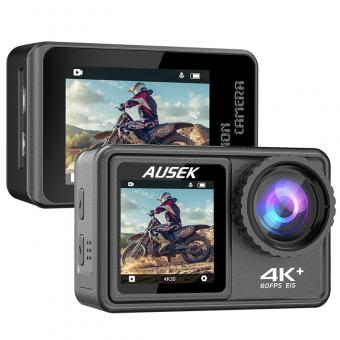
Before diving into the steps to view your photos, it’s crucial to understand the basic functions and menu options available in your AKASO action camera. Typically, AKASO action cameras like the AKASO Brave series, V50 Pro, or EK7000 come equipped with an LCD screen, buttons for navigation, and a user-friendly interface. This familiarity will make it easier to follow along with the steps provided.
Viewing Photos on the Camera’s Screen
Viewing photos directly on your AKASO action camera is very convenient, especially when you are on the go and wish to quickly check the outcome of your shots. Here’s a step-by-step guide to help you navigate through the camera’s interface:
1. Power On the Camera: Press the power button to turn on your AKASO action camera.
2. Switch to Playback Mode: Most AKASO cameras allow you to switch between different modes such as video recording, photo taking, and playback. Use the mode button to cycle through until you reach the playback mode. This mode is often indicated by an icon resembling a play button or a triangle facing right.
3. Navigate to Photos: Once in playback mode, use the navigation buttons to scroll through your recorded media. The photos are usually stored in chronological order. Some models might have separate folders for videos and photos, so make sure you are in the correct folder.
4. Select and View: Scroll through the thumbnails and press the select button (often the shutter button) to view a photo in full screen. You can use the navigation buttons to go to the next or previous photo.
Viewing Photos on a Smartphone or Tablet
Most modern AKASO action cameras come equipped with built-in Wi-Fi, which allows you to transfer photos to your smartphone or tablet. Here’s how you can do it:
1. Download the App: AKASO provides a proprietary app available on both iOS and Android platforms. Download and install the “AKASO GO” app from the respective app store.
2. Connect to Wi-Fi: Turn on the Wi-Fi on your AKASO camera. This can usually be done through the camera’s settings menu.
3. Pairing your Device: Open the “AKASO GO” app on your smartphone/tablet. Go to the Wi-Fi settings on your mobile device and connect to the AKASO camera's network. The default password can usually be found in the camera’s manual.
4. Control and View: Once connected, go back to the app, where you’ll find an option to view photos and videos stored on your camera. You can view, download, and even share them directly from the app.
Viewing Photos on a Computer
For those who prefer seeing their photos on a larger screen, transferring them to a computer is a practical option. Here is how:
1. Connecting via USB: Use the provided USB cable to connect your AKASO camera to your computer. Ensure that the camera is powered on.
2. Using a Card Reader: Alternatively, you can remove the SD card from the AKASO camera and insert it into a card reader connected to your computer.
3. Access the Files: Once connected, the camera or SD card will show up as an external device on your computer. Navigate to the DCIM folder where all photos and videos are stored.
4. Copy and View: Simply copy the desired photos to your computer’s hard drive and use any photo viewer to view or edit your images.
Using an External Display
Some AKASO action cameras include HDMI output or support for micro HDMI cables, allowing you to view your content on an external display like a TV or monitor.
1. HDMI Connection: Connect your camera to the TV or monitor using an appropriate HDMI cable.
2. Switch Input Source: Change the input source on your TV to the corresponding HDMI port.
3. Playback Mode: Put your AKASO camera in playback mode and control the navigation through the camera to display the photos on the larger screen.
Tips for Better Viewing Experience
- Utilize Settings: Familiarize yourself with the camera settings as different models may have various options to fine-tune how media is displayed or stored.
- Storage Management: Regularly back up your photos to a cloud service or external drive. Managing storage efficiently ensures that your camera always has enough space for new photos and videos.
- Software Updates: Keep your camera’s firmware and the mobile app updated to the latest version to ensure smooth operation and access to the latest features.
Final Thoughts
With these comprehensive steps, you now know multiple ways to view photos on your AKASO action camera. Whether directly on the camera, via a mobile device, a computer, or an external display, choosing the method that suits your immediate needs will enhance your overall experience. Understanding and utilizing the technical capabilities of your AKASO action camera ensures that you can relive and share your adventures with ease and clarity.
So, next time you capture an awe-inspiring moment, rest assured that viewing and sharing it is just a few simple steps away. Enjoy your journey with AKASO!

