How To Zoom In On A Microscope?
When working with microscopic samples, understanding how to properly zoom in on your microscope is essential. This skill allows you to observe minute details that are critical in fields such as biology, materials science, and medical research. Although the process may initially seem complex, it can be broken down into manageable steps. This article will guide you through the intricacies of zooming in on a microscope, covering everything from basic setup to fine-tuning your focus for optimal clarity.
Setting Up Your Microscope

Before you can effectively zoom in on a sample, it's crucial to set up your microscope correctly. Start with the following steps:
1. Clean the Lens: Dust and fingerprints can drastically diminish the quality of your images. Use lens paper or a lens cleaning solution specifically designed for optics.
2. Install the Eyepieces: Place the eyepieces into the eyepiece holder. Ensure they are secured properly to avoid wobbling, which can affect your focus.
3. Turn On the Light Source: Ensure your microscope's light source is on and appropriately adjusted. An inadequate light source can hamper your ability to see fine details.
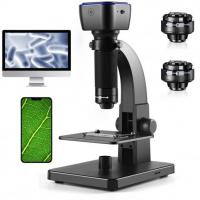
4. Place the Sample on the Stage: Use the stage clips to secure your sample slide firmly in place. Center the sample directly over the light source to ensure even illumination.
Initial Focusing at Low Magnification

Zooming in starts with an initial focus at the lowest magnification setting. This serves as a foundation for higher magnifications.
1. Select the Lowest Power Objective Lens: Rotate the nosepiece to the lowest power objective lens, commonly a 4x or 10x lens.
2. Coarse Focus: Use the coarse focus knob to bring the sample into a rough focus. At this stage, the image will not be sharp, but you should be able to see the general outline and structure of your sample.
3. Center the Sample: Ensure that the area of interest is centered in the field of view. This is essential for when you zoom in further, as higher magnifications have narrower fields of view.
Fine Tuning at Higher Magnifications

Once you have a rough focus, you can move to a higher magnification lens for more detailed observation.
1. Select a Higher Power Objective Lens: Carefully rotate the nosepiece to switch to the next highest power objective, such as a 40x lens.
2. Fine Focus: Use the fine focus knob to sharpen the image. At this level, small adjustments can make significant differences in clarity.
3. Adjust the Light: Higher magnifications often require better illumination. Adjust the diaphragm or condenser to enhance contrast and detail.
Immersion Oil for High-Power Observation

When using very high magnification lenses, such as a 100x oil immersion lens, special techniques are required.
1. Apply Immersion Oil: Place a small drop of immersion oil on the cover slip of your sample. The oil reduces light refraction, allowing more light to pass through the lens for a clearer image.
2. Use the Oil Immersion Lens: Carefully rotate the nosepiece to position the oil immersion lens above the sample.
3. Fine Focus with Oil: Use the fine focus knob again to adjust the image. The immersion oil will significantly enhance image clarity and resolution.
Troubleshooting Common Issues
Even with these steps, several common issues may arise when zooming in on a microscope. Here’s how to tackle them:
1. Blurry Image: Ensure that the objective lens, eyepiece, and sample are all clean. If using an immersion lens, make sure the oil is not contaminated.
2. Double Image: This may indicate misalignment in the optical path. Check that the objective lenses and eyepieces are seated properly.
3. Not Enough Light: Ensure that the light source is correctly positioned and functioning. Adjust the diaphragm and condenser for optimal light.
Maintaining Your Microscope
Proper maintenance is crucial for consistent performance. Follow these guidelines to keep your microscope in good working order:
1. Regular Cleaning: Clean all optical surfaces regularly using appropriate cleaning materials.
2. Storage: Store your microscope in a cool, dry place, covered to protect against dust. Always handle it with care to avoid misalignment.
3. Periodic Calibration: For best results, have your microscope calibrated periodically by a professional technician. This ensures that both the mechanical and optical components are functioning optimally.
Final Thoughts
Zooming in on a microscope correctly involves a combination of proper setup, focusing techniques, and maintenance. By following these steps, you can achieve high-quality, detailed images of your samples, which is invaluable for scientific research and analysis.
Understanding the specific needs based on user demands and intention has also highlighted the importance of starting with a low magnification, accurately focusing, and then progressing through higher magnifications with fine adjustments. Additionally, knowing how to troubleshoot and maintain your microscope will save time and enhance the quality of your microscopic observations.
By mastering these techniques, you'll be well-equipped to handle a variety of samples and research demands, ensuring that you can delve into the microscopic world with confidence and precision.








There are no comments for this blog.