Picture Not Showing On Camcorder When Playing Back?
If you have ever found yourself in a situation where the video playback on your camcorder is not displaying properly, you are not alone. It's a common issue that can occur for a variety of reasons, and troubleshooting it can sometimes be confusing. In this article, we will explore the different potential causes behind this frustrating problem and provide practical solutions that you can attempt to get your videos playing back smoothly.
Understanding the Problem
Before delving into the solutions, it’s important to understand the possible reasons behind your camcorder's playback issue. The problem can be categorized into four main areas:
1. Technical Malfunctions or Hardware Failures
2. Media or File Issues
3. Settings and Software Configurations
4. Cabling or Connection Problems
By identifying which category your issue falls into, it will be easier to troubleshoot and implement an effective solution.
Technical Malfunctions or Hardware Failures
Battery and Power Issues: Sometimes, insufficient power can lead to playback problems. Make sure your camcorder is fully charged or connected to a reliable power source.
Internal Damage: Internal components such as the LCD screen, video playback chip, or other critical parts might be damaged. If this is the case, professional repair may be necessary.
Overheating: Overheating can cause various functionalities of the camcorder to malfunction. Ensure that your camcorder is cool and that your device is not subjected to excessive heat.
Steps to Take:
1. Restart your camcorder.
2. Check the physical condition of the camcorder—look for visible signs of damage or overheating.
3. Try playing back the video with the camcorder connected to a TV or external monitor to rule out issues with the display.
Media or File Issues
Corrupted Files: Files can become corrupted for various reasons and may not playback properly.
Unformatted or Incompatible Media Card: If your memory card is corrupt or not formatted correctly, this could lead to playback issues.
Bad Sectors: Memory cards can develop bad sectors over time, which can cause playback problems.
Steps to Take:
1. Try playing the file on a different device to check its integrity.
2. Reformat the memory card—back up the data first, if possible.
3. Use a different memory card to determine if the issue persists.
Settings and Software Configurations
Playback Settings: Ensure that you haven’t inadvertently adjusted settings that may affect playback.
Firmware Updates: Sometimes, outdated firmware can cause issues. Ensure your device firmware is up to date.
File Compatibility: If the video format does not match the playback mechanism of the camcorder, this could result in an error. Verify the format compatibility.
Steps to Take:
1. Reset the camcorder to its factory settings.
2. Check for and install any available firmware updates.
3. Verify that the video file format is supported by your camcorder.
Cabling or Connection Problems
Faulty Cables: Worn-out or faulty cables can disrupt the signal required for video playback.
Loose Connections: Loose or improper connections can also cause playback problems.
External Display Issues: If you're using an external display, make sure it's functioning correctly.
Steps to Take:
1. Use a different set of cables to connect your camcorder to an external display.
2. Ensure all connections are secure and properly fitted.
3. Test the playback on an alternate external display to rule out display issues.
Practical Troubleshooting Guide
Step 1: Simple Fixes
Turn off the camcorder, remove the battery, wait for a few seconds, and then reinsert the battery. This simple power cycle can resolve minor internal issues.
Step 2: Connection Tests
Connect your camcorder to a different TV or monitor using new cables to determine if the problem lies with your display or cables.
Step 3: File Transfer
Transfer the video files to a computer to check if they play properly there. This can help identify if the issue is with the files or the camcorder itself.
Step 4: Consult the Manual
Refer to the user manual for troubleshooting tips specific to your camcorder model. Different models have different configurations, and the solution might be unique to your device.
Step 5: Seek Help
If none of the above methods work, it’s best to consult a technician or contact the manufacturer’s customer support for further assistance.
Preventive Measures Moving Forward
Once you have resolved the issue, it is crucial to take some preventive steps to avoid recurrence.
- Regular Maintenance: Keep your camcorder and its components clean and well-maintained. Avoid exposing your device to extreme weather conditions.
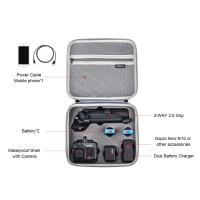
- Proper Storage: Store your camcorder and its accessories in a protective case to prevent accidental damage.
- Regular Backups: Consistently back up your data to avoid data loss in case of file corruption.
- Correct Handling: Always follow the manufacturer’s guidelines for handling and operating your camcorder.
- Frequent Updates: Keep the firmware updated to ensure the camcorder functions smoothly and incorporates the latest fixes.
Experiencing issues with video playback on your camcorder can be an inconvenient hurdle, but with a systematic approach to troubleshooting, most problems can be identified and resolved. Whether the root cause is a technical malfunction, media problem, setting misconfiguration, or connection issue, the key is to methodically eliminate potential causes until you find the true source of the problem. By understanding the foundational troubleshooting steps and ensuring regular maintenance, you can enjoy a hassle-free video recording and playback experience with your camcorder.
















There are no comments for this blog.