What Does An Nd Grad Filter Do?
Neutral Density Graduated (ND Grad) filters are essential tools in the arsenal of landscape photographers and videographers. These filters are designed to balance the exposure within a scene, particularly when there is a significant difference in brightness between the sky and the foreground. By understanding the various user demands and intentions behind the use of ND Grad filters, we can delve into their practical applications, benefits, and how they can elevate your photography or videography to the next level.
Understanding ND Grad Filters
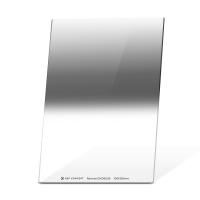
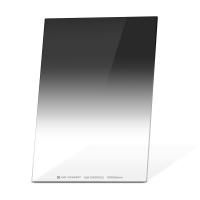
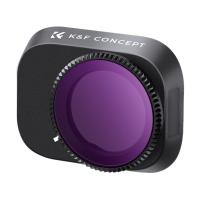
An ND Grad filter is a piece of optical glass or resin that is darkened at the top and gradually transitions to clear at the bottom. This gradient effect allows photographers to reduce the light entering the lens in specific areas of the frame, typically the sky, without affecting the exposure of the foreground. The primary purpose of an ND Grad filter is to prevent overexposure in the brighter parts of the scene while maintaining detail in the darker areas.
Types of ND Grad Filters
There are several types of ND Grad filters, each serving different purposes based on the scene's requirements:
1. Soft-Edge ND Grad Filters: These filters have a gradual transition from dark to clear, making them ideal for scenes with uneven or irregular horizons, such as mountainous landscapes.
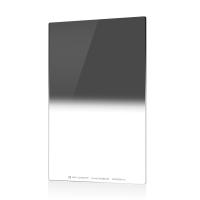
2. Hard-Edge ND Grad Filters: These filters have a more abrupt transition, suitable for scenes with a clear, straight horizon, like seascapes or flat landscapes.
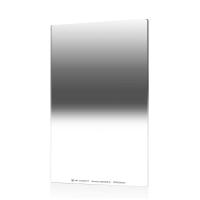
3. Reverse ND Grad Filters: These filters are darkest at the center and gradually become lighter towards the top, designed for shooting sunrises and sunsets where the brightest part of the scene is near the horizon.
4. Blended ND Grad Filters: These filters offer a combination of soft and hard edges, providing versatility for various shooting conditions.
Practical Applications of ND Grad Filters

1. Balancing Exposure
One of the most common uses of ND Grad filters is to balance the exposure between the sky and the foreground. In landscape photography, the sky is often much brighter than the land, leading to overexposed skies or underexposed foregrounds. By using an ND Grad filter, photographers can reduce the brightness of the sky, ensuring that both the sky and the foreground are properly exposed.
2. Enhancing Sky Details
ND Grad filters help in retaining the details and colors in the sky, which might otherwise be lost due to overexposure. This is particularly useful during sunrise and sunset when the sky exhibits a wide range of colors and tones. By using an ND Grad filter, photographers can capture the vibrant hues and intricate cloud patterns, adding depth and drama to their images.
3. Creating Dynamic Range
Dynamic range refers to the range of light intensities from the darkest shadows to the brightest highlights. ND Grad filters enable photographers to capture a broader dynamic range in a single shot, reducing the need for post-processing techniques like HDR (High Dynamic Range) blending. This results in more natural-looking images with well-balanced exposures.
4. Long Exposure Photography
ND Grad filters can be combined with solid ND filters to achieve long exposure effects while maintaining balanced exposure across the frame. This technique is particularly useful for capturing motion in clouds, water, or other moving elements, creating a sense of movement and time in the photograph.
Choosing the Right ND Grad Filter
Selecting the appropriate ND Grad filter depends on several factors, including the scene's lighting conditions, the desired effect, and personal preferences. Here are some tips to help you choose the right filter:
1. Assess the Scene: Determine the brightness difference between the sky and the foreground. If the difference is significant, a stronger ND Grad filter (e.g., 3-stop) may be required. For less contrast, a weaker filter (e.g., 1-stop) might suffice.
2. Consider the Horizon: Evaluate the horizon's shape and features. For irregular horizons, a soft-edge filter is more suitable, while a hard-edge filter works best for straight horizons.
3. Experiment with Different Filters: Don't be afraid to experiment with various types of ND Grad filters to achieve different effects. Each filter can produce unique results, and finding the right one may require some trial and error.
4. Quality Matters: Invest in high-quality filters from reputable brands to ensure minimal color cast and maximum optical clarity. Cheap filters can degrade image quality and introduce unwanted artifacts.
Using ND Grad Filters Effectively
To get the most out of your ND Grad filters, follow these practical tips:
1. Use a Tripod: A tripod provides stability and allows for precise positioning of the filter. This is especially important for long exposure photography.
2. Compose Carefully: Pay attention to the placement of the filter's transition line. Ensure that it aligns with the horizon or the area where you want to balance the exposure.
3. Check the Histogram: Use the camera's histogram to monitor exposure levels. This helps in avoiding overexposure or underexposure and ensures a well-balanced image.
4. Bracket Your Shots: Take multiple shots with different filter positions and strengths. This gives you more options to choose from during post-processing.
5. Combine Filters: For challenging lighting conditions, consider stacking multiple filters. For example, you can use a solid ND filter to achieve long exposure and an ND Grad filter to balance the exposure.
ND Grad filters are invaluable tools for photographers and videographers looking to enhance their work by balancing exposure, retaining sky details, and creating dynamic range. By understanding the different types of ND Grad filters and their practical applications, you can make informed decisions and achieve stunning results in your photography. Whether you're capturing the serene beauty of a sunset or the dramatic interplay of light and shadow in a landscape, ND Grad filters can help you elevate your craft and create images that truly stand out.

















There are no comments for this blog.